 OK, first of all
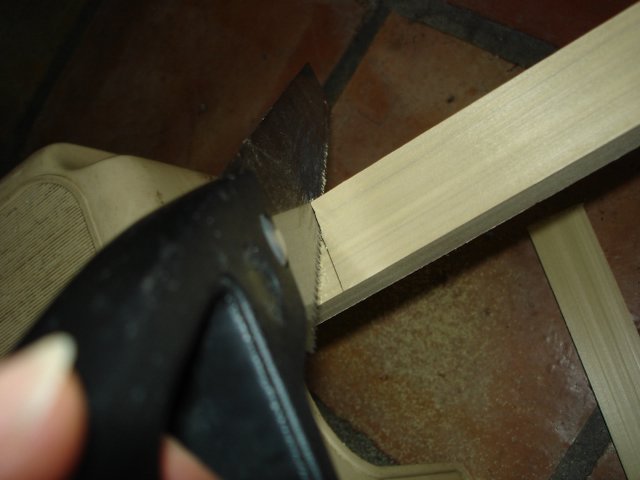
1. Measure the height of the shim needed to put behind the adjustable window screen and mark the wood.
2. Saw along the marked line
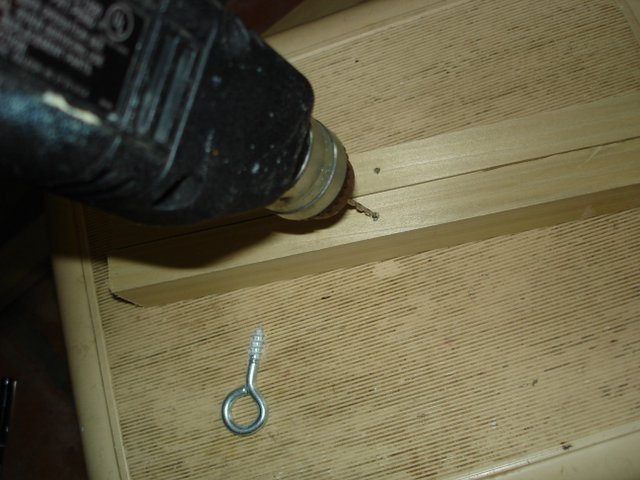 3. At the approximate center of the shim, drill a hole with a drill bit smaller than the center of the thread of the screw you are going to use
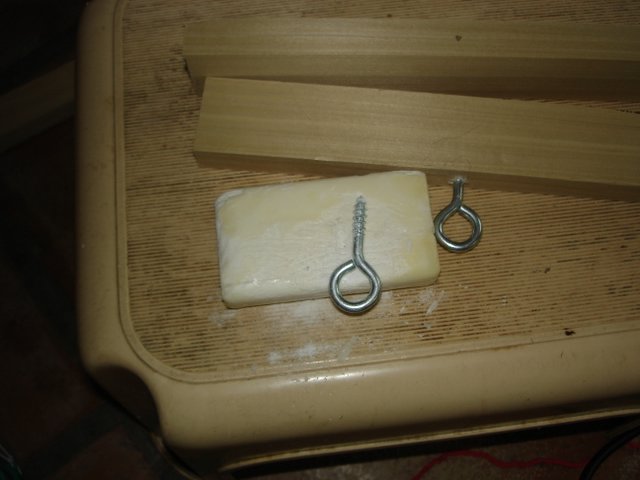 4. Lubricate the threads of the screw by scraping it across a bar of soap....this (for the construction-challenged) helps the screw go into the wood smoothly and with less effort.
5. Screw the screw eye into the sides of the shim, using the drilled hole to help you get started. You can put the blade of a screwdriver into the screw eye to turn it more easily.
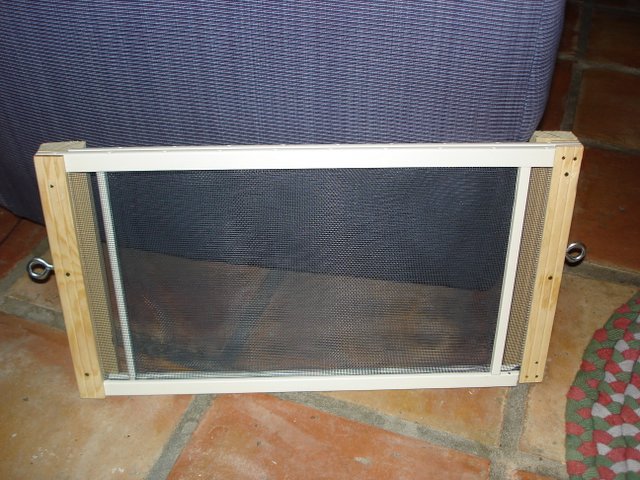 6. Voila! The finished robber screen, ready to be used with bungee cords.


Great it looks so easy to build and its beautiful.
ReplyDelete