Previous to taking the honey from the beehives, I had only been stung once by my bees and that was when I stepped on a bee in my house who was dying on the floor. However, the first weekend that I took honey from the hives, I got stung on my knee when I returned the honey-dripping frames to the hives. I did this without my bee suit, wearing only my veil.
The sting on my knee hurt, but didn't look like anything until the next day when the area was swollen about the size of a silver dollar. It was very itchy for about two days and then went away.
This past weekend, my second weekend to rob the bees, I got stung again. I had been at an all-day choir rehearsal on Saturday and came home at the end of the day to let my dogs out before returning to choir. I love the way it smells when you stand between my two hives. In the warmth of summer, there's a rich smell of honey and bees that is absolutely wonderful. I often go out in the morning before work without my beesuit on to enjoy the smell.
So at 5 PM without my beesuit I went out to stand between the hives before returning to choir. There were three things wrong with this decision: I was wearing all black, I had had a Coke about an hour before, and it was the time of day when my bees are in orientation flights. The Internet forum posters all suggest that you get stung more when wearing black and when you have ingested caffeine.
I got stung right under my eyebrow. It hurt but I went on back to the party. The next day my eye was swollen shut and over the day, although I could open my eye, swelling developed that was an oval about four inches from above my eyebrow to below my cheekbone. This is called a large local reaction by those familiar with stings. One Internet site I read said that stings around the eye often result in "comic distortions of the face" which explains why this post has no pictures!
Now it's Tuesday and everything is finally back to normal after two days of no contact lenses and "comic distortion of the face."
But I'm wearing my bee veil for the rest of the bee season!
Tuesday, August 29, 2006
Sunday, August 27, 2006
Honey differences!

Amazing that there are major differences in the honey I bottled today and the honey from last week. The super this week was on the hive less time than the first week. The honey this week is lighter and tastes very different from the honey from last week.
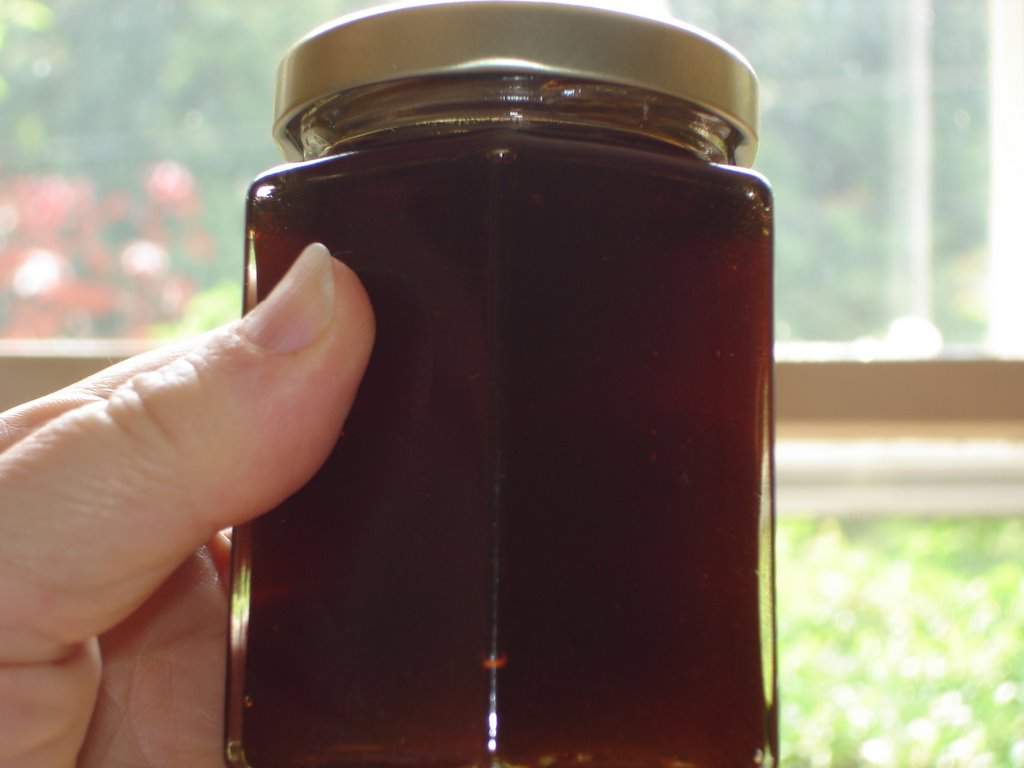
Last week the honey seemed to be flavored by the tulip poplar. It is dark honey with a smooth flavor and has a taste that is softer than this week's honey. This week the honey tastes much lighter and ends with a tart almost lemony note. I love it - and I loved the honey last week.
The last picture is a comparison of the first jar of honey last week with a comparable jar bottled today.

The super this week was one of those where the wax wasn't long enough for the frame and the bees had not drawn it all the way down to the bottom of the frame, so there was less honey and less beautiful comb to cut.
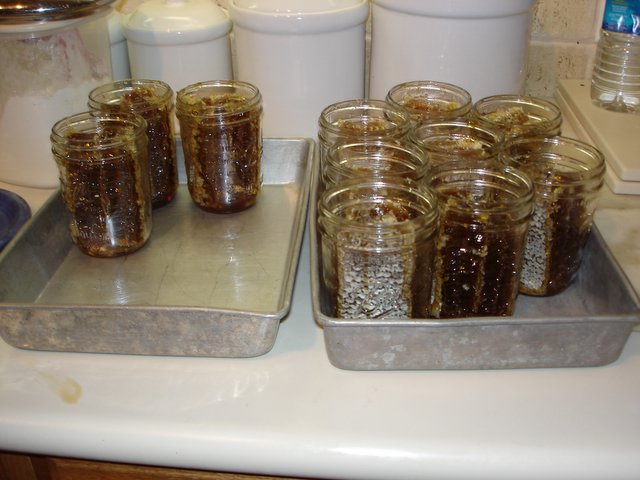
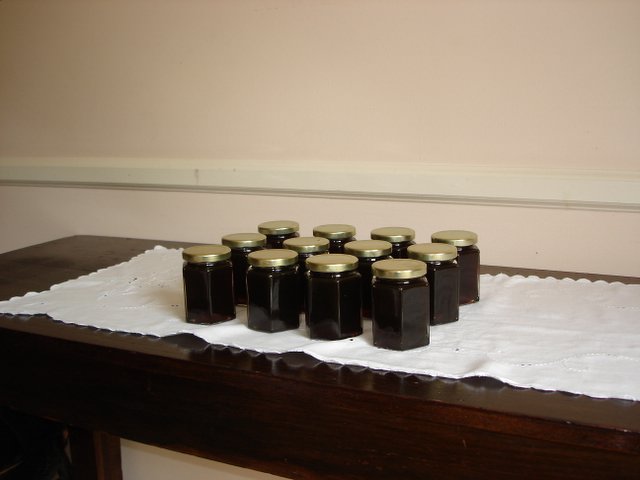
Nonetheless, I bottled 8 pints of cut comb honey, 42 tiny honey bottles to give my Emory grad students when they turn in their final exams on Wednesday, and 10 half pints. The bucket is still outside in the heat and will yield several more bottles before we are all said and done.
I can't get over the fact that the two honeys taste so different. I imagine the tulip poplar is a clear cut honey taste, but where did the tart taste come from in the jars I bottled today?


Second Weekend Honey Harvest

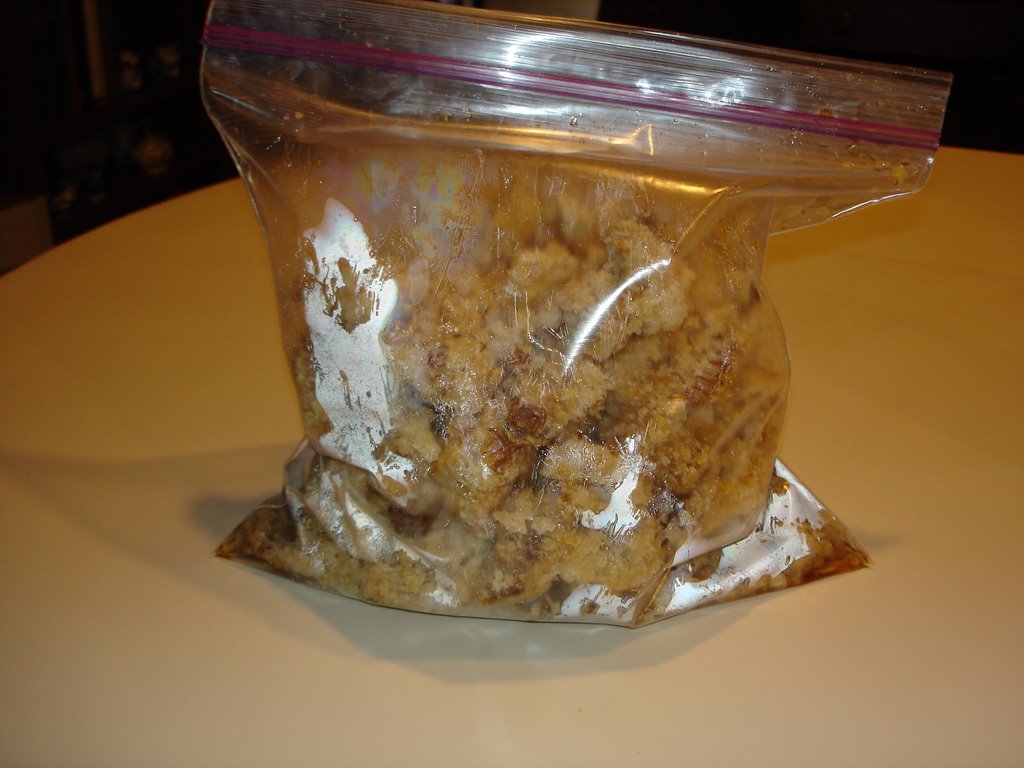
This is the second super I've harvested from the Destin hive. This honey is lighter and tastes a little tart - really yummy.
I cut it off of the frames and put some into comb honey jars. I smashed the rest of it for liquid honey. It's now straining in my front yard in a closed bucket.
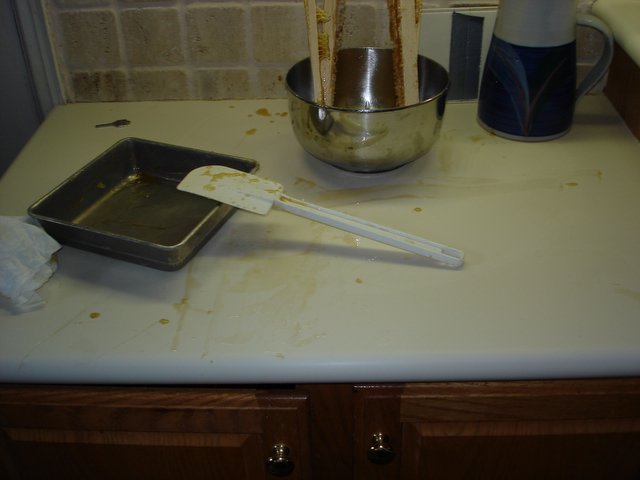
The flexible plastic cutting board has been the secret to less messy honey harvesting. I just take the plastic covered with honey and put it into the strainer. I use a rubber spatula to scrape as much honey as possible from the plastic cutting board.

My children used to love to lick the bowl and never liked to see the rubber spatula - because I am great at getting almost all of the honey/frosting/brownie mixture - whatever we were cooking off of the container and into the pan. I always left batter on purpose so they'd actually be able to lick the bowl, but I got every bit of honey off of the plastic cutting mat and into the strainer.
Everyone says doing honey in your kitchen means a sticky mess, so I wanted you to see the extent of the mess - honey on the counter that has to be washed off, but that's about all. The cardboard protects the floor.

Shorter hives!

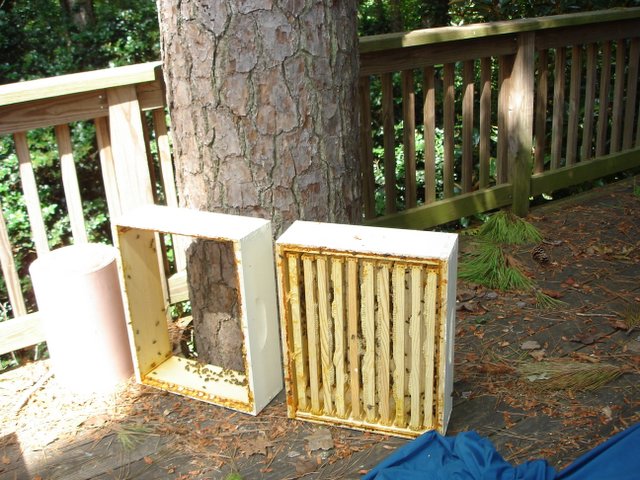
Last week when I took the honey, I put the supers back in the hives with the frames dripping where I cut the comb from the frames. This week the bees have completely cleaned all the honey off, but I don't know what to do now.
I decided to take the supers off, but needed to convince the bees to stay with the hive and not the removed super. I stood the supers on end facing the hive from which they came and left them. I'll bring them inside tonight or tomorrow if they are bee-free.
I also took the super off of Destin that had the frames on it that I am taking honey from this afternoon. I left it on its side near Destin to convince those bees to go back home, as well.

Bermuda super being used for brood

Bermuda has a full, capped super that I will take off of the hive on the weekend after Labor Day.
In another super, Bermuda has plenty of honey but is also using this super for brood. In the first picture you can see a few drone cells.
In the last picture, you can see a brood area in the super.
I'll leave this super on the hive just above the second hive box because they obviously are using it for hive development. There's lots of honey in it in the side frames, but I'll probably also leave it. I'll ask all my bee advisors on the Beemasters' Forum and see what they think.


What's happening in the supers?

I took another full of honey super off of Destin today. I followed my procedures from last week, removing the individual frames, shaking off the bees, brushing off the remaining bees and putting the frame in an empty super under a sheet.
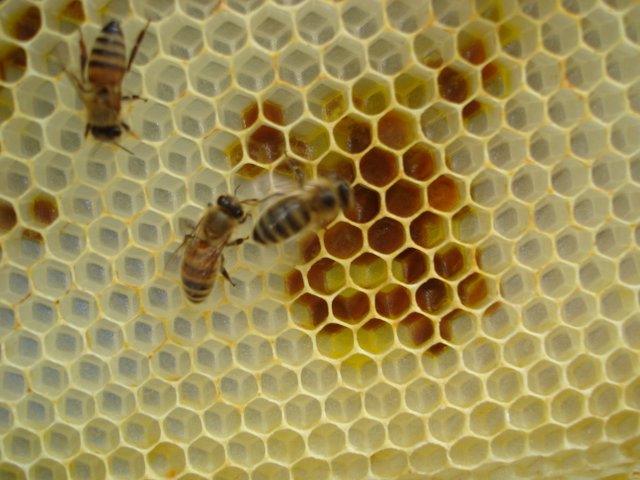
I checked on another super on Desting and it was in the early stages of production. In the first picture you can see uncapped honey. In the second picture from a frame closer to the center of the super, you can see honey beginning to be capped. In the last picture you can see pollen being stored in the frame.

Friday, August 25, 2006
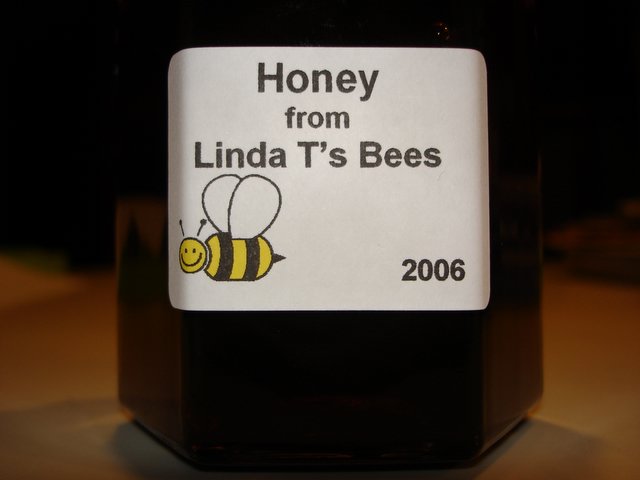
Honey Label
My honey needed an identity, so I made this label for the jars. The cute bee is part of Microsoft Word!

Saturday, August 19, 2006
Chunk Honey - Phase Two

The crushed honey sat on the edge of my garden for several hours and most of the honey strained through the filter by then. I took the bucket in to my kitchen and began filling the wide-mouthed jars filled with honeycomb.
I had 22 jars and just enough honey to fill all of them - which says to me that to do chunk honey, I'll always need to allot about half of the frames to crush and strain to provide the honey to fill the jars.
So at the end of the day of honey bottling, I have:
1. From Bermuda, all done in crush and strain, I emptied one 10 frame shallow super and got about 21 pounds of bottled honey.
2. From Destin, I emptied one 10 frame shallow super and made 22 pint jars of chunk honey, including comb and filler honey.
3. I also ended up with 2 gallon ziploc bags filled with washed wax cappings and crushed comb
At the end of the honey bottling day, I put the empty frames, each with honey dripping from them, back on the hive from which they came. I put the frames in Bermuda back in the empty super below the inner cover. I put the frames in Destin above the inner cover, as suggested in Hive Management.
I'm not sure that was a good idea in that there has been a frenzy of bee activity around the super in Destin with the honey dripping from the frames - I'm not sure if robbing from Bermuda is happening or what.
I left the wax from the chunk honey in the filter over the 5 gallon bucket to continue to filter overnight. Whew!!!! What a day!
Bermuda still has three honey supers on the hive - one is pretty empty; one has honey and brood and is closest to the brood boxes, so I'll leave it on the hive for the bees; one more is full and capped. So I still have at least one super to harvest from that hive.
Destin still has two honey supers on the hive. One is pretty empty and the other is full of beautifully capped honey. I will harvest at least that one super from the Destin hive in a week or two.
Bottling Chunk Honey - Phase one
Chunk honey is often called comb-in honey. Chunk honey includes a chunk or chunks of honeycomb in a jar with honey filling the jar.
I had a frame of beautiful comb from Destin, so I decided to cut chunk honey from it. I cut chunks from 5 1/2 frames of the 10 and crushed the other 4 1/2 frames to make the honey to fill the jars around the comb.
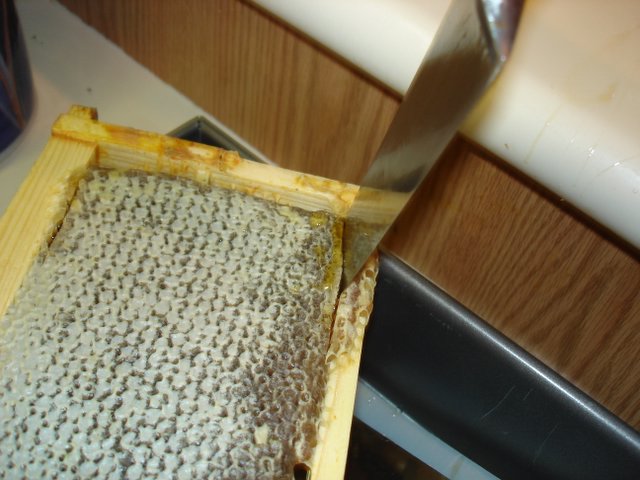
I used a sharp knife to cut a chunk of comb the size of the frame and the width of a wide mouthed canning jar. I balanced the frame over the wonderful 12X17 Calphalon pan I bought at my local Super Target. I held a spatula under the frame as I made my last cut to catch the chunk.

I then transferred the chunk to the wide-mouthed jar. Each jar held 2 chunks. Each frame yielded four jars and a small chunk to be included in the crushed and strained honey at the end of the process.
When I was done I had filled 22 wide mouthed jars. I crushed the rest of the honey into a strainer over a 5 gallon bucket, covered it with the top, and put it out on my front sidewalk near my garden. The heat of the day should make the honey run through the strainer so that I can finish filling the jars before the day ends.

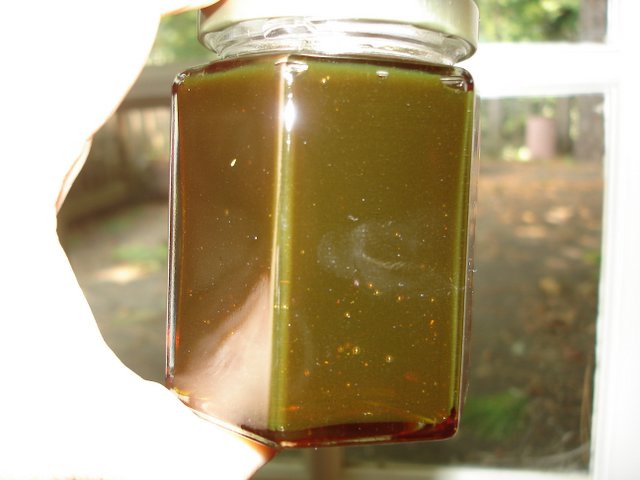
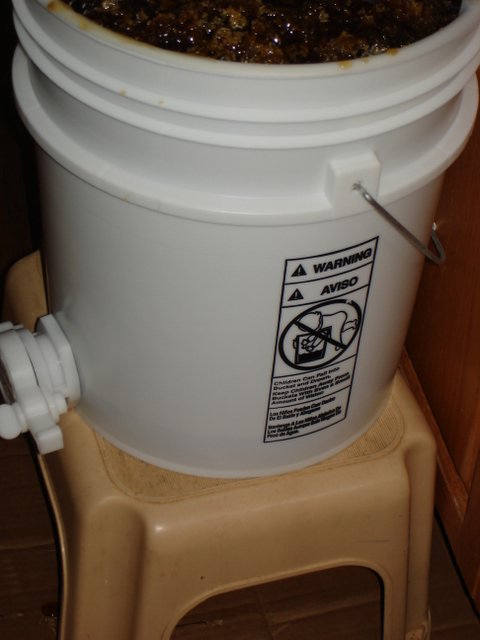
First honey from Linda's Bees
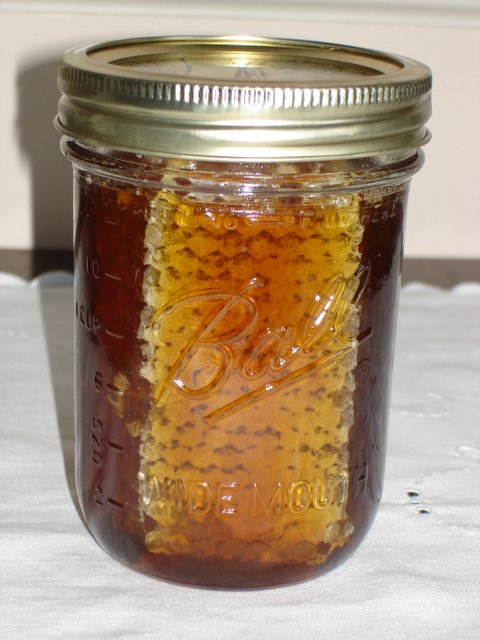
 The very first jar!
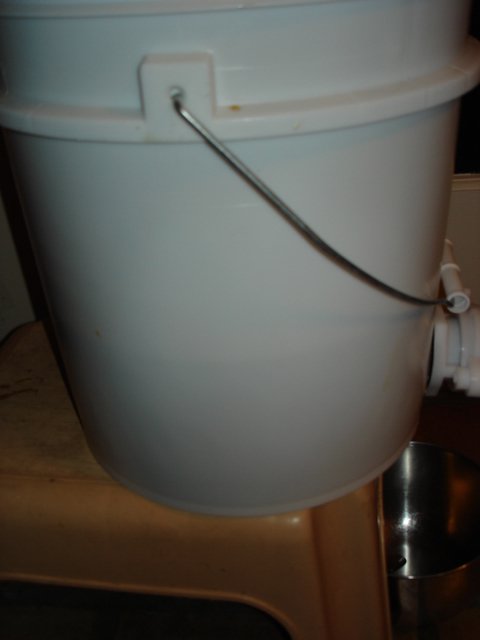
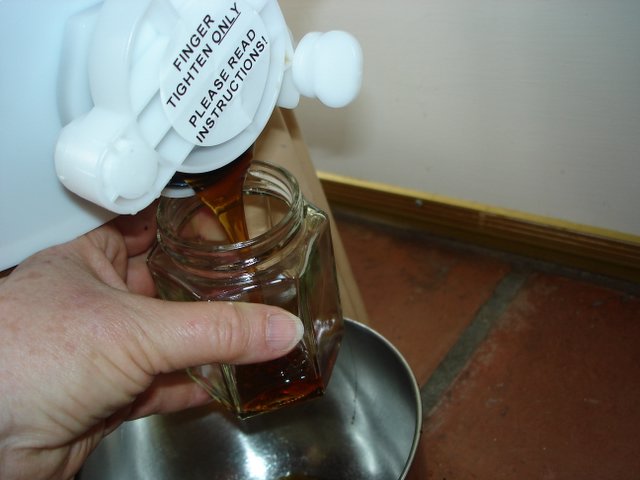
If you'll look at the picture of the bucket, you can see that the filtered honey has filled about half
 of the bucket.
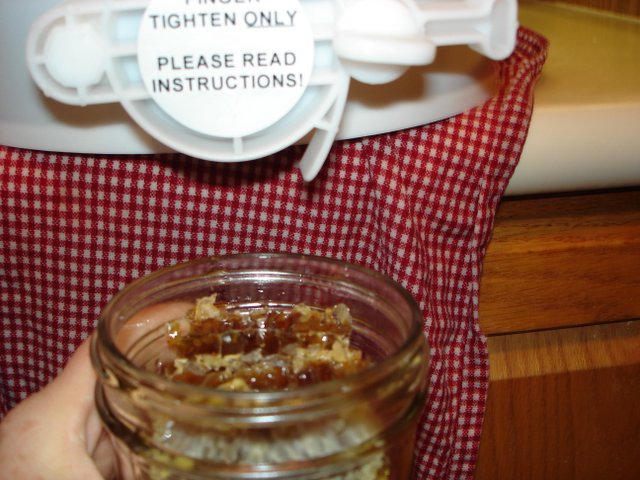
Today I took my first jars and opened the honey gate to fill them. (You'll notice I put a mixing bowl under the gate to catch the drips). The honey flowed out, red and gorgeous - it tastes great too!
Because I kept the supers on throughout the summer, there's no way to identify the flower that this honey represents - those of us who are hobbyist beekeepers produce "garden honey" or "wildflower honey." However this honey is dark, reddish and flavorful and is from the first super I put on the hive when the tulip poplars were in full flow. Probably the main flower contributing to this batch of honey is the tulip poplar.
From Wikipedia: "Poplar Liriodendron tulipifera is actually not a poplar, but honey called "poplar" is a favorite native monofloral honey of the Southern Appalachians. In mason jars it looks black, but when held to the light it looks reddish. It is strong flavored, liked by those familiar from childhood, but not usually liked by persons tasting it for the first time. "
The jar I held up has the sun shining through it and you can see the air bubbles. The jars all need to sit so that bubbles can rise to the top.
Here is the collection of my first honey bottling. This honey bottling was literally a drop from the bucket as it is still almost half full after the bottling.
This afternoon (after the wide mouth jars get cleaned - I FINALLY found them on sale at Ace Hardware down the street) I will cut comb and bottle the honey from Destin frames that had such beautiful comb.
Friday, August 18, 2006
Filtering the honey
I bought a set of filters from Dadant.
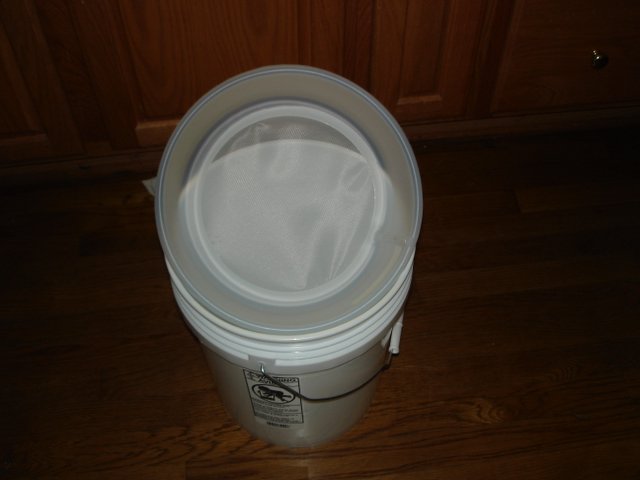
 The crushed honey comb is currently being strained through the largest filter. The filters are designed to sit in a five gallon plastic bucket.
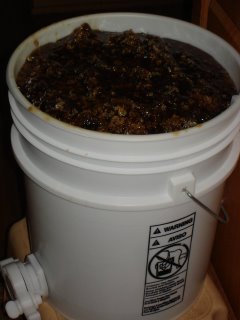
When I had transferred the crushed comb from 10 frames of honey, the filter was filled to the top. In the third picture you can see that the honey had filtered through to be about 1 1/2 inches deep in the 5 gallon bucket.
I left it straining and went to babysit my grandson for about 4 1/2 hours. When I returned the honey filled about half of the 5 gallon bucket with more still working its way through the filter.
The final picture in this post allows you to compare the comb and liquid honey when I started and the comb without much liquid when I came home.
Tomorrow morning, I hope the straining will be completed. Then I have to decide if I will strain it through a finer strainer??
Also tomorrow I plan to take the more beautiful honey from the 10 frames from the Destin hive and put it in jars as chunk honey, cutting the comb from the frame and putting it in jars.
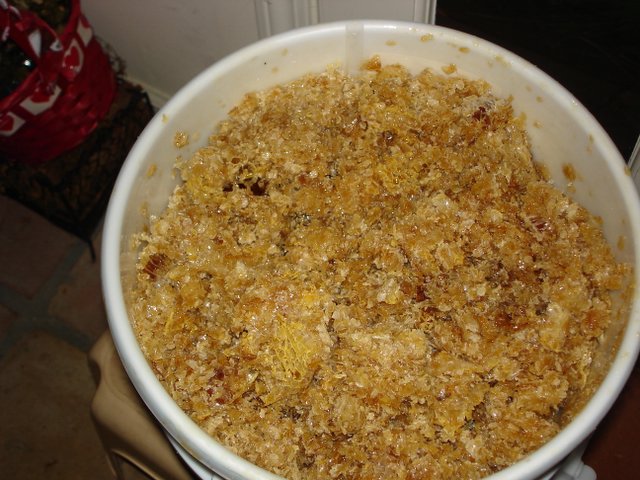
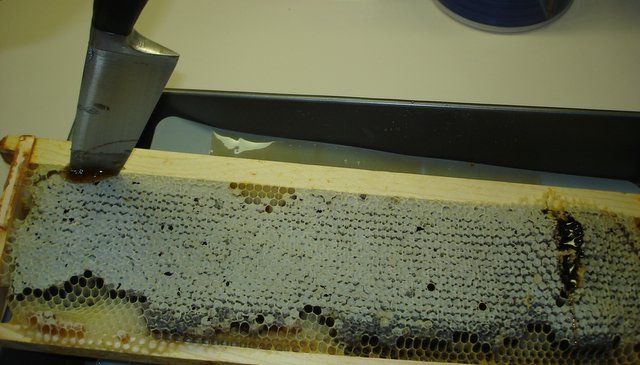
Crushing the honey and honey comb

The empty frame, dripping honey, had to be carried back to the super without getting honey on my floor so I held the frame in a mixing bowl and carried it back to the super.
I used a wooden pestle to crush the honeycomb.
 It was the most fun I've had since Play-doh.
You can see more and more of the gorgeous liquid as the process continued.
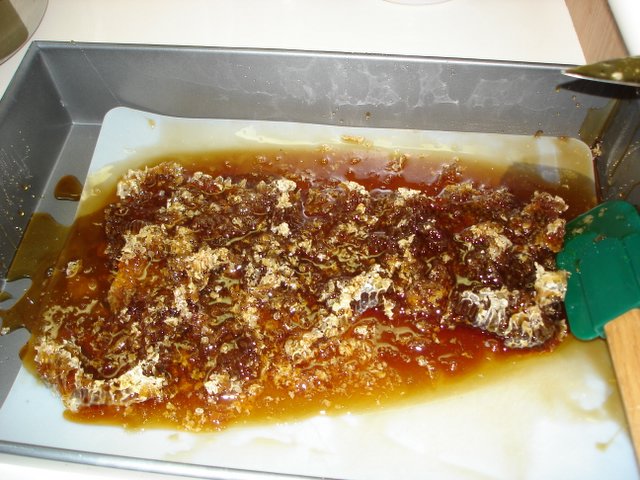
The plastic cutting sheet along with a rubber spatula helped me transfer the honey from the roasting pan to the five gallon bucket I had waiting. (see next post!)
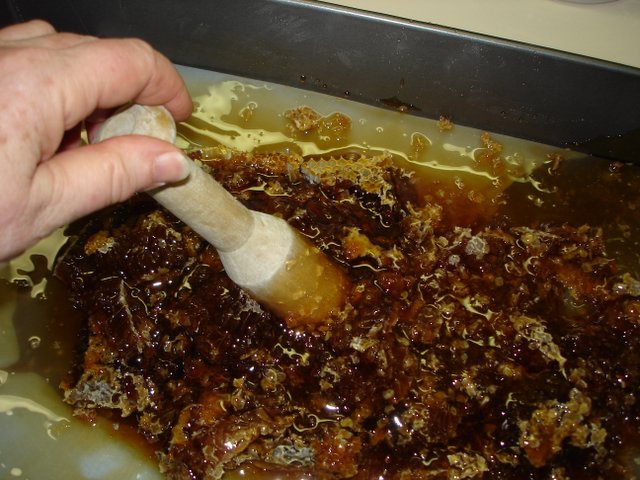
Step Two in the Crush and Strain Part of my Harvest
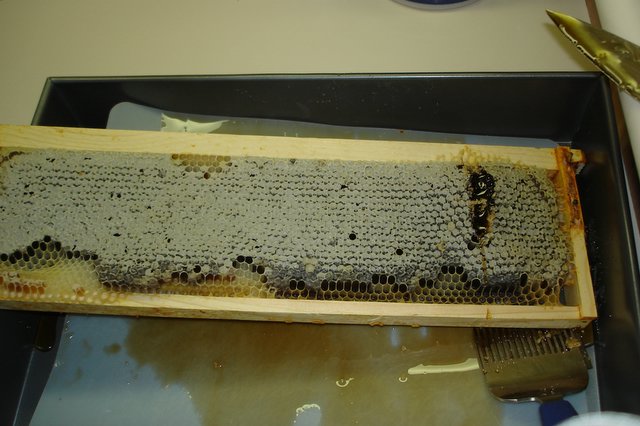
Everyone said, "Don't harvest your honey in the kitchen - it's a completely sticky mess." But I don't have any enclosed outdoor space, so the kitchen is all there is.
I got prepared - lined the floor with broken down flat cardboard boxes so the mess could be easily carried out. I already had the frame-filled super sitting on the sheet on my counter, so honey dripping from the frames could fall on the sheet. I lined my 17 inch pan with a plastic sheet cutting boards so the pan wouldn't be damaged when I cut.
I carried the frame to the roasting pan, held it and cut with the knife around the edge of the capped honey. This frame has some empty comb at the bottom, so I left it on the frame.
The honey falls into the roasting pan where I used my fancy uncapping fork to break open the comb.
It's really dark reddish honey and has a dark taste - wonder if it's tulip poplar honey. I think this super is the oldest one on the hive.
 When my bees first started making honey, the tulip poplar was in full flower.
Subscribe to:
Posts (Atom)
Pin this post

LinkWithin
