
He likes top bar hives and builds them now according to his own standard although there is no industry standard. Here are a few of his hives below. The photo below shows one that he built by weaving sticks together with telephone wire to form the sloping sides of the hive!

Because he does keep to his own standard, then he can easily transfer combs from one hive to another since the slope angle is the same on every box. He uses his own template.
He starts with a 1 X 12. The dimensions for the end boards are 12" sides, 17.5" top and 9.25" bottom. The sides are 1 X 12. He uses untreated wood and he keeps his entrance holes standard as well. He drills six holes at the end of the hive with a hand drill. Because he moves these hives, he has a hand grip on each hive which is simply a top bar turned sideways and nailed to the end. The floor is a 10" board (which we know is actually about a 9.75" board). He puts a cleat at the front of the hive to fill in the space between the first top bar and the end of the hive.. He paints his hives with paint rollers rather than brushes.
His top bars are 1 3/8" wide. He cuts starter strips for his top bars that are the same width (1 3/8"). He waxes these in with a dipper of melted wax - he made the dipper by cutting down a plastic cup and melting it slightly to form a pouring spout. He attached a dowel for a handle.
Note: This man is very handy and inventive. He makes all of his own equipment in a small tool shed. He showed us the stacks and stacks of wooden end boards and sides as he worked on putting together some 200 hives over the winter.
His slides are his own and although I took pictures of many of them for my own learning, I am only going to share the one below. The top bars are upturned so that you can see the starter strip. This is a 3 foot hive with 22 top bars. Since beekeepers have been known to lose fingers ripping top bars, I asked him how he got them cut and he gets a sheltered workshop to do them for him.

Very, very generously after his talk at EAS, he stayed in the hall and spoke to a number of us for about another hour afterwards.

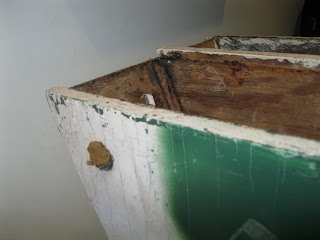
He uses roofing tin as his roof. He says that if you don't have a good enough roof the combs drop off of the top bars (which explains why my top bar hive has comb lying on the SBB at the bottom.) He also said that bees won't stay in a top bar hive unless you have some old comb that is drawn to help the bees want to stay in the box (which is what finally worked in mine).

He nails the roofing tin to 2X4s to allow ventilation in the hive. I used that corrugated white plastic but it wasn't enough insulation to protect the hive from the intense Atlanta heat this summer. I went to our big box stores in Atlanta and they don't carry roofing tin. Maybe I can buy some in the mountains at the hardware store there.
The notch you can see on the edge of the roof is for anchoring the rope he uses to tie down the top.
He cuts the tin section so that it can have an overlap the length of his hand. He demonstrated how he measures it with his hand when he puts the top back on the hive.


 Then he begins the tying down process. He uses the notch cut in each end of the tin roof to anchor the tie.
 He is very efficient so he quickly throws the rope to the opposite side. He has this down to a fine science.

 He has a screw eye on the end of the hive through which to tie the top down.

The hive is now secured until the next time. (Don't you love his hat and jumpsuit - he said nobody recognized him on his wedding day because he didn't have it on!)
He plugs his entrances with pieces of sponge rather than trying to find a cork that will fit - like I said he is quite inventive.
I learned so much from Wyatt Mangum at EAS. He was the highlight of the conference for me.
As I was chatting with him, up came my buddy from the Southeastern Organic Beekeepers Conference where we both were presenters: Sam Comfort - my other top bar hero.


The notch you can see on the edge of the roof is for anchoring the rope he uses to tie down the top.
He cuts the tin section so that it can have an overlap the length of his hand. He demonstrated how he measures it with his hand when he puts the top back on the hive.


The hive is now secured until the next time. (Don't you love his hat and jumpsuit - he said nobody recognized him on his wedding day because he didn't have it on!)

He plugs his entrances with pieces of sponge rather than trying to find a cork that will fit - like I said he is quite inventive.
I learned so much from Wyatt Mangum at EAS. He was the highlight of the conference for me.
As I was chatting with him, up came my buddy from the Southeastern Organic Beekeepers Conference where we both were presenters: Sam Comfort - my other top bar hero.

