Welcome - Explore my Blog

I've been keeping this blog for all of my beekeeping years and I am beginning my 19th year of beekeeping in April 2024. Now there are more than 1300 posts on this blog. Please use the search bar below to search the blog for other posts on a subject in which you are interested. You can also click on the "label" at the end of a post and all posts with that label will show up. At the very bottom of this page is a list of all the labels I've used.

Even if you find one post on the subject, I've posted a lot on basic beekeeping skills like installing bees, harvesting honey, inspecting the hive, etc. so be sure to search for more once you've found a topic of interest to you. And watch the useful videos and slide shows on the sidebar. All of them have captions. Please share posts of interest via Facebook, Pinterest, etc.

I began this blog to chronicle my beekeeping experiences. I have read lots of beekeeping books, but nothing takes the place of either hands-on experience with an experienced beekeeper or good pictures of the process. I want people to have a clearer picture of what to expect in their beekeeping so I post pictures and write about my beekeeping saga here.Master Beekeeper Enjoy with me as I learn and grow as a beekeeper.

Need help with an Atlanta area swarm? Visit Found a Swarm? Call a Beekeeper. ‪(404) 482-1848‬

Want to Pin this post?

Showing posts with label top bar hive. Show all posts

Sunday, April 01, 2018

My New Top Bar Hive

My friend Andy Marcus is an air conditioning guy in spring and summer, but during the calmer days of winter, he builds top bar hives. Julia ordered one from him and I saw it and loved it. I called Andy, who told me he had just enough time to do one more top bar hive this winter.

When he finished it, Jeff and I went up to get it. Andy lives near Dahlonega, GA. We took Jeff's car, which is bigger than mine, because the hive is HUGE. It was a cold, misty, rainy kind of day in early February.

We were blown away by the gorgeous top bar hive that waited for us at Andy's house. Here it is with Andy, the builder:

To put this in the car, we had to remove the legs! Both of my sons-in-law carried it out of the car into my yard where it sat on a stack of hive boxes, waiting for me to paint the legs.

Last weekend, Jeff worked to attach the now-painted legs. Literally as he tightened the last bolt, my phone rang with a swarm call to pick up a swarm not too far away on an arbor - it was such an exciting swarm collection that I will do a separate post on it.

So here it sat in my backyard waiting for the swarm to arrive!


The hive boxes are under it because the top bar rested on the boxes while we worked on getting the legs attached.

I could sleep in this box - it's as big as a coffin!


Wednesday, April 18, 2012

The ongoing Tale of the Top Bar

So I opened the top bar to find an entire ant colony camped out on the top of the top bars.  I brushed them all off with my bee brush, but I kept feeling distracted by ants on my hands.  I like the feel of bees walking on my hands, but ants are another story.  Maybe I should sprinkle cinnamon on the tops of the top bars.


The bees were doing about a B+ job of building comb.  There was some jutting out inappropriately.  One set of two combs - the first two, actually, were joined together.  Comb three on bar three was a little crooked as well.

I tried to straighten it out, but later today thought I might go in and reverse the bar.  I think that would confuse the bees but would at least put a straight comb in position three going forward.  The combs on four and more were not built out to the ends yet, so were straight in the center.

At first looking at the brood on the comb below, I was concerned about the green in the bottom of some of the cells, but now in looking further at the photo, I think the green is grass showing through holes of incomplete cells….at least I hope that's what it is.


Here is one of the bulging combs - probably the one I will reverse (comb three)….so once again, the top bar is challenging me even though it is in my own backyard and more accessible for keeping up with it.


Posted by Picasa

Sunday, March 25, 2012

Swarms Here, Swarms There, Swarms, Swarms Everywhere

There are swarms all over Atlanta - many calls during these last couple of weeks.  As you know from my last post, I collected a swarm in Decatur on Friday night and housed it in an eight frame medium box at my house.

I had invited beekeeping friends for dinner on Saturday night and as one couple walked up my sidewalk, they noticed a swarm on one of my azalea bushes.  We all went out and looked at it and it was still hanging there when they left much later.  I decided to collect it this morning bright and early.

This morning the swarm was still there - as it hung on the azalea, I thought to myself that it was so similar in size to the swarm I had caught in Decatur.  I spread a sheet under the swarm in preparation for shaking it into a box and walked to the backyard to determine where I would put it.

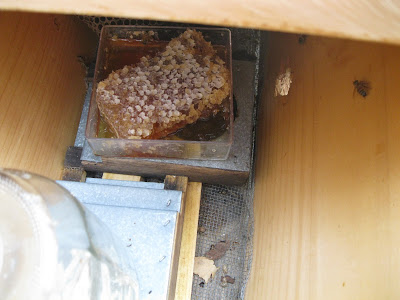
I looked at my backyard hives - SOS1 and SOS2, the swarm hive from the day before and the MABA club nuc.  As I looked I realized no bees were flying in and out of the swarm hive box.  I lifted the top:  NO BEES.

The swarm in my front yard looked like the one from Decatur because it WAS the swarm from Decatur.

They didn't like their new digs and left.  Now what was I to do with them?

They are very small bees - likely feral bees because of their size.  I began to think that a hive box was not for them.  I decided to house them in my top bar hive box.  It's more similar to a tree, albeit a tree lying on its side.


So I set up the bars for it, putting the follower boards close enough to each other that only seven bars would be available at first for these bees.   I heard Buster Lane speak at Tara last week on installing nucs, packages and swarms.  He said that swarms and packages don't like screened bottom boards and that he closes up the SBB when he installs.

So I took an unfolded cardboard box from my move and slid it under Topsy to close off the SBB.  I put old comb top bars as most of the seven bars so that a homey smell would greet the bees.

Then I returned to the front yard.


I placed my swarm catcher banker's box under the bees, sprayed them with sugar syrup and shook the branch hard, dropping bees into the box below.  (A few azalea flowers came too)


The handle area of this banker's box is closed with screen wire on both handle sides, but the handle on this side includes an open area about 2 inches along the bottom of the handle to give the bees an entry.


I had five other packages to install today that were picked up from Don in Lula yesterday, so I left these bees for about an hour and went to install bees at the Morningside Community Garden where I am going to be the beekeeper.

When I returned the bees were gathered at the entrance, sending the nasonov signal to draw bees into the hive.  Most bees were in the hive except for a few who remained in a cut open milk carton that I use as a scoop.


I opened the area in the top bar between the follower boards and shook in the bees.


I hope they will like this hive and will stay.


I replaced the top bars, put on the cover and left for a day of bee installations, crossing my fingers that the bees would still be in the box when I returned.


I had so little faith that these bees would stay that I bet my son-in-law that I would return home at the end of this long bee day to find the bees had left.  If I lost, I had to buy him a beer at dinner.


I returned to find the bees still in the box, orienting and not swirling around as they had been at 11:30 when I left.  I gladly bought his beer and hope that this portends well for the future of this hive.  In my own backyard, I should be able to manage this top bar better and since it is a swarm and not a package, there's no queen cage to start the comb building off all catty-whumpus……so we'll see.
Posted by Picasa

Saturday, June 11, 2011

Topsy Turvy Curvy - Decisions to be Made

The new top on Topsy is lifted off of the top bars by two sections of 1X6 nailed to the bottom of the cover. This creates space for ventilation beneath the cover. So in Topsy instead of bearding off of the front of the hive, the bees collect under the cover where I found them on Thursday when I visited the hive.


My first task was to remove the comb we left in front of the follower board from trying to un-attach the comb several weeks ago. It helps to clear out the hive not to have old comb on the floor of the hive.


The hive has built out to about the last ten bars, so they have used about 25 - 30 of the top bars available to them.


Looking in, I could see that the last two combs curved forward, occupying the space under at least two top bars. Instead of trying to look at the comb or any further into the hive, I backed up and decided to make a different plan about this hive.


I don't think there's a way at this point to straighten out the mess that is Topsy. There are several problems:

First, I don't have Topsy at my own house so I don't see what's going on there on a regular basis. If I am to work on a top bar hive, I need it to be at my own house.

Second, I haven't addressed the comb problems in an appropriate way yet - causing the comb to drop off of the top bar is what has continued to happen and that doesn't work. I have a new hive tool for the top bar and understand now that I need to cut up with the hive tool if a comb is attached to the side of the hive, rather than cut down.

So I plan to leave Topsy alone until after I move to my new house in July. At that point, I am going to treat the hive like a cut out and move the comb into probably two hives in a split.

I have recently watched several of JP and Schawee's videos on Beemaster of how they do cut outs and I think I now understand better how to cut comb to fit it into frames. Thus far the only time I have rubber-banded comb is when I am trying to repair an accident, not when I've made an intentional cut.

I think I could treat Topsy as a cut out and following JP and Schawee's lead, I could cut the comb out well.  I'll move the two created hives to my house. At that point, I will move the empty Topsy box to my new house as well, leaving it empty until Spring 2012 when I'll start over with better management.
Posted by Picasa

Tuesday, April 19, 2011

Topsy Turmoil

The last two times I've checked the top bar hive, one top bar has come off from the top bar as I've tried to lift it. The comb attached (or not) is all full of honey.  The comb appears to be attached to the bottom of the hive.  I haven't really had any idea what to do.

The last time I was in the top bar hive, the brood bars were full all the way up to this honey.  I didn't want the honey to make the queen feel honey bound and influence the hive to swarm.  The only choice was to undo the stuck comb.

I have not enjoyed the top bar hive.  It is so much more difficult to work with than the hive box.  I can't see what is going on and I tend to create destruction as I did today.

With a regular frame, you can shake the bees off of it.  This comb could not possibly be shaken, nor can any top bar comb.  I wonder how in the world you harvest honey without making the mess we did today?

I put all of the mess on a slide show.  We killed at least 500 bees in the process and may have destroyed the queen as well, although wet with honey bees all look like queens because their bodies are so shiny.

First Jeff and I slid our hive tools down the side of the hive to loosen the comb from the hive.  Then we reached in and gently pulled the honey comb up from the bottom of the hive (and at least 500 bees).  Bees died from being squashed.  Some died from being coated in honey.

We put the comb in a large roasting pan and tried to brush the bees off....OMG what a mess!  Suddenly Jeff said, "Oh, no, there's the queen!"  He's really a good queen spotter but I'd prefer to think that I'm not sure it was the queen.  We took the questionable bee, covered with honey, and gently put her back into the hive.

We put some of the cut honey back into the hive in front of the follower board on some aluminum foil.  I took the rest home and was heartsick as I cleaned tons of dead bees off of the remaining comb into my kitchen sink.

At least we did see brood and eggs so they have the resources to make a queen if we have destroyed her.  I am so sad about this.  Makes me not want to open the top bar ever again.  I certainly won't build another one.  Here are the problems I've had:

1.  Hard to keep bees in the hive - lost one swarm, lost and recovered one package
2.  The only way to keep the bees in the hive was to put old comb on the bottom and close off the screened bottom board.  The comb on the bottom was the source of the problem today
3.  If comb is crooked or breaks off, there's no easy way to tie it into the hive - you can use string on the top bar, but it doesn't really do the trick and bees get tangled in the fiber of the string.  Rubber bands can't be used.  Below this list is a picture of how bees get caught (and die) in the string
4.  Any problem on the bottom of the hive is invisible until you tear things up to get to it......grrrr.
5.  I can't imagine harvesting - how do you get the bees off of the comb without using smoke and without shaking the comb?

Picture below of bees entangled in the fibers of the kitchen twine (dead).


Anyway, here's a slide show of the mess:


Sunday, February 20, 2011

Tales of the Top Bar Hives

On Saturday we checked Noah's top bar hive. There was lovely comb throughout the hive like the one in the frame above but all of it was empty - no honey to be seen. Bees were flying in and out so we felt like the hive had survived the winter so far, but no stores does not bode well.

Julia had a box of cut comb honey in the house, so she brought it out and put it in the hive.


Suddenly we spotted the queen. She's at about 9:00 just above my shadow cast on the comb.


Here she is again. You can see that the hive has pollen but no honey. We didn't keep looking at the comb at the point when we saw her Majesty. Instead, we closed it up for another day.


I feel reluctant in the first inspection after cold weather to break the propolis sealing the hive.  If the queen is dead, as she is not in Noah's hive, we can't replace her at this time of year anyway.

If we had looked deep enough into this hive to see the beginning of brood, it would be reassuring but doing so would not be worth compromising the safety of the hive as March's unpredictable cold/warm weather is upon us.

I visited my own top bar hive today at Valerie's.  This hive certainly has many fewer bees than went into winter. They also seemed a little disgruntled. So even though I didn't hear a queenless roar, I am concerned that they may be queenless.  Or maybe they just resented the intrusion.


Here they are congregating at the entry.
I could see the tiniest bit of pollen in the pollen basket on the bottom bee and felt a little relief.  Maybe there is a queen and some larvae that need feeding.  We'll see in the next inspection.

Despite opening a top bar and tearing off the wax covering over obvious stored honey, I still left them some comb honey in a box to let them know I was thinking of them and that there still is a beekeeper interested in them.

Posted by Picasa

Monday, January 24, 2011

Top Bar Topsy is Alive and Well - at least for now

It's 55 in Atlanta today (according to my car) and Valerie called with delight to report that the bees are flying out of Topsy, the top bar hive at her house. When warm temperatures arrive, the bees come out to relieve themselves and to carry out the waste from the queen. If it stays warm (which is not the case predicted), they will do some housecleaning, but temperatures are predicted to fall to the upper 30s tonight.


Yesterday I stopped by Valerie and Jeff's house to check on the bees. Topsy was quiet, still and appeared dead - felt cold, could hear nothing - but I still crossed my fingers that our so far so cold winter had not resulted in their starvation.


Today they are alive. Bee killing weather is possible for the next couple of months - our bees in Atlanta often starve with suddenly cold weather in February or March.

I'm hoping for a very sunny Groundhog Day!

Oops, upon re-thinking this, I realize that what I want is a very cloudy Groundhog Day so that he doesn't see his shadow so that spring will be on its way.
Posted by Picasa

Monday, November 08, 2010

New Topper for Topsy

When I arrived at Valerie's house today, it was 64 and the bees were flying in and out of Topsy. I saw one bee with pollen on her legs. I don't know what the others were doing. With the severe cold nights over the weekend, I imagine there is no more aster nectar.

You can see the bees at the entry in the photo below (if you can't, I put a red arrow pointing to them). There was a constant entry and exit at that end of the hive the whole time I was there.


Both jars of syrup were empty. Since we are having flying temperatures every afternoon this week, the bees are likely to be able to use this syrup, so I replaced both jars.

As a nod to the colder weather, I moved the follower board closer to the actual hive to help shrink their hive space. I didn't get it as close as I'd like but I'll get that done next week.


I traded out the wavy plastic cover for this newly constructed hive top. It was awkward and a little heavy, not like the wavy plastic. I may not like having this on top of the hive. When I tried to put it on the first time, I knocked against one of the top bars at the unused end of the hive and the bar dropped into the hive, necessitating my removing the top, replacing the top bar and essentially starting over again.

Doesn't it look more effective, though, than the white plastic one?


Here's a side view so you can see the supports and the amount of air space between the top and the top bars. I hope this helps the bees stay warmer than that flimsy plastic.


Tomorrow I'm checking on Blue Heron.
Posted by Picasa

Friday, November 05, 2010

New Top for Topsy

We're having our first hard freeze of the winter in Atlanta this weekend. Topsy still has that plastic, wavy top on it that was insufficient insulation in the summer. I know this because comb drawn by the bees fell into the bottom of the hive. This means the hive got too hot. I don't want it to get too cold in the winter and don't trust that top to do the job.


Today at a break I went to my local big box store and bought two 1x12s and had them cut to the right length for the top bar hive, allowing about a 3 1/2 inch over hang on either end. I used the cut off ends of the boards to nail the two boards together and to provide a one inch raise in the top above the top bars. (Well, we all know that a 1x12 isn't really 1x12, so I guess I mean a 3/4" raise above the top bars).  You can see how I nailed it below.


I had a roll of aluminum flashing and covered the top in that (for water protection) and used the staple gun to secure the flashing to the top. It was only 20 inches wide so I had to cut another strip to cover the edge.


When it was covered I folded down the ends and nailed them to the end as well. I'm a little worried about cutting my hand on the cut aluminum edges.


Here's the finished top for Topsy.


Here's a look at the top from underneath:


To protect my hands I covered the rough edges on each end with the all-useful duct tape.


I'm going to the mountains this weekend but when I get home, I'll deliver this better top to Topsy on Sunday.  It won't be there for the freeze this weekend but will be there for the rest of the winter and going into next summer (when hopefully the hive will still be alive).

Posted by Picasa


Thursday, October 28, 2010

Revisiting Bee Tea

It's been over a week since I have fed either Blue Heron or Valerie's hives - I decided to take care of that today so I went with Julia to Blue Heron before I went to work and to Topsy at a break after lunch.  Here is the process of making the bee tea and the feeding of the hives.

I put a slideshow up because I am now including both chamomile and thyme from my garden in the bee tea.  Interestingly, the hive at Blue Heron had only used half of the baggie syrup and almost none of the pint jar in the Boardman on the interior.

I wonder if they have run out of storage room?  Or if the aster blooming in the fields is meeting their current needs?  Or if I hadn't cut long enough slits in the baggie or had clogged holes in the jar lid of the Boardman?  I cut longer slits in the baggie and changed out the pint jar for a jar with a better lid.

We'll see this weekend when Julia and I revisit these hives to do a final consolidation for winter.


Posted by Picasa

Thursday, October 14, 2010

Feeding Topsy on Tuesday

I fed Topsy on Tuesday. They are really going through the food. I found both interior Boardman feeders empty. I'll need to think about this hive as winter approaches. They are only occupying 10 bars of the 40 in the hive.

I'll need to move the follower board close to bar 10 to make the space smaller for winter. I'll also have to rethink feeding. Currently the feeders are far down the hive from the combs in unused space. I don't know how to locate feed close to the used bars for winter feeding.


You can see in the comb below that the bees are back-filling comb that has been used for brood raising with honey as the cells become available.


They are doing the same in this comb.


I have a ways to go to learn how better to handle the top bar hive. I still squash bees even using the scissor method of lowering the top bar. However, I find this a very calm hive and often wear open-toed sandals and just a jacket and veil when I am working with them.


Posted by Picasa

Pin this post

LinkWithin

Related Posts Plugin for WordPress, Blogger...