Welcome - Explore my Blog

I've been keeping this blog for all of my beekeeping years and I am beginning my 19th year of beekeeping in April 2024. Now there are more than 1300 posts on this blog. Please use the search bar below to search the blog for other posts on a subject in which you are interested. You can also click on the "label" at the end of a post and all posts with that label will show up. At the very bottom of this page is a list of all the labels I've used.

Even if you find one post on the subject, I've posted a lot on basic beekeeping skills like installing bees, harvesting honey, inspecting the hive, etc. so be sure to search for more once you've found a topic of interest to you. And watch the useful videos and slide shows on the sidebar. All of them have captions. Please share posts of interest via Facebook, Pinterest, etc.

I began this blog to chronicle my beekeeping experiences. I have read lots of beekeeping books, but nothing takes the place of either hands-on experience with an experienced beekeeper or good pictures of the process. I want people to have a clearer picture of what to expect in their beekeeping so I post pictures and write about my beekeeping saga here.Master Beekeeper Enjoy with me as I learn and grow as a beekeeper.

Need help with an Atlanta area swarm? Visit Found a Swarm? Call a Beekeeper. ‪(404) 482-1848‬

Want to Pin this post?

Showing posts with label melting wax. Show all posts

Monday, July 20, 2015

New Take on the Solar Wax Melter - Trying Something Different

I've got a lot of wax to melt and have been feeling a little frustrated with the solar wax melter method I am currently using. I hate wasting all of those paper towels and you can only do a little at a time with the Tupperware, the paper towel, the rubberband, etc.

So wandering around Youtube, I found another solar wax melter, fancier than my version below, but based on the same idea. I quickly went past the video and haven't been able to find it again, but thanks to whoever provided this idea.

I went to the grocery store and bought aluminum 8X10 cake pans with about 2 inch sides. I took the handy awl I have in my toolkit - don't ask - it's the influence of my father in my childhood and his ideas of what one should have in a tool box. I may have never used it before. I used it to punch holes in the bottom of one end of the cake pan.


I also bought some plastic rectangular boxes and filled the boxes about one inch or so deep with water. I took my reliable on stand-by styrofoam beer coolers and placed a plastic water-filled box in each of them. The box was too large to go all the way down to the bottom but was large enough that it supported itself against the walls of the styrofoam cooler.

Then I put the aluminum pans at a slant in the cooler above the water filled plastic box. I made sure the end with the awl-punched holes was on the lower end of the slant.

I filled the aluminum pans with dry wax particles.


Then I covered the cooler with its pane of glass cover and left them to sit in the sun. Oh, and I lifted the high end up a little with an empty frame as support.


At the end of the day, the wax had melted and gone through the holes to float on the water below; the slum gum was all black and yucky, and I had lost no wax to a paper towel.


I have been using this for about a week now and have melted a lot of wax. Here's what I have gotten from my efforts so far.


Advantages of this melter:

1. Larger quantities of wax can be processed at a time.
2. No loss of wax to the paper towel filter.
3. The wax is quite clean and shows no need for a filter - all the slum gum stays in the aluminum pan. The water works beautifully as it did in my old melter for providing a surface on which the wax can float.
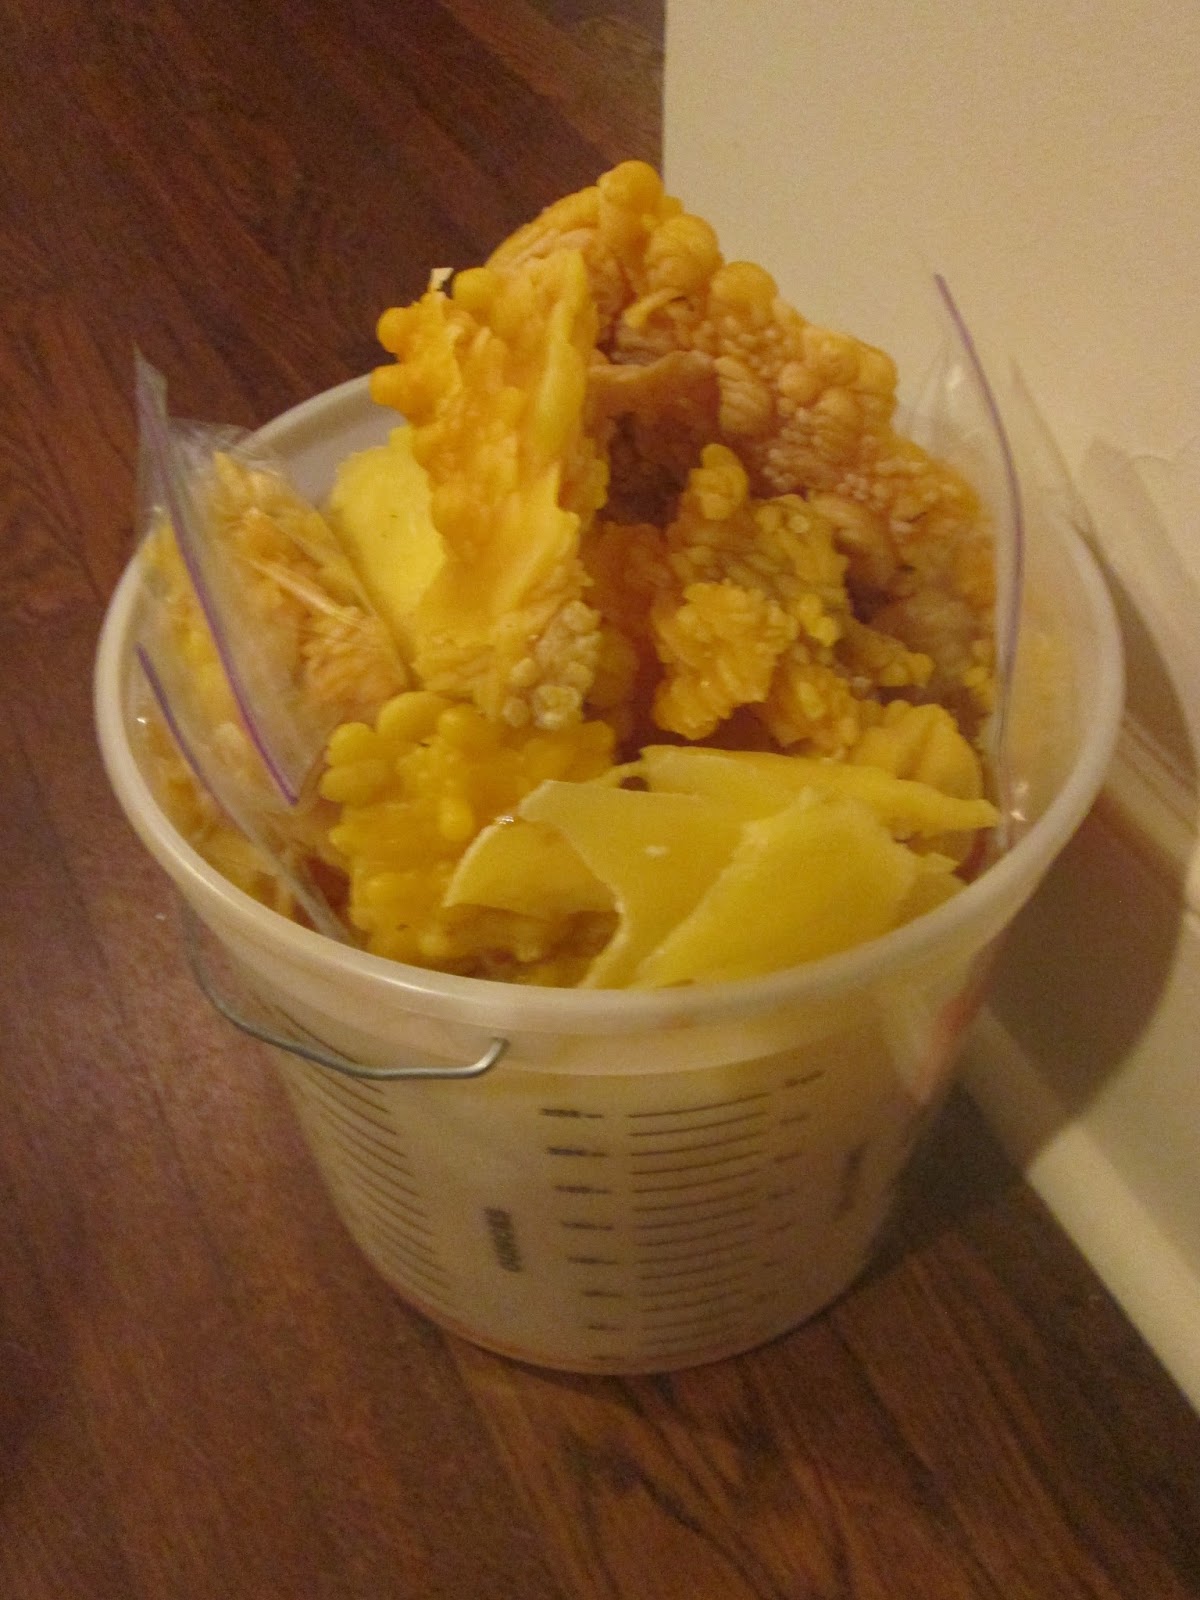
4. The wax is often in small bits from dripping through the holes - this will be easier to measure for soap and lip balm than having to melt the huge wax block before measuring (that's what's in the small plastic bags in the bucket - small bits of wax)

Disadvantages of this melter:

1. I believe the aluminum pans will have to be replaced after ten or twelve runs
2. At the end of the day, when the sun is no longer beating down, the slum gum hardens to the bottom of the aluminum pan. I've had to put the slum gum pans in the melter for a couple of hours the next day and then wipe them out with paper towels before they are available to use again.
3. The above task requires a pot holder because the pan is so hot and it's nasty to wipe out the slum gum...yuck.
4. Costs from scratch about $15 - $18 to make because the aluminum pans were not cheap...$6 for the styrofoam cooler, $5 for the aluminum pans, cost of glass pane will vary. The other solar wax melter cost about $10 total but melts much less wax and is more bother.


Thursday, August 01, 2013

Make Hay While the Sun Shines

The solar wax melter would be getting rusty at my house if styrofoam were something that rusts.  We have had the rainiest summer I can remember.  It rains almost every day.  You'd think we were in Seattle, but our rain in Atlanta is rather fierce, unlike Seattle, and usually comes with thunder, lightning and heavy sheets of rain.

The fact is that Atlanta has had 41.28 inches of rain in 2013 through July 8.  It has apparently rained every 2.6 days and we are on pace to have the wettest year since 1879.  Not good for the bees or the solar wax melter.

There have only been a few solar wax melter worthy days in the past months. Tuesday was finally one of those days, so I put out two wax melters and set them to work.


This has been a rainy summer in many parts of the country, but especially in the Southeast.  This year, for the first time in the six or so years that my solar wax melter video has been up on YouTube, I've gotten several emails from people who say their wax melter isn't working.  One of them said she had left it outdoors in the hot summer NIGHT of 80 degrees and the wax didn't melt.  Another said that she was experiencing heavy moisture condensation under the glass, but that the wax didn't melt.

Seems like it is important to emphasize that the solar wax melter got its name because the SUN is required for it to work.  The temperature has to be high enough all day, it's true.  But for the solar wax melter to work, the sun must shine for most, if not all of the day.

On cloud covered days when the sun peeks in and out of the clouds, I often also come home to find moisture condensed inside the SWM and the wax unmelted.  I just leave it out for the next sunny day and the wax does melt in the sun.

This time I put out the filters from filtering honey to let the bees clean it up in my bee yard.  When I returned to get the filter, the wax was completely dry and cleaned:


This felt much less wasteful to me than washing the wax and letting the bits of remaining honey run down the drain.  I crunched the wax into balls and put them onto the tops of paper towels on Tuesday.  I also put broken up sheets of wax from melting old brood combs.


At the end of hot and sunny Tuesday (finally), I had some lovely wax.  Here is some of it.


Tuesday, January 15, 2013

Goody Bags for Short Course

Our MABA Short Course is this Saturday - it's been full at about 110 people for the last two weeks.  Julia and I are chairing it for next year so we have to pay close attention this year to make sure we have an idea of what we will be doing.

One of my volunteer tasks this year was to make the lip balm for the goody bags that the participants take home.  The bags have a lot of items in them - catalogs from bee companies, lists of local bee suppliers, resource lists of Internet and other resources (including this blog ;-}), a small jar of honey, a small candle, and a tube of lip balm - guess whose job it was to make the lip balm?

Mine.

So tonight I poured 100 tubes of lip balm.  We already have a few more to make up the 112 or so that we need.

First I melted wax in the Presto Pot:


Then I set up my pouring tray with fifty lip balm tubes (I get them from Majestic Mountain Sage).  I got orange tops for the tubes so they wouldn't get lost in the Goody bag!


So I melted the wax.  In a Dutch oven filled with simmering water, I put my oversized measuring cup.  I put into that 1/2 cup plus 4 T of sweet almond oil, 1 tsp honey, 1 tsp cocoa butter (had to heat it with my hair dryer to allow me to scoop out a teaspoon), 1 tsp vitamin E oil, 9 T beeswax, melted.

All of this sits in the hot water until I am ready to pour.  Then I pour it in the tubes.  Notice I set the pouring tray on a sheet of wax paper in a cookie sheet.  This makes for a clean work surface and any drips can be scraped off of the wax paper with a rubber spatula and remelted, but you couldn't do that off of the counter.


I scrape off the excess from the tray and remelt it.  Then I refill the tray, make the mixture again and fill another 50 tubes.  The recipe will fill about 40 - 50 tubes.

Finally I capped the tubes with the cute orange tops:


Tomorrow night I'll print and put on the labels, but for now, I'm off to bed.  If you try to make lip balm and have any helpful hints, please post them in the comments section below.

Thursday, September 15, 2011

The Eternal, Never-Ending, Beyond Challenging Saga of the Wax Block

So it's honey contest time of year and once again I face the challenge of the wax block.

A man sent an email to me telling me that he had poured a gorgeous wax block by putting the wax, unmelted into the mold in the oven and turning the oven on to 150 degrees. When the wax had melted in the mold, he turned off the oven and put a pane of glass over the mold. It was, he said, the perfect block.

The Georgia Beekeepers Association had its fall meeting and honey contest this past weekend. In preparation for it, I tried the melt-the-wax-in the mold plan - TWICE. Both times the block had a huge crack in it. You can see the crack in the melting wax in the photo below.


So I went back to the tried and mostly good method I've been using in the past few years. First I melted the wax in my converted Presto Pot.  I want a good block for the Metro Atlanta picnic, auction and honey contest this weekend.


While the wax was melting, I put my Pyrex measuring cup (8 cup) in a pan of hot water so that the wax would not harden the minute it filtered into the measuring cup.


I put a large pan with about an inch of water in it into my basement oven and turned the oven on to 195. I also put the glass brownie pan I was using into the pan of water to heat up as well.


When the wax was all melted, I fitted the measuring cup with silk, held to the cup with a large rubber band. You can see the end of the wax as it finally finishes filtering in the picture below.


I poured the melted wax from the measuring cup into the glass mold in the hot water bath in the oven, covered it with a pane of glass, and left it overnight to cool and harden.

The next morning the mold looked like the perfect block. There were no ripples on the surface (I covered the mold with a pane of glass in the oven as it cooled over night). Here it is sitting in the freezer to release the wax block from the mold.


Oh, NO, not again (and again and again). The perfect block has wax blemishes on the sides where the wax has adhered to the pan.


It's on three sides - MOAN and GROAN and MOAN some more. I simply can't pour a good wax block this year. This is pour THREE (at least it's not 18, I hear you thinking).

Look at the no-ripple top. Doesn't it make you sick to think that I have to do it all over again?


So tonight I repoured this light wax into a brand new no-stick pan. (I actually think the secret to a good wax block may be to use a new pan every time)  At the same time I also melted some slightly yellower wax and poured a brand new Pyrex round casserole used as a mold. I am cooling and hardening the square block in the hot water bath in the oven with a pane of glass over it and I am cooling and hardening the yellower wax on my workbench. It is also in a hot water bath with a plastic cover over it.

So we are up to FIVE pours. I refuse to do 18 this year.

Sorry about the pictures - Picasa lets me down again.  I'll upload them one at a time from my computer.

Sunday, July 31, 2011

How do you Get Beeswax Off of a Ceiling? (!) You Iron It, Of course.

As you know this has been a topsy-turvy month. I moved out of my old house and Jeff and Valerie moved into it. In the old house once upon a recent time, wax exploded in my kitchen, sending globs of wax all over the ceiling, cabinets and counter. What a mess!!

The house was going to be painted while I was at the beach this past week, so Jeff and I set upon the task of getting the globs of wax off of the ceiling. I learned a number of years ago how to get wax off of floors so I thought maybe the same approach would apply to the ceiling.

I bought a whole roll of brown paper, figuring we would need a lot.

We plugged in the iron and heated it up. I cut the brown paper into usable sizes. Even with the preparation, this was a hard task. It's not fun or easy to iron upside down like that while standing on a ladder. I had waited until Jeff could help me so I would have a spotter when it was my turn.

He's laughing in the picture - we both were - at the ridiculous nature of this task, but we managed to iron all of it off.

I told the painter about it before she came to give me an estimate. By the time she arrived at the house to do the estimate, she had checked with her painter colleagues and none of them had faced this problem before. She didn't have any idea what to do.

I told her Jeff and I would iron it off.

Imagine her surprise when she arrived on Monday to find nary a trace of ceiling wax. I immediately think of Alice in Wonderland in "The Walrus and the Carpenter" and want to say that forever more I'll read that line as "shoes and ships and CEILING wax, of cabbages and kings."

(I suppose it is important for the Walrus to talk of "sealing wax," however, among the many things.)

The miracle of ironing wax with brown paper is that the wax liquifies in the heat and soaks into the paper, leaving the ceiling altogether.

Does call for some awkward body positions, though!


I will not have this problem in my new house. I didn't like the stove that was in my new kitchen because it had a gas oven but it seemed a shame to simply replace it. So I had a plumber come and install the all-gas stove into my bee part of my new basement.

Any further explosions will not be in a pretty cooking kitchen, but rather in a basement area set up purely for bee stuff and other messy business.  I plan to harvest honey down there, make lip balm, lotion, melt wax, all the messy stuff.  I can build bee equipment down there - it's really a beekeeper's heaven.

I had the stove moved down there and put in a utility sink right beside it so I would have hot and cold water.  There's a work bench - soon I'll post pictures.  I'm going to have about 1/3 of my basement devoted to bees.

Saturday, July 09, 2011

Differences in Old and New Wax, Melted

Below you can see the product from my first two uses of the solar wax melter this year. The top disk came from Lenox Pointe, all new drawn honey comb; the bottom one came from Stonehurst, again all new drawn comb.


Yesterday I had the wax from some frames that included some old comb (also from Lenox Pointe). BTW, here's a useful tip in squeezing the wax into a ball: Put the wax in a plastic bag and use that to help you form the ball. Your hands won't get all sticky with honey.


You can see the pieces of older comb mixed in with the new comb on the paper towel below. This wax is ready to go outside.


At the end of the day, here's what the wax looked like - much brighter and darker in shade.


The color isn't so good in the picture below but you can easily see the contrast in old wax (on the left) and new comb (on the right). When people who use extractors melt capping wax, they get the results on the right. If you go foundationless and do crush and strain with the all new comb, your results should also look like the comb on the right.

Comb is also affected in terms of color by the type of pollen in the honey.  The wax on the left came from honey that I would define as medium to medium/dark.  The comb on the right was a very light honey.


If you are entering a honey show with your wax, the judges will give more points to a lighter wax. All wax should retain the smell of the beehive, which is why you need to use this year's wax in wax melting for a honey show.
Posted by Picasa

Thursday, June 30, 2011

First Date with the Solar Wax Melter

Yesterday was my first date this year with the solar wax melter. I set it out before I left of work and when I returned at the end of the day, the wax had all melted and filtered through the paper towel. I couldn't find one of my industrial strength rubber bands and the flimsy rubber band I used had popped during the process (see below)


But this wax from Lenox Pointe is light and beautiful. The advantage of foundationless frames is that all new wax from honey combs (not just capping wax) melts to look like this. Brood wax is always darker and not as pretty - but wax from comb holding honey is gorgeous.


Here the disk is popped out and sitting on a paper towel.


Happy with my first date, I balled up the cleaned wax from the Stonehurst four frame harvest and set the wax melter up to work again today.


Sometimes the melting wax wicks down through the paper towel and accumulates on the foil below the container.   I found a new container with more surface area - I'm hoping this will be an even better result with less wicking.


Posted by Picasa

Tuesday, June 22, 2010

Rendering Wax with Cindy Bee

At Young Harris Beekeeping Institute, I went to a demonstration by Cindy Bee on rendering wax. I wanted to see what she does because I now have a number of frames of slimed comb from the small hive beetle and I'd like to capture some wax from them.

Cindy puts gross old wax into an old flannel pillow case. She just pops the wax comb out of the frame and dumps it into the pillow case.


She then puts the full pillow case into this huge pan (it's for frying turkey originally). She has the water heated to boiling on a propane burner.


The wax quickly melts down and she uses this stick to help push it down and out.

The stick helps press the gross scum gum down into the bottom of the pillow case.


Then she lifts the pillow case out of the water and puts it into a colander of sorts that sits at the top of the pan and drains.


She wears gloves so as not to get burned and presses down on the solids in the bag.


Then she dumps the remains (the slum gum, as it is called) into a box and discards it.


She leaves the pot to cool and when all is said and done, she has a ring of wax.  It still needs more processing to be usable but at least some wax is recovered from useless frames or old comb.


I've bought some equipment - not as sturdy or sophisticated as this, but I'll report on my own wax rendering a la Cindy Bee in the next day or two.
Posted by Picasa

Pin this post

LinkWithin

Related Posts Plugin for WordPress, Blogger...