Welcome - Explore my Blog

I've been keeping this blog for all of my beekeeping years and I am beginning my 19th year of beekeeping in April 2024. Now there are more than 1300 posts on this blog. Please use the search bar below to search the blog for other posts on a subject in which you are interested. You can also click on the "label" at the end of a post and all posts with that label will show up. At the very bottom of this page is a list of all the labels I've used.

Even if you find one post on the subject, I've posted a lot on basic beekeeping skills like installing bees, harvesting honey, inspecting the hive, etc. so be sure to search for more once you've found a topic of interest to you. And watch the useful videos and slide shows on the sidebar. All of them have captions. Please share posts of interest via Facebook, Pinterest, etc.

I began this blog to chronicle my beekeeping experiences. I have read lots of beekeeping books, but nothing takes the place of either hands-on experience with an experienced beekeeper or good pictures of the process. I want people to have a clearer picture of what to expect in their beekeeping so I post pictures and write about my beekeeping saga here.Master Beekeeper Enjoy with me as I learn and grow as a beekeeper.

Need help with an Atlanta area swarm? Visit Found a Swarm? Call a Beekeeper. ‪(404) 482-1848‬

Want to Pin this post?

Tuesday, August 23, 2016

Crush and Strain Harvest When You Use Foundation

The bees where we poured the nematodes a week ago had honey to harvest. But the frames in the hive were put there by the previous owner and the frames all had plastic foundation. I haven't ever harvested from plastic before, but there's a first time for everything.

I harvested from them in mid-July and just haven't posted about it until now.

We took about two boxes worth of honey off of the two hives. We actually removed two boxes from each hive, but many of the frames were not used so we only harvested the excess, amounting to two boxes. I wanted to leave each hive with one full super in addition to whatever they have stored in the bottom brood box so that they have a good chance going into winter.

I brought the honey home and used a spatula to scrape the honey off of the plastic and into my crushing pan. This was the messiest harvest ever. And the frames were really drippy. I put the dripping frames into another roasting pan and will use the honey that dripped off of them to feed any bees who need feeding going into winter.

You can see in the first frame that it was only partially filled with capped honey.


I used a spatula to scrape the honey into the crushing pan.


The fuller frames were more fun!


When I had crushed it all and put the pulverized wax into the filter buckets, I then let the bees clean it up. I always do this in my front yard so it's not right next to the beehives.


Out in front of my house puts the house between the cleanup and the apiary. Mostly I am sure I am feeding bees from around the neighborhood (there are at least five beekeepers within a block of me).


It is quite a party for the bees but at the end of the day the wax is clean, not at all sticky, and ready to put in the solar wax melter.

Monday, August 22, 2016

The Value of a Beekeeping Mentor

When I first started beekeeping, I had many mentors. An Atlanta beekeeper came over pretty close to the arrival of my first hives and walked me through my first inspection. I went on hive inspections through my local bee club at the Atlanta Botanical Garden where there were beehives. Most of my local bee club believed in feeding the bees all the time and treating the bees for everything, so I couldn't find many/any like-minded beekeepers there. I relied for mentorship on people at Beemaster and Beesource online and felt wonderfully mentored.

Now that I've been keeping bees for eleven years, I have the opportunity to give back and I do a lot of mentoring new beekeepers. Beekeeper-wanna-bees, as well as new beekeepers, show up to spend time with me in my bee yard and I am glad both for the company and for the chance to teach someone something new.

I was contacted by a man in north Atlanta when he first got his bees. He came to our Meetup in Atlanta and had met me and wanted some hands-on help with his new hives. He lives about 25 minutes from me (Atlanta is really big!) but I went and was glad to go.

He had read a lot online and really wanted to be a natural beekeeper. He had regularly read Beesource and Beemaster and knew a lot, but was uncertain about his hives. The first time I visited, it was about reassuring him about his hives and helping him to know how to conduct a hive inspection.

He has a beautiful organic garden.


He requested a second visit because he was worried that he had a queenless hive. The closest hive in the photo below looked less active and he had opened it and hadn't seen any brood, any sign of a queen.


You can see less activity in the closest hive in the photo above. So we opened the hives and went through them. We started in the less active hive. We took off the medium boxes and got to his deep bottom box. I pulled out the next to last frame and there was dark biscuit brood in the center in a pretty good pattern. According to Billy Davis, that means the brood was about to emerge so it was about three weeks old. Also in that frame I could see brood and larvae at all ages and eggs. I showed him how to put the sun over your shoulder the better to see the larvae and eggs.

Every time I go, he comments on how patient I am. I am so not a patient person, but that was nice for me to hear because I think one of the benefits of beekeeping for me is that it slows me down and makes me behave patiently.

Turns out that he was panicked when he had read on Beesource that many people were finding that they had lost their queens here at the end of bee season. He had not looked through the entire brood box (must have started on the other side of the box) and assumed he didn't have a queen.

However, the hive was actually thriving and had a healthy, laying queen. The other hive was in equally good shape with a little more stores than the first hive. I asked him if he would like to take a frame of honey out of the hive so they could at least taste what his bees could do? He loved the idea so we took out a frame (giving me the opportunity to show him how to shake and brush off the bees).

I told him how to scrape it off of the foundation and crush it. He emailed me later in the day to say, "Oh boy, it is awesome!"

It's great to ask for help and guidance at any point, but especially when you are starting out beekeeping. I think the next time he is worried, he will look more carefully through the hive and maybe take reading glasses or a magnifying lens to help him see the eggs and larvae.

As I backed down his driveway, I could hear him literally giving a whoop of joy that his hives were OK.

Tuesday, August 09, 2016

Applying Nematodes to Get Rid of Small Hive Beetle

In the middle of May, I was contacted by someone who had bought a house about 20 minutes from me. Her house came complete with chickens, koi fish in a pond, and four beehives. She had found a home for the chickens, don't remember about the fish, but she had four beehives, three of which contained bees. Leslee asked me to help her with the bees. "I love all creatures and hope to keep these bees healthy," she said.

When I went to her house, the hives clearly had been neglected for probably two years. One hive was small with a large population of small hive beetles. The other two looked like they were busy and being productive.


This hive was isolated away from the other two. 

Leslee had put sugar syrup on all the hives in an effort to feed the bees. I explained to her that we were in a nectar flow and we didn't need at that time (mid May) to feed the bees.

On one of the hives the area around the feeder smelled just awful. I couldn't imagine what it was. Then I returned a week or so later to take the hives apart and really inspect them. When I did, the hive with the smelly feeder area was quite interesting. In that deep bottom box, behind the feeder was a very nasty smelling area in a perfect rectangle. The bees had left empty the three frames immediately above the nasty liquid. 

This house had been for sale and I wondered if maybe one of the realtors showing the house had sprayed poison into the hive in that area to try to kill the bees (and sell the house more easily).

I removed the feeder, took out the three empty frames and cleaned up the area. One of the four hives was empty and I didn't want to put a box that had poison in it back on the hive. I removed the box completely. I had brought with me a ten frame bottom board and slatted rack. I took two deeps off of the fourth failed hive and got rid of the poison-filled box. I didn't have deep frames with me, so I substituted three medium frames. It won't matter. The bees will build comb below the bottom bar. I've done this before in other hives. 

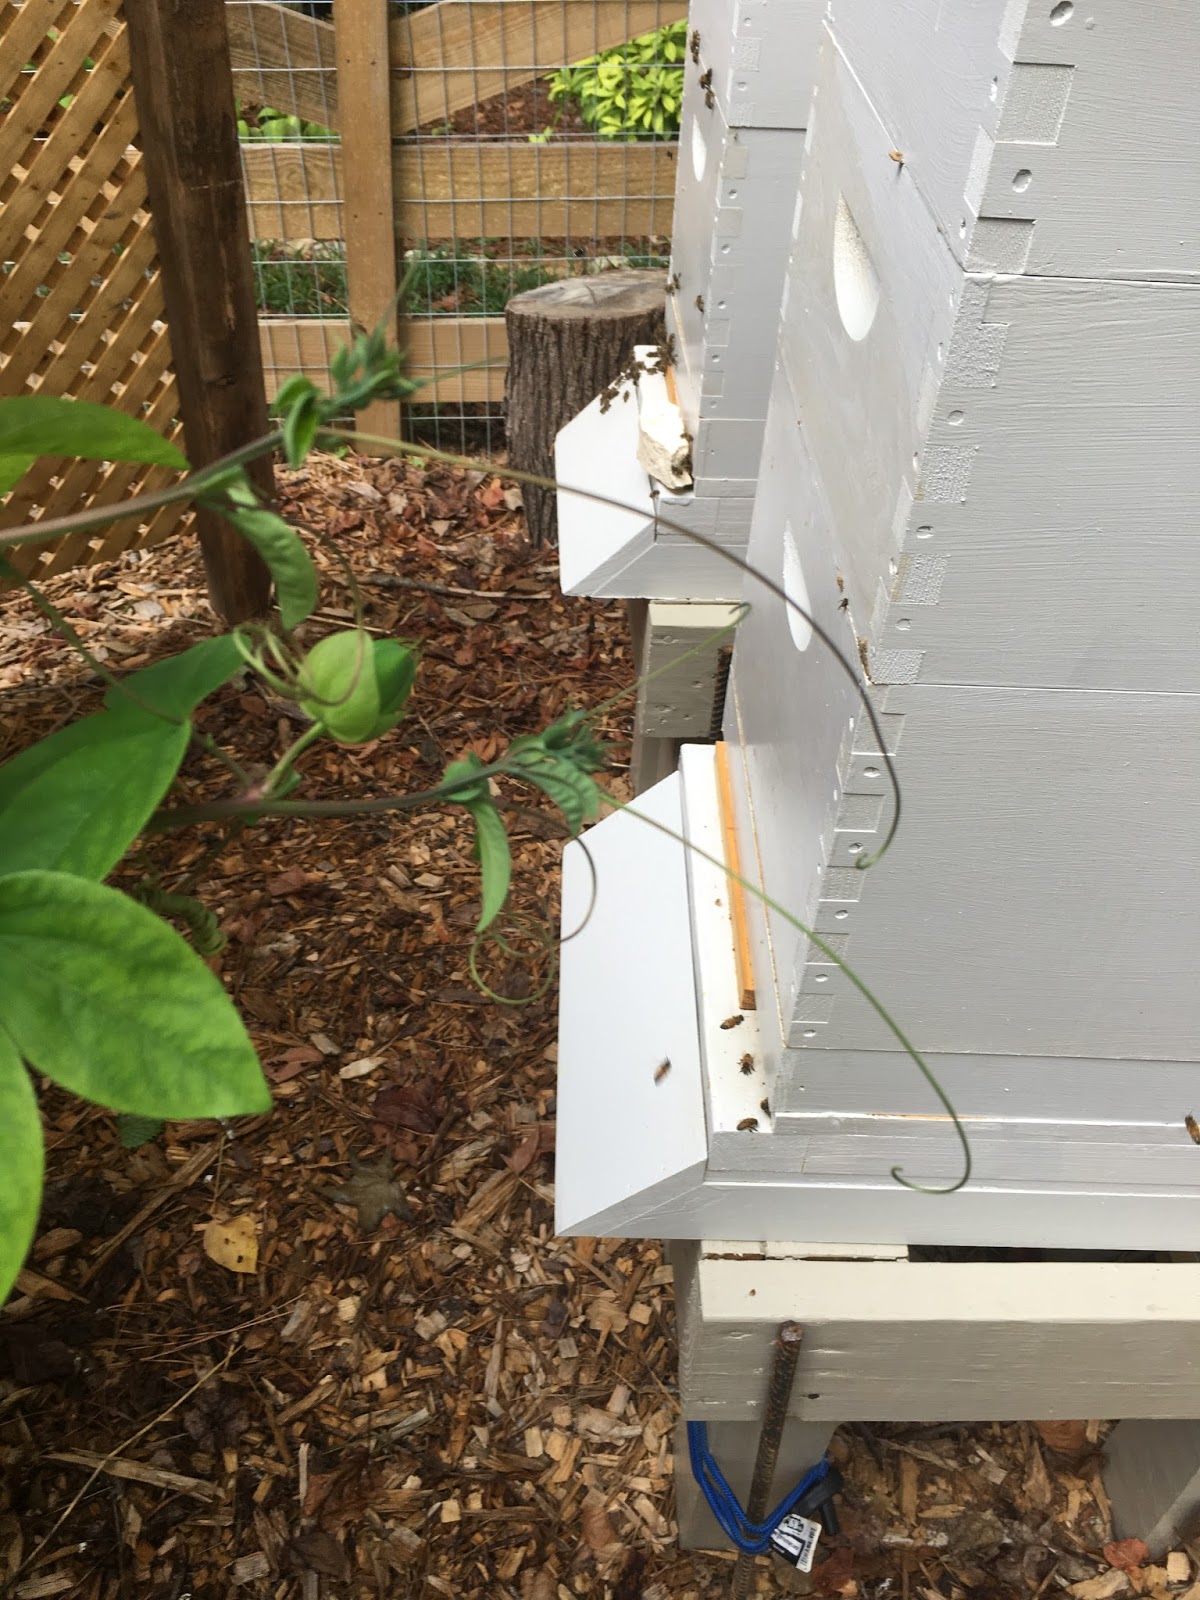
Below you can see the hive with its new slatted rack. The removed frames are on one side of the hive and the feeder is off to the other side. The hive has two deeps because I needed space for these bees and that was all that was available, left from the previous beekeeper.


The third time I visited these hives, the small hive in the photo above had absconded and was completely overrun with small hive beetles. These three hives are on a tree-covered ridge and are totally in the shade. What a mess - all the comb smelled like orange crush and the honey was slimey. I closed the hive up and worked on the other two instead. 

So I talked to Leslee and we decided to treat for small hive beetles by pouring beneficial nematodes on the ground around the hives. I actually planned to treat the entire hillside since the other two hives had failed from small hive beetle.

I ordered nematodes from Southeastern Insectaries. I've had a previous experience with these - it's truly an act of faith. The beekeeper can't see the nematodes, but the instructions say to stir them to dissolve them into water.

So I followed the instructions to the letter:

You might think you are looking at the nematodes, but no, you are looking at the gel in which they come.

The cloudy liquid in the pint jar represents the dissolved nematodes

The well-rinsed gel looks like this - all of the nematodes should (who knows?) be in the water!

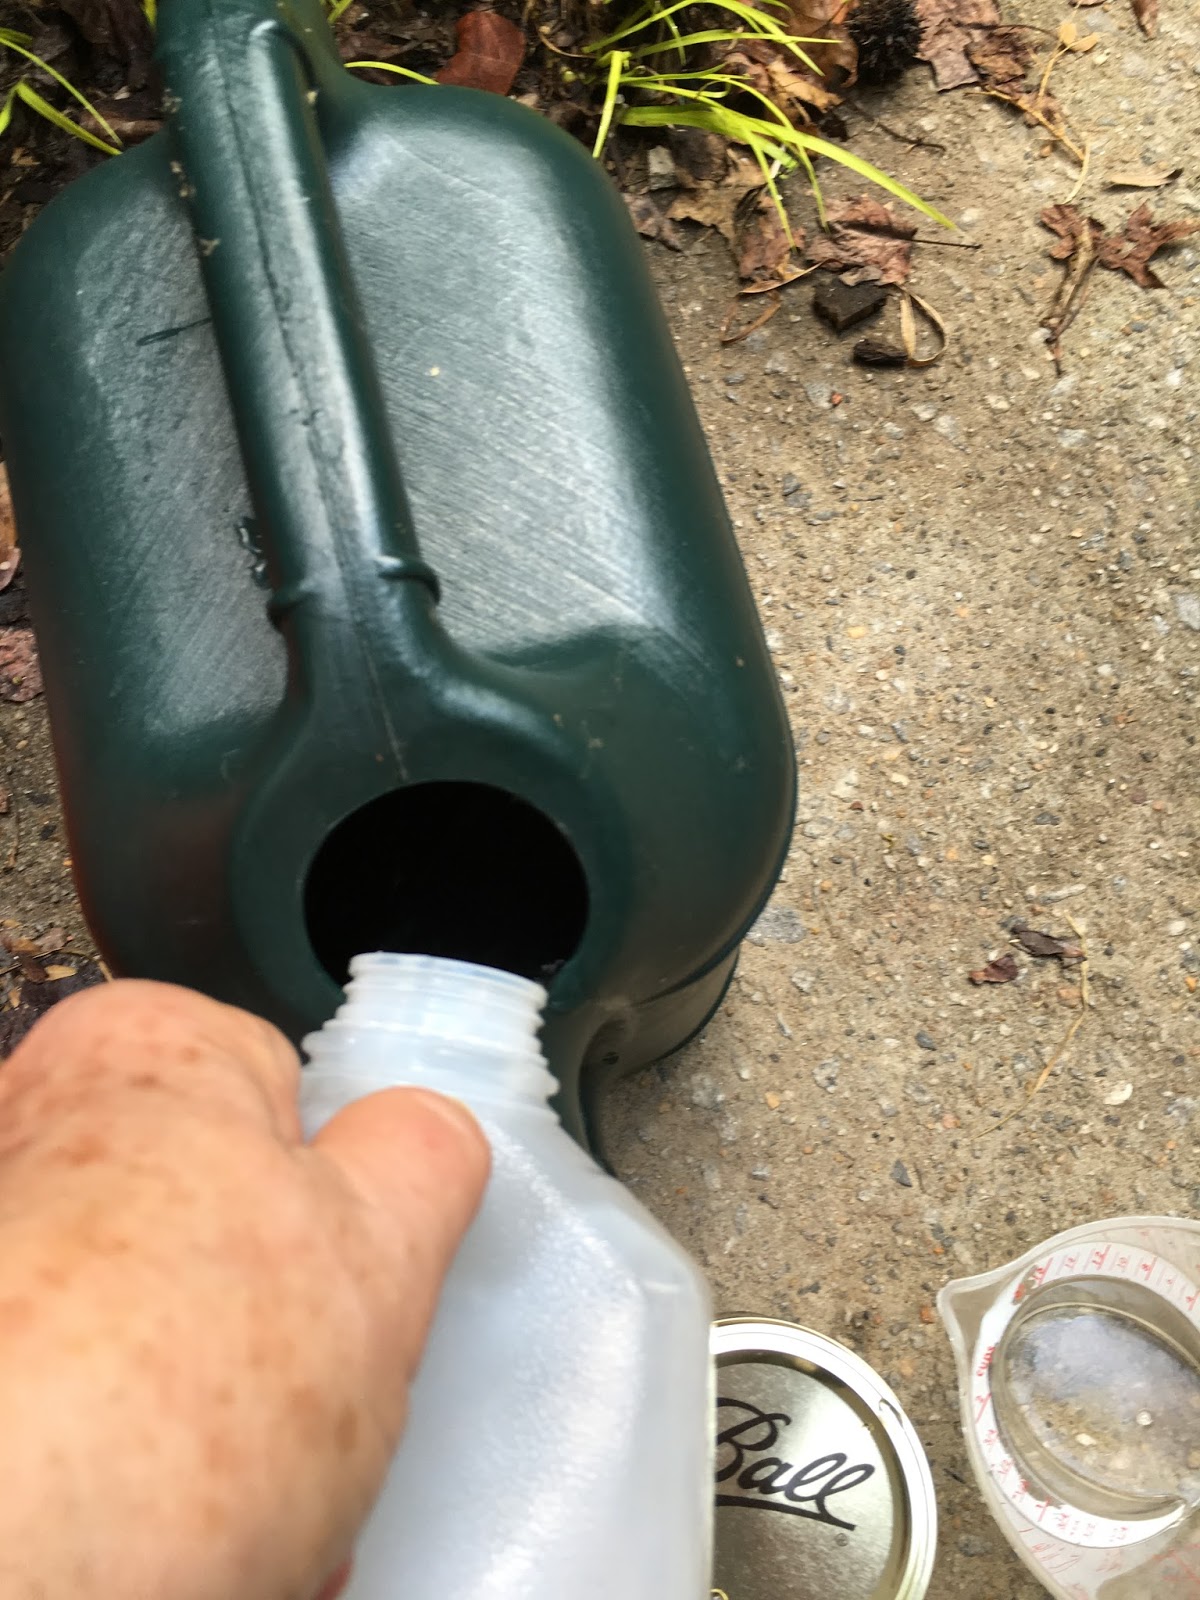
I was scared of losing any of the 53 million little guys so I put the pint jar in the bottom of a five gallon Home Depot bucket. I know the photo looks like abstract art, but it's the inside of the bucket, looking down on the pint jar sitting on the bottom of the bucket. 

Never removing the jar from the bucket, I opened its top there and then poured the nematode solution into the bottom of the bucket. Then I added water with the hose and stirred the invisible little creatures with a long-handled wooden spoon. (The instructions say to stir frequently because the nematodes tend to sink to the bottom - I'd never know, so I stirred like mad!)

I had a half gallon empty milk carton with me so I used it to fill my sprinkler can.


Then I poured the water with hopefully well-stirred nematodes all around the hives and around the old hive locations on the hillside. 


BTW, before I left, I photographed the two living hives. This photo shows you the impact of the slatted rack. The closest hive has one, the fartherest one does not.


Close-up of the non-slatted rack hive. I can't say enough for the slatted rack. If I can find another 10 frame slatted rack, I'm bringing it over. These hives are so heavy with the ten frame boxes that I don't dare try it by myself. I'm spoiled by eight frames! I always bring Jeff to help me on these large tasks!

Working with bees that were started by someone else in their equipment is quite the adventure. We have no idea of these bees' history. Where did he get them? He apparently built his own equipment. Part of the reason the hive boxes are hard to lift is that the hand holds are very shallow, much more so than my commercial boxes. The previous beekeeper left it all behind. He left his beesuit, his smoker, his frame lifter and his hives. At least Leslee will be able to use those things.
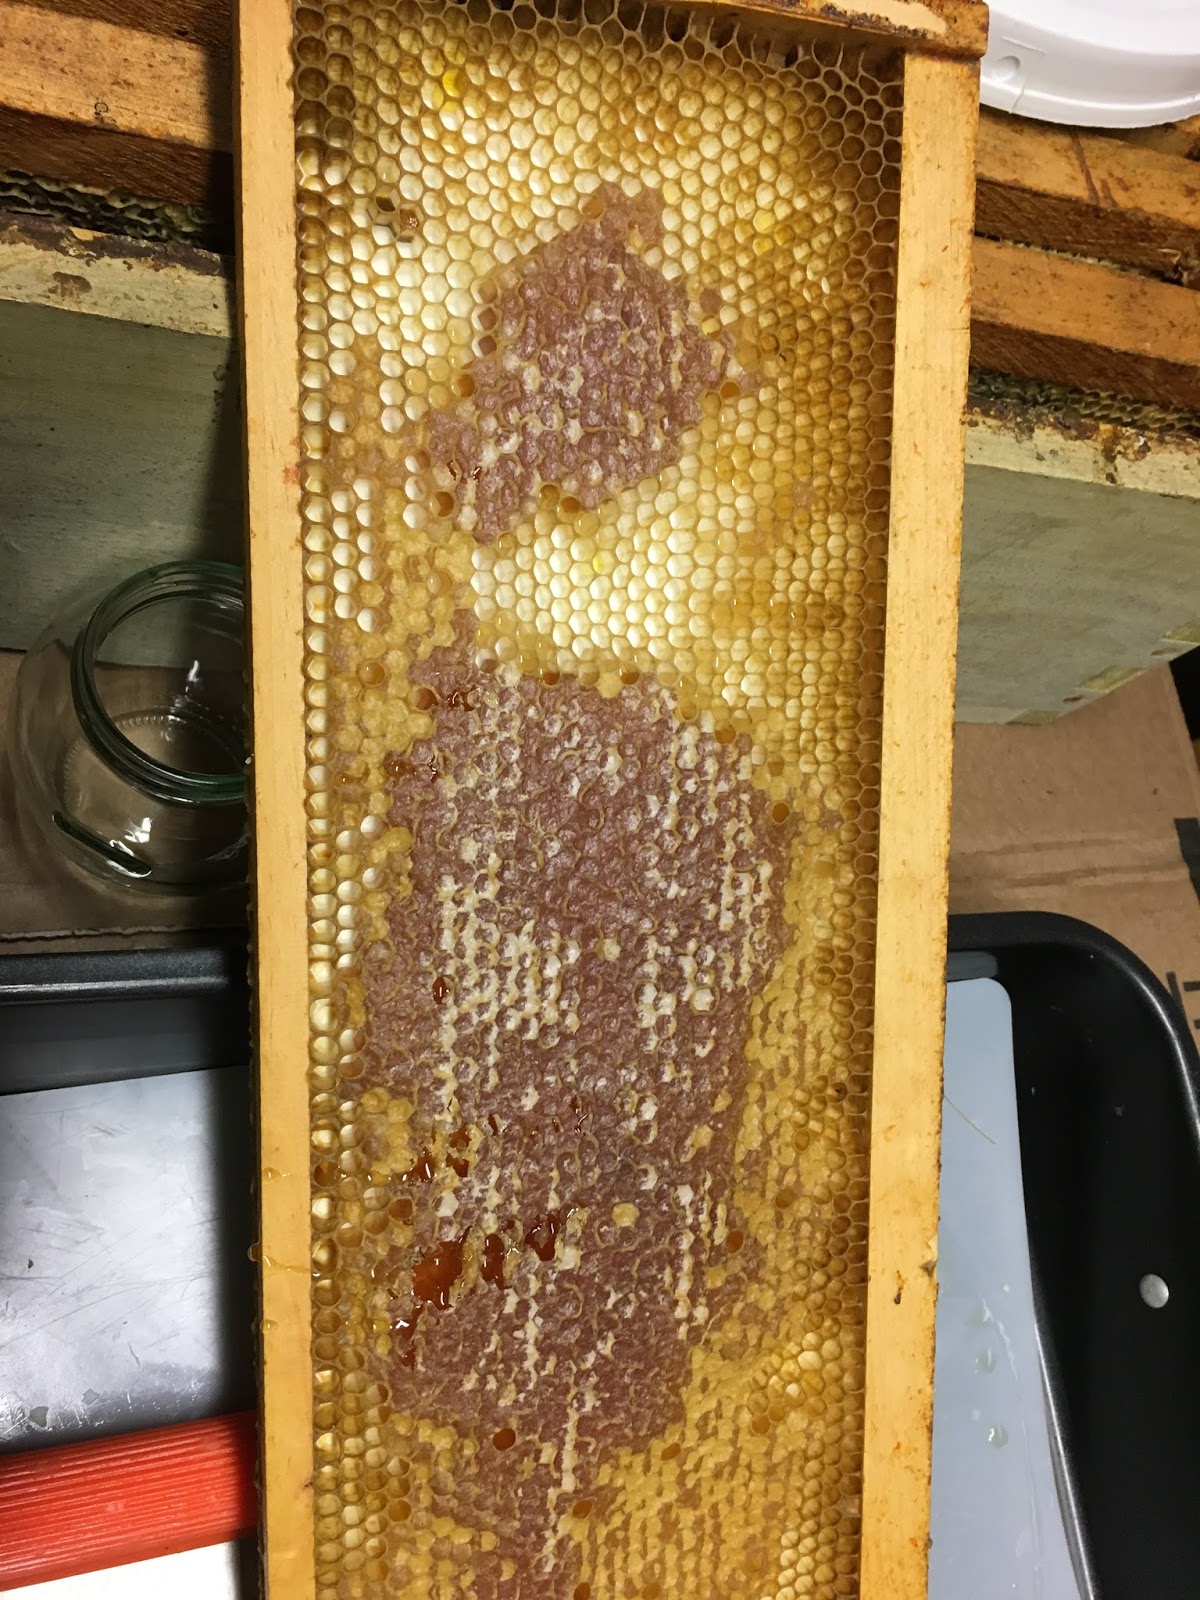
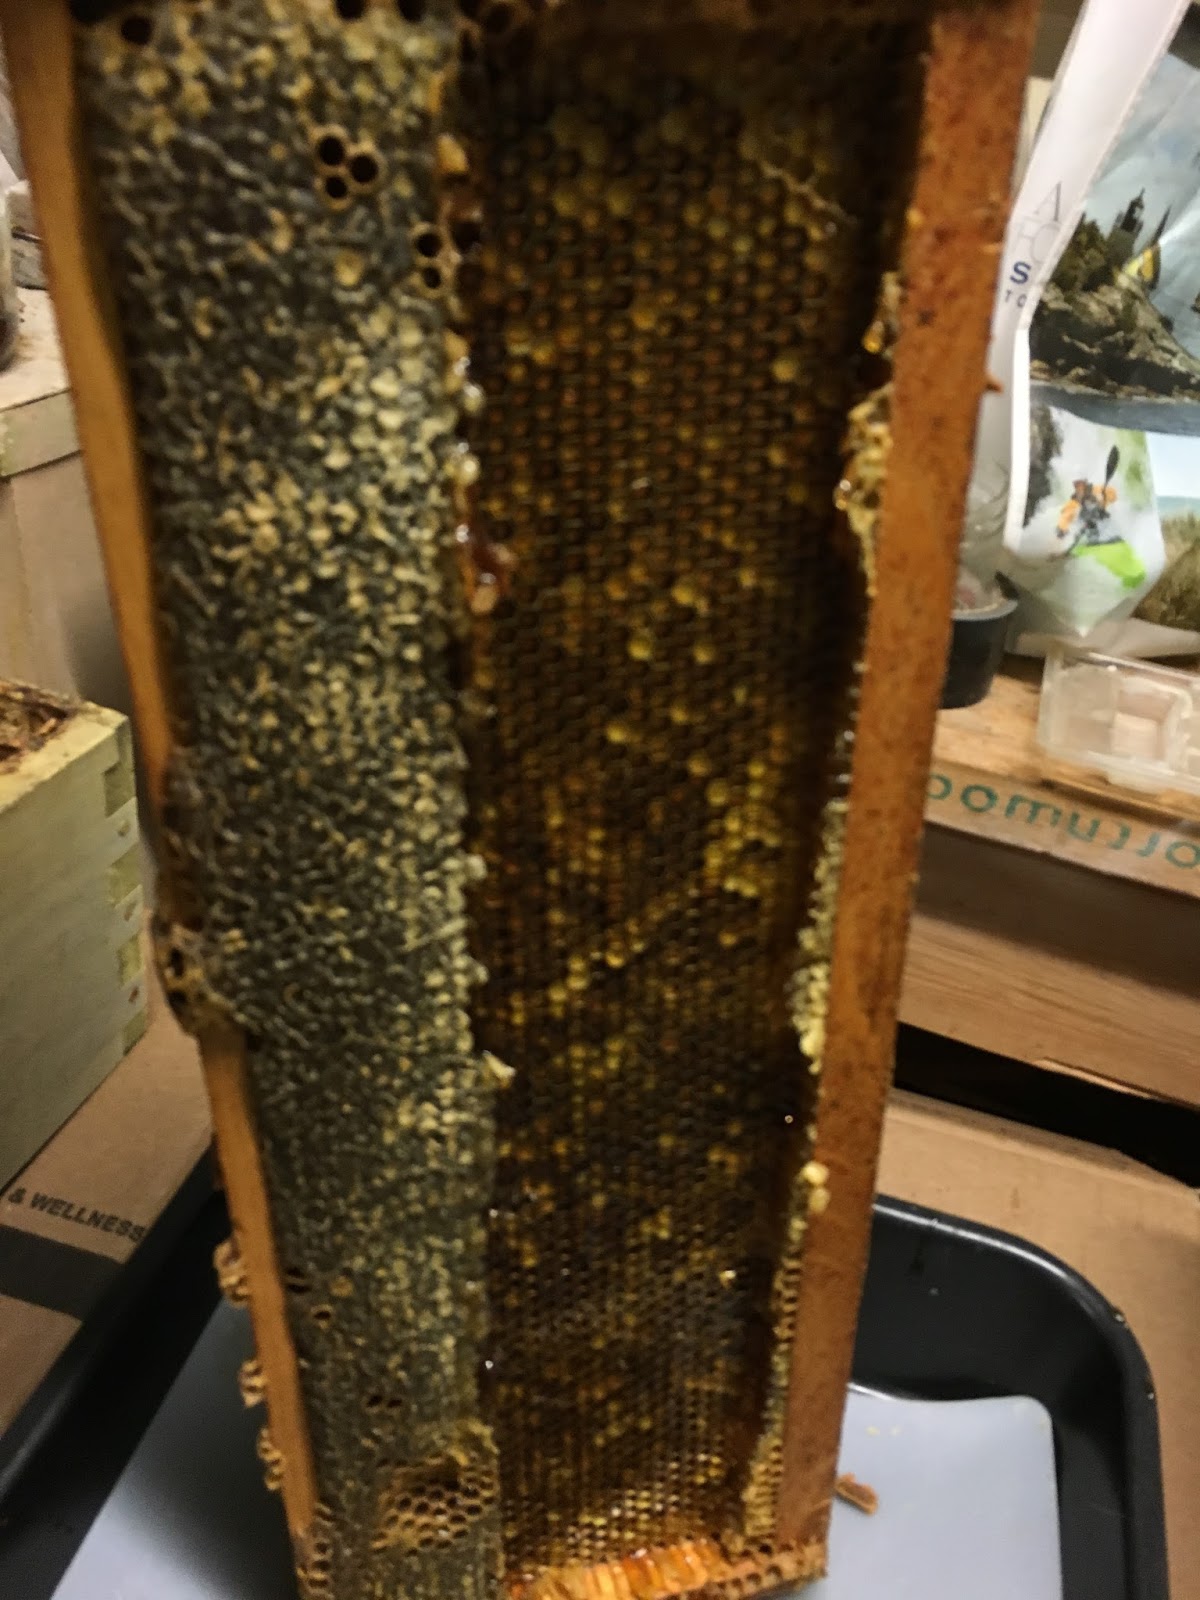


Pin this post

LinkWithin

Related Posts Plugin for WordPress, Blogger...