Welcome - Explore my Blog

I've been keeping this blog for all of my beekeeping years and I am beginning my 19th year of beekeeping in April 2024. Now there are more than 1300 posts on this blog. Please use the search bar below to search the blog for other posts on a subject in which you are interested. You can also click on the "label" at the end of a post and all posts with that label will show up. At the very bottom of this page is a list of all the labels I've used.

Even if you find one post on the subject, I've posted a lot on basic beekeeping skills like installing bees, harvesting honey, inspecting the hive, etc. so be sure to search for more once you've found a topic of interest to you. And watch the useful videos and slide shows on the sidebar. All of them have captions. Please share posts of interest via Facebook, Pinterest, etc.

I began this blog to chronicle my beekeeping experiences. I have read lots of beekeeping books, but nothing takes the place of either hands-on experience with an experienced beekeeper or good pictures of the process. I want people to have a clearer picture of what to expect in their beekeeping so I post pictures and write about my beekeeping saga here.Master Beekeeper Enjoy with me as I learn and grow as a beekeeper.

Need help with an Atlanta area swarm? Visit Found a Swarm? Call a Beekeeper. ‪(404) 482-1848‬

Want to Pin this post?

Showing posts with label cut comb honey. Show all posts

Saturday, April 25, 2015

Three Good Uses for the Queen Excluder

In a tree there is no queen excluder.  Bees in the wild build where they want to and the queen is free to wander in the comb and lay where it suits her.  However, humans are always wanting to bend nature to meet their convenience.  The queen excluder is no exception.

It was developed for the convenience of the beekeeper.  In the time of honey harvest, the queen excluder insured the beekeeper that he/she could remove the top boxes of the hive (honey supers) and be almost guaranteed that the queen would not be removed with the boxes.  I can imagine that for the commercial beekeeper, this is essential for efficiency in the honey harvest.

However, those of us with less hives than a commercial outfit have the luxury of respecting our bees and their process in the hive.  We can employ an unlimited broodnest for the better functioning of our hives and deal with where the brood is come harvest time without needing to simply pull off the top boxes for harvest as the commercial beeks would do.

The beginner kits I bought when I started beekeeping ten years ago each came with a queen excluder so I have two queen excluders. Since I don't want to exclude the queen from the hive boxes, I have found three good uses for the queen excluder and want to share them with those of you who have never used yours.

1. The queen excluder is the perfect drain rack for draining cut comb honey.


The spaces between the wires are small to keep the queen from being able to push her enlarged abdomen through (excluding her).  As a result they are relatively close together compared to a cake cooling rack. On a cake cooling rack, the distance between the wires is much wider and if you put cut comb honey sections on that kind of rack, indentations are made in the honeycomb. If you want your cut comb honey to be show quality and pleasing to the recipient, it should not have wire indentation marks in it, and the queen excluder is your answer to this potential problem!

I can't find the name of the physical principle that defines the above distribution of weight - if anyone knows what it is, please put it in a comment or email me.  A kind anonymous soul has answered in the comments below:  Pressure = Force/Area!  Thanks so much for letting me know and say the appropriate thing here.


2. Once upon a time I thought I had two queens laying in my hive at the same time. There were eggs and brood in the bottom box of the hive and in the third box up, separated by a box of capped honey, there was another box full of eggs and brood. I went on Beemaster Forum and posed the question: Could I possibly have two queens laying in my hive?

The forum members suggested that I put a queen excluder between the two boxes and leave them for a week.  At the end of that time, if there were new eggs in both the top box and the lower box, then I would have a queen laying in both boxes.


I did it and in fact there were two laying queens in the hive.  So the second use of the queen excluder is to prove that there are two queens in a hive.

3.  The third use of the queen excluder is to let the queen excluder make sure you don't take the queen by accident when making a split. 

While there are several ways to do this, I'm going to share the easiest one. The simplest way is to take the frames you want for the split out of the hive and shake or brush every single bee off of them.  You will be taking a couple of frames of brood and eggs so that the new hive can make a queen. Then put the queen excluder on top of the top box in the hive.

On top of the queen excluder, put an empty hive box and fill it with the five frames you have pulled and shaken free of bees. Don't put any other frames in that box. On top of that box put the inner cover and the top cover and leave the hive for the night.

The next day, the brood frames should be covered with nurse bees who have come up to make sure the brood and eggs stay warm enough, and you can move the five frames into their own box with no fear that you have accidentally taken the queen. Simple nuc, simply made.

I'm sure there are other good uses for the queen excluder beside the traditional one of separating the queen from the honey supers. I'd love to hear how you repurpose this device!



Friday, April 12, 2013

Morningside Honey - Gorgeous Bee Work

When I got back from Rabun County this afternoon, I went straight over to Morningside.  I've taken frames of brood and eggs out of that hive, but I haven't really inspected the survivor hive in about a month and I haven't ever opened the split hive up there.  The split was made on March 9.

I started with the split.  The queen, if they successfully created her and she mated successfully, should be laying by now.  She would just barely be laying.  When the bees make a queen from an egg, it takes 16 days for the queen to emerge.  Then she spends four or five days in the hive to reach sexual maturity.  (We're up to March 29 at this point).  Then she may mate over two to four days, making more than one mating flight.  (We're up to April 2).  Then she returns to the hive to begin her forever job as an egg-laying machine.  (April 3).  So she may have been laying for about 9 days at most.

Here is the opened queen cell, so when I got into the bottom box (first), I was pleased.


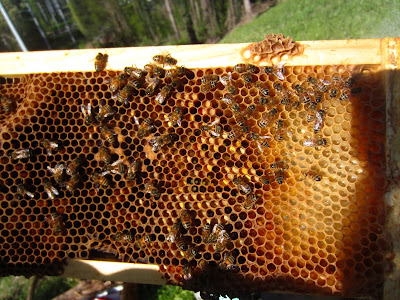
I was pleased to find that she is indeed laying and the bees seem happy.  They have lots of empty drawn comb and have drawn some nice comb.


In the second picture you can see stored pollen and a little capped worker brood.  In every empty cell there is either an egg or larvae.  Really good results of this split.  Since larvae is capped at about 7 days, those capped larvae in the center are probably her first capped brood!


The Morningside survivor hive I first inspected this year on February 24.  I haven't looked deeply into it since then (horrors!).  I have opened it to steal a frame of brood and eggs to help other hives.

Well, it is boiling over with bees.  While I was lighting the smoker (before I put on my veil), I got stung twice in the head by bees blown into my hair from that hive!  I opened the hive planning to add a box but ended up adding two.


The top box was filled with almost fully capped GORGEOUS white comb honey.  I marked the box as a possible cut comb honey harvest with a magic marker.  I brought a box of foundationless frames to give them for more honey.   I put it beneath the white capped honey box because I didn't want the honey to make the queen think the hive was out of room.

I was so overwhelmed that I forgot to take a photo of the white capped honey.


I then went into the next box and both it and the box below it were full of brood.  The queen had nowhere else to lay.  This is a real problem.  So I took another hive box and checkerboarded the brood frames with empty frames in hopes that I can prevent a swarm.  I didn't see swarm cells but I didn't go into the bottom box.  


The photo below was an interesting frame - it was drone brood on either side with worker brood in the center.  I think it must have been a drawn frame that I put in the box to act as a ladder so the queen used the cells by virtue of the size of the cells....the large ones for drones and the small ones for workers!

Perhaps if I have time this weekend, I'll make a split (or two) from this hive and take one of them up to be the second Rabun hive.  I was hoping for a swarm from the school wall hive but today when I walked up there, the school bees that have been there for years were dead and gone.


Tuesday, September 20, 2011

Happy Blues for the Honey Contest

Well, my jarred honey - light and medium - did not place at the honey contest this year. While that honey may not have placed no matter what because there were a lot of great entries, I have to confess that I used all old jars and one should never do that, so next year, it's new jars for me. Much of honey judging has to do with presentation and mine, sad to say, were all in old jars (which show their wear or have smudges from the dishwasher, etc.) , but I got several blue ribbons and one red one.

My chunk honey came in with a blue ribbon. This is the first time I've used these jars that are designed specifically for chunk honey. I loved them and will use them again.


You know the wax block saga and this is pour # 6. I marked the pan that I used for this one, but likely it will not be used again for wax blocks, but rather for bar cookies or some other such cooking use.


And I got a blue ribbon for crafts - this was a quilted bag that I made - all original. I made up the pattern. The bee skep is on a pocket. It has pockets on the inside of the bag (six of them).


I got the idea for these handles from a book and really was pleased with how they turned out as well.


My beekeeping buddy, Noah, won the blue ribbon in cut comb honey and mine came in second with the red.  Mine had lots of problems - wet cappings, some honey on the bottom of the container, but what the judge said was the midline was not straight!  I laughed - it's the bees fault, then!

When you go foundationless, the bees determine where they want the midline rather than the beekeeper who has more control with wax foundation.  So I guess if I keep entering cut comb, I'm going to have to be more selective about my creative bees!

Noah also uses foundationless frames - I think his cut comb came from his top bar hive - and the judge essentially said it was a perfect entry.  I know he's not my kid, but I was so proud of him for getting that blue ribbon as a teenager.

My friend Scotti Bozeman won many ribbons including best in show!  This was only her second honey show.  She's in the center with the two Welsh honey judges, Evelyn and Marcy on either side.


Posted by Picasa

Thursday, June 23, 2011

Preparing Honey and Wax for Competition

Because it is harvest time, many beekeepers are bottling honey and preparing bottles to enter into honey contests.  We are hoping to have record numbers of entries at the MABA honey contest in September.  We have recently rewritten and much improved the honey contest rules for our club.

I gave a talk at the June meeting of the Metro Atlanta Beekeepers on the topic of preparing honey and wax for competition and have uploaded it as a YouTube movie so that if you weren't at the meeting, you can learn about what to do.

It's a video, but if you want to pause it to read a slide better, it's easily done with a click on the pause icon (the two parallel lines) at the lower left..


Monday, October 13, 2008

Honey Judging and Entering Honey Contests

Robert Brewer, Welsh honey judge from Young Harris, Georgia

I know I haven't posted in a while. I had to miss the last Metro Beekeeper's meeting because I was leaving town on the day after the meeting and had to pack and get organized. I'm sorry I missed it - Keith Delaplane spoke on the thermodynamics of bees and I know I would have learned something new.

Sometimes, however, being a grandmother trumps being a beekeeper!

I did go to a talk at GBA by Robert Brewer, well-respected Welsh honey judge, on preparing honey for a show while I was at the GBA meeting a couple of weekends ago. I found my notes, so I want to share them with you.

In preparing honey jars for a show, Robert strongly urged that one always use new containers and new lids. Most people take their honey to the show with plastic wrap between the jarred honey and the lid so that no honey gets on the top of the jar. He suggested carrying new lids with you to the show to put on the jars when you remove the plastic wrap.

The first order of business is the cleanliness of the jars. He suggested that denatured alcohol will remove smudges from the jar. He also suggested polishing your jar with nylon or silk. I saw a number of people entering jars in the GBA show who came with special cloth for polishing the jar.

I used knee-high panty hose, but next year I'm going for silk!

After the judge determines if the jar is clean and without smudges, he or she will look at the fill level. On a queen-line jar, the honey should be just high enough in the jar that there is no air line between the honey and the jar lid when viewed from the side of the jar.

He said that honey is judged on clarity and cleanliness. If you see something in the jar or want to clear bubbles from the top of the honey in the jar, Robert said that a silver spoon will for an unknown reason do this better than a stainless steel spoon (who knew?). The judges take a flashlight and really look at the jar, both to see possible smudges on the jar and to pick up anything floating in the honey, so strain your honey very, very well.

For chunk honey (a cut of honey comb sitting in a jar of liquid honey), the comb should fit the length of the jar. As I've written about earlier, the comb needs to go in the jar the way it is in the hive, right side up. Judges prefer that the comb sit on the bottom of the jar.

Although my chunk honey won a blue ribbon in the state show, the judge (Robert Brewer) wrote that he would have preferred to see the chunk on the bottom of the jar. Since the wax wants to float, the only way to accomplish this wish is to somehow stick the honey comb to the jar bottom. Robert said that some people set the wide-mouthed jar in hot water so that when you put the chunk in the jar it melts slightly to the bottom of the jar and sticks there.

"Cut comb" is the comb in the clear plastic 4 inch square box. Robert said that judges look for clean cuts of the comb, no honey drips in the box, and for dry cappings. Bees can cap honey in two ways: wet cappings and dry cappings. The wet cappings look somewhat transparent as if the honey is touching the wax and sort of soaking into it. Dry cappings look white and lovely and the honey is not apparently touching the wax.

Robert also talked about pouring wax blocks (remember my 18 pours??). He noted that pouring a good wax block is particularly hard to do. Wax is affected by air currents and vibrations in the room. He suggested doing what I have done - pour the block and go to bed, leaving the block in a quiet room to cool. He said that some people put the block in the oven to cool with a piece of glass over it to keep the air currents from affecting the block. Even the air conditioner turning on or the vibrations of the refrigerator can cause wave marks on the top of the wax.

I've always liked the wavy surface when the wax cools. This year is the first year that I've learned that wavy surfaces count off, so I bought a pane of glass and have tried to minimize the waves.

While I knew the importance of even, slow cooling and the importance of avoiding the wavy look from the air currents, he also said that the edges of the wax block needed to be smoothed so that they are not sharp. Mine are always sharp so I am going to try what he said next year during my 18 or 19 pours. He said to take the ball of your thumb and rub it on the sharp edge to round it off.

Wax block pouring for judging is one of the hardest things to accomplish. This year my wax block won a red ribbon in the state show, but with all these helpful hints, maybe I can do even better next year.

I'm hoping to try all of Robert's techniques described in his talk "Preparing Honey and Hive Products for Show." There are other good hints about honey show success on the Metro Atlanta Beekeeping Association web site as well.

Monday, September 15, 2008

The Metro Atlanta Beekeepers' Honey Contest


Tonight was the annual Metro Atlanta Beekeepers Association honey contest and party. The food was great. I took a beehive cake like I'd made for my book club last year. The little jelly bean bees with almond wings turned out better than the previous cake I baked.

I'm so grateful that my daughter Valerie gave me this cake pan - what fun I've had with it!


We had an auction of donated items from a garden hive top and an observation hive to baskets of honey goodies, baked goods, etc. I bought a candle holder, a basket of homemade honey lotions, balms, and other body indulgences, a pair of bee earrings and a necklace, and a bee hand towel.

We did all of this while the honey contest was being judged.

Our honey contest has grown - there were about 60 entries this year. Some of us entered in more than one category, but it is still a phenomenal number. Our Welsh honey judge, Evelyn Williams, declared that next year we need to have more than one judge or more time. I think she worked like a Trojan for several hours.

I am so excited! I won six ribbons - four blue first place ribbons and two red second place ribbons.

The blue ribbons were for:

1. The wax block that I poured in the end 18 times!!!!!
2. My boxed cut comb honey
3. My jarred chunk honey
4. My entry into the black jar contest - the honey is poured into a black jar and is judged purely on the taste and consistency. I wasn't planning to enter the black jar but did at the last minute. So I was particularly pleased about winning that because it was so last minute! My bees make delicious honey and I think it helps not to use an extractor in terms of the richness and thickness of the honey.

The red ribbons were for:

1. My light amber honey
2. My dark amber honey

Now I'll re-pour the wax block for the Georgia Beekeepers' meeting in a couple of weeks and I'll re-clean all of my jars and the cases for the cut comb honey and start all over again!


Posted by Picasa

Thursday, July 17, 2008

Four Ways to Harvest Honey without an Extractor

Last Wednesday I was part of a panel on ways to harvest honey. I talked about harvesting without an extractor. Below is the slideshow of slides I used for my part of this. Each type of harvest has been more extensively talked about on this blog previously and most can be found in the video/slideshow bar on the side.

Here are my slides illustrating four ways to harvest honey without an extractor:


Click on the slideshow to see captions for each picture.

I have detailed slide shows and videos on all of these ways on the sidebar on the right.

Crush and Strain Honey Harvest
Cut Comb Honey
Chunk Honey
Jar to Jar several links: one, two, three

Wednesday, July 09, 2008

Talk at Metro Atlanta Beekeepers' Association

Tonight I was part of a panel called "Everything Honey." Jerry Wallace and I were to talk about harvesting honey. We went together well since he uses an extractor and I do not. I talked about four honey harvest methods: Jar to Jar, Crush and Strain, Chunk Honey and Cut Comb Honey. Jerry talked about extracting and how different honeys come at different times of the year.


I had four slideshows - one on each topic above and I showed my video on Crush and Strain.
I'll try to post the slides in a single group later.
Posted by Picasa

Tuesday, June 17, 2008

Cut comb Lessons Learned from Last Year

Last year I cut comb, drained it, boxed it, froze the honey in the boxes, thawed it and found that honey oozed out around the edges of the comb as it thawed.

This year I cut it; drained it; put the draining rack and honey into the freezer overnight; removed the draining rack and honey from the freezer and thawed them; and THEN boxed it. This year's honey doesn't have liquid honey oozing out the bottom.

Below you can see the difference in 2008 honey on the left and 2007 honey on the right.

Here are six dry packed boxes of cut comb honey. The honey is earlier honey than last year and is lighter. Last year I made cut comb from the dark honey made by my bees in July.

Here's a close-up of the ooze from last year's thaw post the overnight in the freezer.

Here are my last two boxes from 2007 stacked up against the lighter boxed honey from 2008. You can really see the difference.

Beekeeping is all about learning new things every year.
Posted by Picasa

Sunday, June 15, 2008

Today's Honey Harvest with a Special Helper

I've read that if a mouse lives in a beehive (as mice often have the propensity to do over the winter) and if the mouse dies, the bees are likely to encase the mouse in propolis. I have in my own hives found small hive beetles encased in propolis near the edge of the frames.

Imagine the gross surprise when I pull these gorgeous frames of honey from Mellona and there between two frames, the bees have encased a roach egg with wax. It literally was bridging the space between two frames.

I cut out the piece containing the roach egg and ground it up in the garbage disposal! I did crush and strain on the rest of the frame in case there were any hidden eggs of any type elsewhere in the frame.


Some of the honey in this super was so well-capped that it begged to become cut comb honey, so that's what I did with it.

Last year I allowed the cut honey to drain, boxed it and then put the boxes in the freezer. When I thawed the boxes, there was more bleeding of honey in the now-boxed honey. I wanted to prevent the post-freezing honey drain into the packaging. So these squares of honey will be frozen overnight, allowed to thaw and drain into the pan below, and THEN I'll box the cut combs.

My favorite part of the honey harvest today was that I had my enthusiastic grandson to help me with this super. If you're interested you can click on the slideshow below and see all of his and my adventures with the honey.


Posted by Picasa

Second Super Harvested This Season

Collecting honey from the beehives was a challenge because since I unexpectedly have eight (8) hives (!!!!!) I don't have any extra medium boxes.

When I take off a super from a hive, I shake each frame to free it of bees and put the bee-free frame into an empty super to take inside. When the super is filled, I carry in the frames to harvest. Because I have NO empty boxes, I didn't know how I was going to clear out the super from Mellona today. Looking in my bee equipment in the basement, I found this box from a bee order that was just the right size to hold honey-laden frames. It saved the day!


Mellona makes gorgeous honey - this hive produced lovely honey last year and this year is no exception. The frames from this super were perfectly capped frames of honey - what great bees grow up in this hive.

The frame below is sitting on top of a queen excluder because I am about to make cut comb honey with this lovely comb and the queen excluder is the best drain rack there is. The wires are close enough together to avoid causing damage to the comb.


When I cut the honey comb off of the frames I stacked the dripping frames in an extra honey bucket. The small amount of honey that drained off into this bucket will be unfiltered. I don't want to mix it with my beautiful filtered honey so I will save it to be fed back to the bees. The opaque looking sheet is my flexible cutting board from the crush and strain I did today. (Note: less than 8 ounces of honey drained into this bucket and I put it in a small bottle to give to the bees, when needed)

After I had harvested all 10 frames from this super, I put the dripping leftovers into my only empty medium super (the one I took off of Mellona to harvest these). I put the medium box with the dripping frames on the new swarm hive (whoops, need a name for this one!) The bees there will have the advantage of the dripping honey since I am not feeding them and they can use the frames to build new comb and work hard.


I believe I'll call the new hive Hyron² since it is a swarm hive and is exponentially vigorous compared to the original Hyron.
Posted by Picasa

Saturday, July 07, 2007

Making and Boxing Cut Comb Honey

Today I took a super of honey off of my Bermuda hive with the plan to cut comb and box it in plastic boxes. I've never done this before so I didn't make a movie but instead I made a slide show. Maybe I'll make a video of it next year!

I learned a lot doing this harvest method.

1. I had a difficult time cutting the comb and not dripping the frame onto previously cut squares of comb. I finally figured out that to help with this problem, I needed to lay the frame of comb on top of the draining rack. Then cut the squares all out at once before moving the frame.

2. My bees made all of their comb from starter strips this year. Sometimes they didn't make straight lines of cells and my comb isn't as pretty as it might have been. I appreciate their hard work, however. Next year I might look for the straightest lines of cells in choosing frames for this process.

3. I have another hive, Mellona, that produced some gorgeous comb, but I kept waiting for them to fully cap all the frames in the super before harvesting it. It took them so long that when I harvested that super I had to use crush and strain as a harvest method because there were too many travel stains on what had been gorgeous white comb. Next year I may harvest frame by frame for cut comb, rather than wait for the entire super to be ready.

4. On the Internet forums, I was advised to use a serrated knife. I didn't because I have a wonderfully sharp Victorinox knife with a really thin blade that went through the comb like butter. If you try this at home, however, you may want to use a steak knife with a serrated blade. I cut on the inside of the cutter to make sure the squares actually fit into the 4" boxes.

5. I bought these plastic boxes from Brushy Mountain. They snap shut but not really tightly. I think if I do this again, I'll find a different container. When I take these out of the freezer and label them, I'll probably use tape to keep the box securely closed.

The slide show should start automatically. If you want to see the pictures larger, then click on the picture and you should go to my Web Album where you can see the pictures more easily.


From the eight frames that I harvested, I got about 26 pounds of honey product (since comb is included in cut comb and chunk). This brings my harvest this year to approximately 103 pounds of honey from 32 frames or about 3.2 pounds per frame. That isn't a particularly useful statistic since some of the frames were mediums and some shallow.

Note:  (added 2011)  I learned an improved system posted after this was made.  You can read about the changes here.

Pin this post

LinkWithin

Related Posts Plugin for WordPress, Blogger...