Welcome - Explore my Blog

I've been keeping this blog for all of my beekeeping years and I am beginning my 19th year of beekeeping in April 2024. Now there are more than 1300 posts on this blog. Please use the search bar below to search the blog for other posts on a subject in which you are interested. You can also click on the "label" at the end of a post and all posts with that label will show up. At the very bottom of this page is a list of all the labels I've used.

Even if you find one post on the subject, I've posted a lot on basic beekeeping skills like installing bees, harvesting honey, inspecting the hive, etc. so be sure to search for more once you've found a topic of interest to you. And watch the useful videos and slide shows on the sidebar. All of them have captions. Please share posts of interest via Facebook, Pinterest, etc.

I began this blog to chronicle my beekeeping experiences. I have read lots of beekeeping books, but nothing takes the place of either hands-on experience with an experienced beekeeper or good pictures of the process. I want people to have a clearer picture of what to expect in their beekeeping so I post pictures and write about my beekeeping saga here.Master Beekeeper Enjoy with me as I learn and grow as a beekeeper.

Need help with an Atlanta area swarm? Visit Found a Swarm? Call a Beekeeper. ‪(404) 482-1848‬

Want to Pin this post?

Showing posts with label smoker. Show all posts

Monday, April 10, 2017

Hidden Cost of the Forest Fire in Rabun County

Last year in the fall, Georgia was plagued with two forest fires. The Rough Ridge fire was in the Cohutta Wilderness. The Rock Mountain fire in Rabun County where I have bees engulfed over 40,000 acres. The smoke from these fires was so bad that the air in Atlanta over 100 miles south of the fires was smoky.

This is a photo from the US Forest Service:


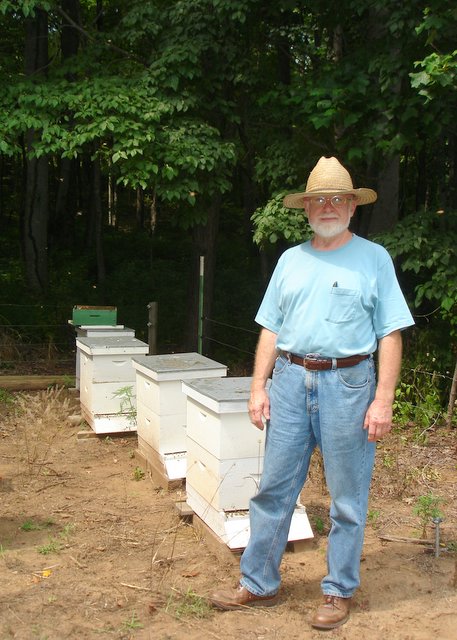
My bee hives in Rabun County are on my friends' mountain property. They live on the edge of the national forest off of Patterson Gap road. As Thanksgiving approached, so did the fire. Photos from their land at night looked like this with the forest fire just over the ridge from their house:


Helicopters came to their land to drop big buckets into their pond to get water to dump on the fire.

When the fire was the closest, here's how it looked through their window at night (these photos were taken by their daughter-in-law):


My beehives were about half a football field's length away from this window in the direction of the fire.

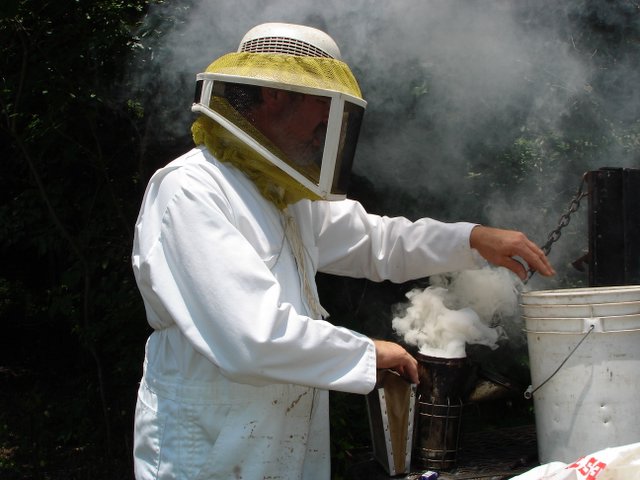
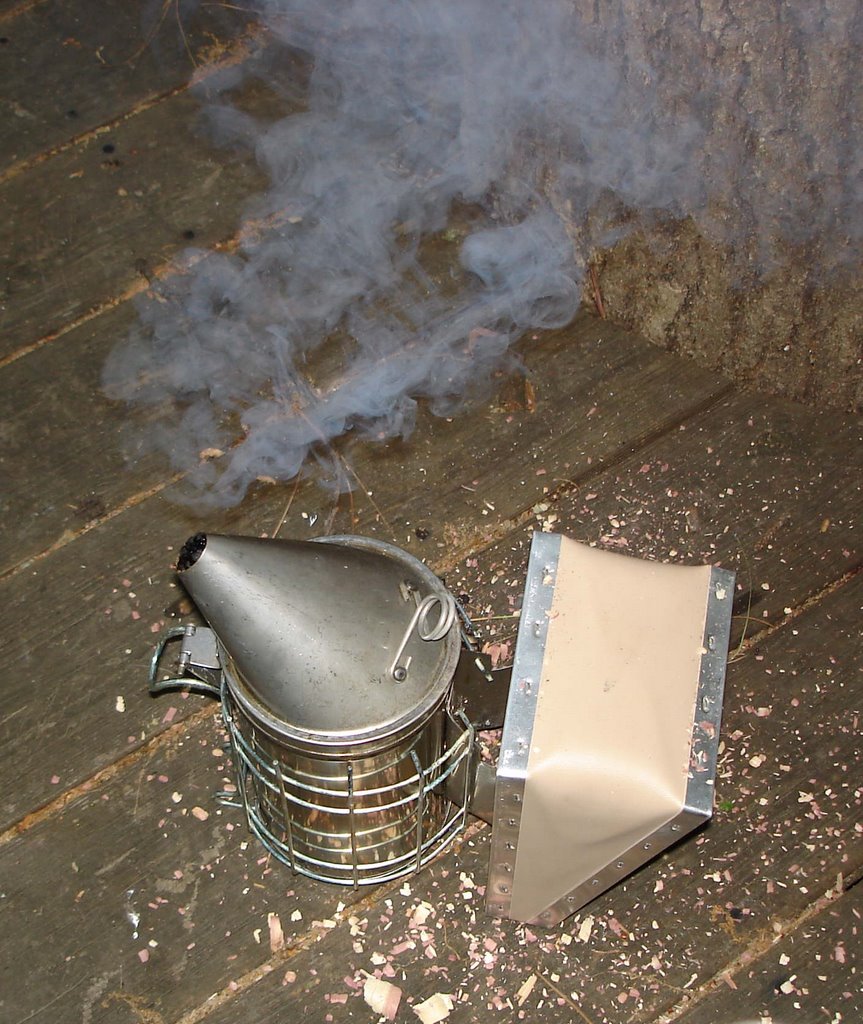
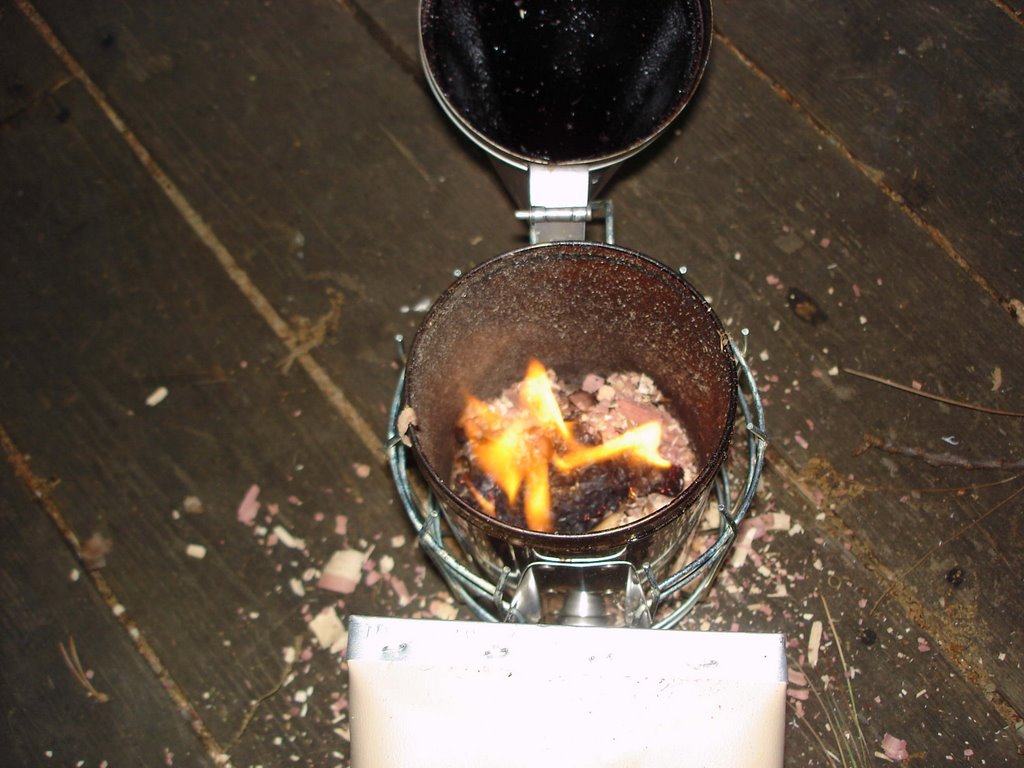
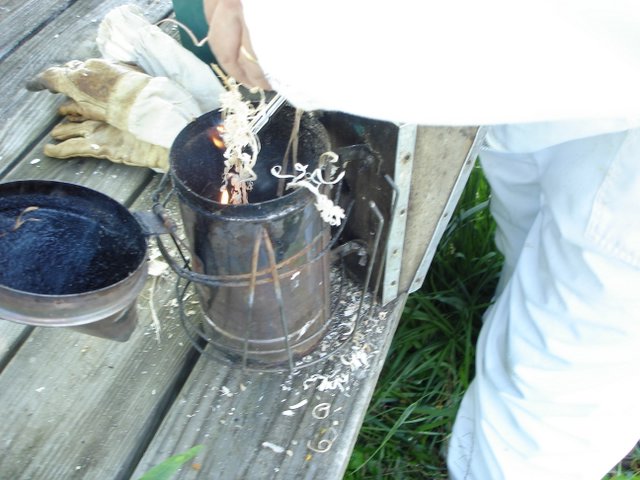
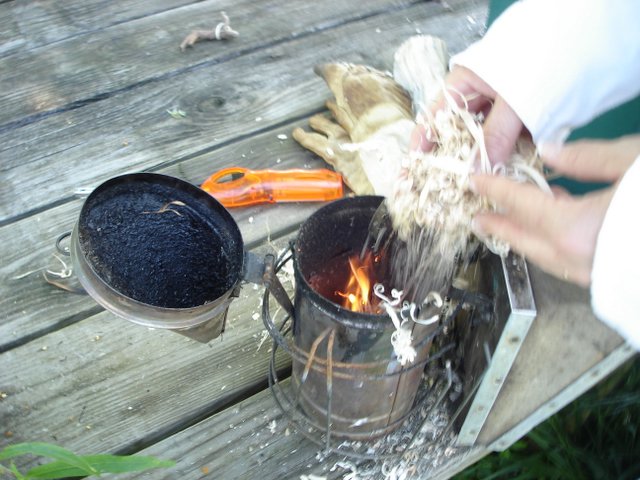
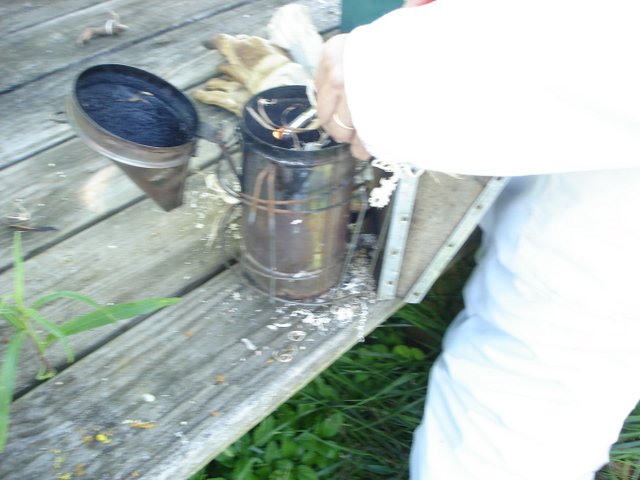
This past week I was up in Rabun County and when I went to check the hive, the bees (as one might imagine) were gone. We smoke bees when we inspect the hives to create the illusion that a fire is nearby, distracting the bees to go in panic and address the question, "What should I take with me if my house is on fire?" For the bees, what they should take is honey. 

Of course bees absconding at the end of November would not survive. And where would they go? The county was thick with smoke and the fire moved through slowly as it made its way up to Gatlinburg.

Engulfed in smoke for days, at some point these bees left. There was not a dead bee anywhere in the hive. I'm sure they took what honey they could, but they left behind full supers of honey. 

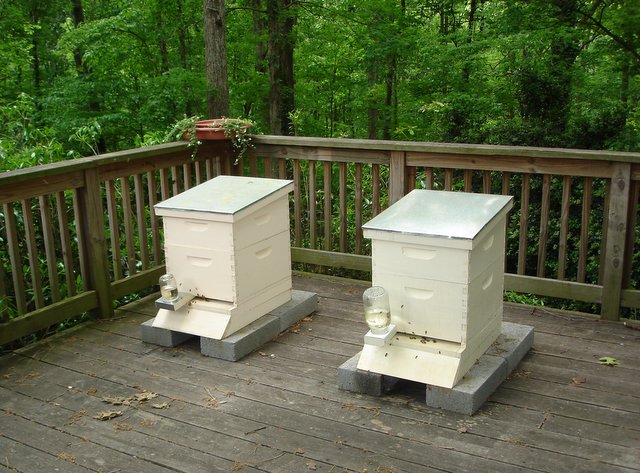
I brought these supers home to harvest and set both Rabun County hives up as swarm hives since swarm season is just starting in north Georgia. I left the hives with two boxes of drawn comb each and smeared swarm lure at the entrance and on the top bars. Maybe I'll get lucky. If not, I'll make a split later this spring to take up there before the sourwood season.


Wednesday, May 28, 2014

A Chastain Quick-Stop

This morning I had to drive to the north part of Atlanta to pick up my tax data from my accountant.  Easy to go by the Chastain hive as I drove back to my office, so I did.  I was in business clothes, no camera, but helpfully, all of my beekeeping equipment was in my car from the mountains this past weekend.

I had an apron to put under my jacket to protect my nice pants.  I lit the smoker, put on my jacket and veil and went up to the hive.

When last I was at Chastain (about a week ago), the hive looked anticipatory.  They were not making a queenless roar, but they definitely did not have a laying queen.  The hive was full of queen cells that had been opened.  The brood cells were not back-filled with nectar but instead were polished and waiting at the ready for the advent of a new queen.

I thought I had read somewhere that it is not unusual for a swarm to requeen once it is settled into its new hive, but I now can't find a reference for that, so I'm not stating that as a fact.  This swarm hive has definitely made that decision.  Clearly the hive had requeened itself and was in no distress except for the fact that I was disturbing their peaceful anticipation.

The top two boxes were all honey - not completely filled.  As a matter of fact, no more honey had been put up than before I left for Memorial Day.

When I got to Box 2 (second from the bottom), there were open brood cells, polished.  So I held the frame with the sun over my shoulder and there they were:  EGGS - tiny new beautiful evidence that these bees have successfully requeened.

I closed the hive back up, took off my bee gear, tried to wipe the campfire smell off of my hands with wipes, and headed back for work.

It was a good day in my bee world.

Wednesday, February 12, 2014

Unlikely Smoker Fuel

At GBA in Columbus, GA, Gina and I ate breakfast with a couple who were attending the bee conference as well.  Naturally we talked bees.  They said that they use old tea bags as smoker fuel.

I drink tea every day.  Usually I have a cup in the morning near breakfast - either during or just after.  Then around mid morning I probably have another one.  If I get sleepy late in the day, I'll have a cup of herb tea at the office....not because it will keep me awake - it doesn't have caffeine - but it will give me something active to do (drink the tea) to keep me from nodding off.

This morning I allowed my used tea bag to dry out and looked at it:


It definitely is quite small.  I imagined how many it would take to fill a smoker and that blows my mind. Even if I collected and dried one or two a day, I think in a month I might have enough to fill the smoker for one inspection.  I'm going to collect them for a while to see.

Now I'm not a big smoker user.  Most of the time I blow a puff of smoke into the entry to tell the bees that I am coming in, but I generally put it down after that and don't pick it up again until I move to the next hive.  Even at that, I go through a smoker full of fuel by the time I've finished looking at all the hives for that day.

I think I'll stick to pine straw.


Monday, January 20, 2014

The Short Course is DONE!

Julia and I worked since last summer getting ready for the short course.  It's amazing how much time it takes to prepare an event like that.  There are many little details, but we covered almost every one.  There were only tiny things that we wish we had done differently.

Here's what the room looked like on Friday, waiting for the registrants to arrive on Saturday.

 These are what we called the pollen baskets.  As people came in, they picked up their name tags and sat down.  Most of the people were from the Metro area, but we had someone with a Colorado address as well as people from outside of the Metro Atlanta area.  There were 105 registrants.  We sold out the week before the short course and had to tell about 30 people that we had no room for them after that.

However, our registration process was pretty clear to people and we didn't have anyone show up on the day of the event wanting to come in at the last minute, which was great because that would not have been fair to the 15 people on the wait list and the total of 30 that I told we didn't have room after registration closed.

The photo below is for the volunteer table.  We had antennae for the volunteers so people would know who was available to answer questions.  At lunch we had an "experienced beekeeper" sit at each lunch table so the participants could ask one on one questions during the lunch. Without some designation, the experts don't look any different than the participants, so we asked them to wear antennae.


The men were generally good sports about it!  Chris was a fabulous volunteer all day long, wearing many virtual hats, and, of course, his antennae.

We had demonstrations of how to light a smoker.  Curt did a great job of showing the participants how it is done.

And we had some breakout sessions on building hive equipment, top bars and foundationless beekeeping, and making hive products.  We were supposed to have a breakout on qualifying for certified naturally grown but the presenter decided she didn't want to talk about the topic - didn't really matter since only a few participants had signed up for it.

Noah's talk on top bar hives and foundationless beekeeping got the highest ratings for the breakout sessions so far in the evaluations we've received.  He is the youngest master beekeeper in the state of Georgia and is a very poised speaker, fielding questions well and doing an overall good job.

Julia and I enjoyed our work together to plan and prepare the course and I heard all day from many people that they were getting a lot out of it, so I am very, very pleased.

Thursday, March 21, 2013

What Not to Do with a Smoker

My life has been really bee-busy lately and at the same time I've been really busy at work.  Also I keep my grandson on Wednesdays and Thursday from 3 - 5 and have my other two grandchildren at my house on Fridays all day.  So I've been going at a run for the last week or two between all of that.

The other day I went to the Morningside Garden to check on the bees.  I lit my smoker to inspect the hive.  I actually put a good bit of pine straw in it out of habit, but only needed to be there a very short time.

When I was done, I stuck a cork in the mouth of the smoker and threw it into the back end of my Subaru.  I ran home to do work there and didn't take any bee equipment out of the car.

Two hours later I went to my car to go back to my office.  I got in the car and was shocked that the car was all foggy on the inside.  At first I wondered what was going on because it wasn't foggy OUTSIDE the car.  Then my nose woke up and I realized the car was completely filled with smoke.  The cork had been knocked out of the smoker on the less than a mile ride home from the garden and it had been puffing along inside the car for TWO HOURS.  I could have won a smoker lighting contest with this smoker.

Now when I want the smoker to stay lit, it goes out every five minutes, but when it would have been perfectly lovely had it cooperated in that way, on this particular day, it stayed lit for over two hours.

Ten days later and my car still smells like a forest fire.  Every time I leave the car in my business clothes to go into my office, I think the people who come to talk to me are going to think I've been on a Girl Scout campout because I'm sure the smell comes into the office with me.

Today I took my car to a car wash where they do the wash by hand and are pretty meticulous with the inside.  The car still smells of smoke, but not as badly as before.

I am lucky - the smoker was right over the gas tank and at least the car did not catch on fire!

Note to all:  Do not leave a smoldering smoker in your car.  Worse things can happen than that your car fills with smoke, and that is certainly bad enough!

Monday, March 19, 2012

It's March and Colony Square is Bursting at the Seams

Today I gave a talk at the Riverside West Garden Club in Sandy Springs (part of Atlanta).  I reviewed the talk last night and packed the car this morning.  Yesterday I volunteered at the Publix Marathon in Atlanta (5:30 AM - 1 PM); worked the bees with Jeff in the afternoon; and went to a bee course planning meeting over dinner.

I wasn't functioning on all cylinders this morning.

I put my computer in the car, the LCD projector, some honey and crackers for them to taste, a box to take to Colony Square after the talk, and my bee gear.  I drove 25 minutes to the meeting site, set up all my equipment (computer and slide projector) and then discovered that I had left my flash drive back at home with the whole talk on it in Power Point.

Luckily I had another talk actually saved on the computer that covered the topics, but didn't have the lovely bees on flowers pictures that I always take to garden clubs.   Despite all of that,  I think the talk went OK.  Then I drove to Jeff's to add a box to Colony Square.

We've made two splits from Colony Square and it is still bursting at the seams.  I got fully suited and lit my smoker and opened the hive.  This hive is so angry all the time.  Bees head butted me throughout the small intrusion.  I decided I should name the two splits from this hive (also angry bees even in their new location at my house) Spawn of Satan One and Spawn of Satan Two (SOS1 and SOS2).

All I did to them today was remove the top box (about 50 pounds full of honey) and add another box under it.  I took two frames of comb from Box #3 and put them in Box #4 in the center.  I put foundationless frames in their place in Box # 3 (see below).

With the addition of the box below the top box and with the two ladder frames in the center of the hive, the bees are supposed to build comb more easily.  In a hollow tree, for example, the bees start at the top and build down.  So putting the box below is a more natural way for the bees to build their comb.


Bees were so in my face that all the photos I took were like the one below with a bee obscuring your view as she flew toward my veil in front of the camera!


In the end I left Colony Square with FIVE boxes - it's only March - and met Julia at the Blue Heron (see next post).  If things continue to go well, this hive will produce a record amount of honey.  It was so difficult to lift that fifty pound box by myself into the top position.  The second they have capped that honey, we are harvesting it.


Jeff showed me a unique way to stop the air flow to the smoker and I employed it today.  We'll call it Jeff's acorn method:


Posted by Picasa

Thursday, July 22, 2010

Mixed News from the Top Bar Hive

I had an early afternoon today at the office so I left and drove to Valerie's house to check out the top bar hive. The hive was full of bees, no small hive beetles at all in the hive and the bees looked healthy and enthusiastic. I didn't use smoke and could have worked without gloves - next time I will. These are very calm bees.


The mixed news is that the hive was full of bees, eggs, young brood and capped brood but no honey. It didn't look as if it had been robbed or anything - just that they had no stores. Valerie and Jeff's yard backs up to a huge mess of kudzu in their neighbor's back yard. The kudzu is about to burst into bloom and is a great nectar source. I decided to wait until next weekend to decide if I should feed them or not.

The hive occupied ten bars of the top bar hive. They had done a strange thing. They had built comb in the bottom of the hive - on top of the screened bottom. I thought maybe they had stored honey there, but the photo below of the comb lying in the bottom of the hive is full of empty cells. I did see lots of pollen.


Below is one of the prettier brood combs. These are small cell bees from Don K in Lula and you can see the smaller cells they build for brood in this photo.


Posted by Picasa

Tuesday, June 30, 2009

Blue Heron Inspection June 28

On Sunday we held a Blue Heron inspection of our three hives there. There were several goals for the inspection.

1. Julia wanted to taste the honey from her hive, so we planned to take a couple of frames off of it. This gave us an opportunity to show how to remove a frame from the hives without using chemicals or anything very violent - like a blower - to get the bees off of the frame.

2. We wanted to use hive #2 to look into the hive to see the development of the hive. This meant we planned to look for eggs, larvae, the queen, the state of the hive.

3. Hive #3 looks from the outside like it is not thriving and we wanted to understand why. In addition, Jerry Freeman sent me a new small hive beetle trap. Since this is a weak looking hive, it is subject to being damaged by the small hive beetle. I planned to take this hive apart and replace the current screened bottom board with the Freeman beetle trap.

It was about 100 degrees in the field at Blue Heron and we all sweated our way through the inspection.

I did not light the smoker for the first hive because we were taking off honey frames. The smoker sends a smoke smell into the hive which the bees can clean up over time, but if you are taking off honey frames, they will have a smoke smell if you use the smoker, so I never use a smoker when I am robbing the hive.

After removing the frames of honey from Julia's hive, I then lit the smoker, puffed at the door of the second hive, set the smoker down, and completely forgot about it. I never used it again. When I opened the third hive, one of the guests reminded me that I hadn't used it.

In spite of using no smoke, we had a very peaceful inspection of three hives. I explained to everyone that I rarely use smoke and the bees do just fine. As long as you move slowly and take some care with what you do, why should you need to smoke them?

With these goals in mind, please enjoy the slide show with pictures thanks to Julia. Click on the slideshow to see the pictures full sized and with captions.


So did we meet the goals of the inspection?

1. We removed two frames of honey for Julia

2. We saw eggs and tiny larvae in the second hive and saw great brood patterns, confirming the thriving nature of that hive

3. We determined that hive #3 is probably on its third queen and she has barely started laying. We did see very young (tiny C-shaped larvae) proving the existence of a functioning queen. She probably broke out of the queen cell, went on her mating flight, and has just gotten started. However, we'll keep an eye on this hive for the possible need for queen resources or extra frames of bees before the end of July.

4. We installed the SBB for the Freeman trap but didn't put the tray in or arm it with oil. We only saw one hive beetle and it's too hot to deprive the bees of the ventilation from the SBB.

Note to self: Buy ventilated inner covers for all of my hives. Julia's hive looked so cool and comfy.

This inspection is the last one Julia and I will be doing at Blue Heron for the Metro club this year. We've had a great time and I hope you've enjoyed our slide shows.

Monday, March 30, 2009

First Semi-Inspection at Blue Heron

We're having a strange March in Atlanta - or really a typical March. March is always both lion and lamb in Georgia. We had thunderstorms and fierce rain for three days running at the end of the week.

I woke up on Saturday, the date of our scheduled inspection for the Metro club, expecting sunny weather in the high 50s. But no, that was not to be. Instead the skies remained overcast all day long and the temperature was only 46 by 11 AM. The inspection was scheduled for 1:30. We had four people eagerly signed up and we were as prepared as we could be.

We decided to meet our participants at Blue Heron and see if the bees were flying at 1:30 when the temperature was supposed to be up. When Julia and I arrived, it was 48 and very cloudy....grim weather and not conducive to inspecting bee hives. Julia brought her two sons: Sam and Noah, both of whom had helped install the hives at Blue Heron.

We decided to do a truncated "inspection." I had brought a new super for the nuc we installed last weekend and we knew it would be needed by that hive and we had a handout for the participants on how to do an inspection, derived from this blog post. We also thought we could demonstrate lighting a smoker, how to use the hive tool, and how to slide a hive box onto a hive.

Here's a slideshow of our "inspection" visit to Blue Heron. Click on the slideshow to see the captions and choose the length for each picture to remain visible to you.


We talked about Housel positioning and each participant was able to see the "Y" in the back of the honey cells - that's why we are looking so carefully at the old comb.

Because of the bad weather, we are rescheduling the inspection to happen at 10:30 AM on Saturday, April 4 at Blue Heron. In Atlanta's inimitable way, let's hope it doesn't snow!

Tuesday, March 03, 2009

Newbie Questions at the Beginning of Bee Season

Here at the beginning of bee season, there are many questions that the first year beekeeper asks. I have posted a lot about my challenges and what I have learned. Here are some of the links to posts that may be helpful if you are just getting started:

The basics: What you need to get started in beekeeping
How to build a hive box
How to build a frame
How to install a nuc (a four or five frame mini hive of bees)
How to light a smoker (as if I really can!)
How to do a hive inspection (and why?)

If you get through all of that, there are numerous posts on harvesting honey to produce clear honey, chunk honey and cut comb honey as well as posts on how to melt wax with a simple, cheap solar wax melter - just look on the right side of the blog under videos and slideshows.

Also be sure to search using the Google search bar on this blog for any questions you have and after 500 something posts, I imagine you'll find that I've probably been challenged by the same question at some point!

Sunday, May 11, 2008

Hives at Blue Heron Nature Preserve

My new beekeeping buddy, Wade, has a new hive at the Blue Heron Nature Preserve. This is a community garden. People rent plots and grow organically at Blue Heron. There are three beehives located at the preserve. Several beekeeping friends have asked or emailed me to find out if I know who they belong to. It's such a great idea to put hives at the site of an organic community garden - so we are all curious.

Lucky me, one of the beekeepers there emailed me to comment on my blog. Mystery solved!

He was concerned about his hive and the performance (or lack thereof) of his queen. I offered to come for an inspection with him and he took me up on it. Wade (who has an injured foot and is clomping around the trail in spite of it) is one of the best smoker lighters I have ever met. He alluded to Boy Scouts, and I imagine this experience serves him better as a smoker-lighter than it did me to be a Girl Scout!


Wade had seen the queen in his nuc when he installed it, but when we opened the hive, there was no sign of a laying queen - no young brood, no eggs, lots of empty cells. The only brood in the hive was old, emerging now from being laid about three weeks ago. We did find opened queen cells. One of the queen cells was appropriately opened (see yellow circle in the picture below - you may have to click on the picture to enlarge it for better viewing). Wade is pretty sure this cell was not open the last time he inspected.

In addition to that opened cell, we also found two other intact, closed queen cells.

We decided that probably his hive had requeened itself and the virgin queen had not started laying yet. If this is the case and there is, in fact a queen, she may not lay for three weeks. If Wade had had another hive, we might have taken a frame of brood and eggs from it, but the other two hives belong to other people and were started at the same time as his.


We closed the hive up. You'll notice the hive box sitting on top of the inner cover. Wade is doing this as a way of storing the hive box until the bees need it.


We opened his friend Kent's hive and found beautiful brood patterns throughout the hive. Perhaps when he and Kent are back at the preserve at the same time, they can move a frame of Kent's into Wade's hive. A frame of brood and eggs would allow Wade to give his bees the opportunity to make a new queen in the event that they are queenless.

Posted by Picasa

Monday, April 14, 2008

What's Involved in a Hive Inspection


This weekend if the weather cooperates I'll make a video of an inspection - I'm no master of inspections, but I'll show you what I do when I do one. Meanwhile, there is a slideshow that I made last year when I went on a hive inspection of the beehives at the Atlanta Botanical Garden. Here's the link.

I spend a lot of time observing my hives from the outside. I watch them when I am at home for meal times and sometimes I just sit on my sunporch and watch their comings and goings.

However, this post is about inspecting the inside of the hive.

It's important to know why you are inspecting the hive. There could be many reasons.
  • As a beginning beekeeper, inspecting the hive is the only way to know what goes on in there in the dark since the bees don't have windows!
    • You can learn to tell the difference between the drones and the workers
    • You may see the queen
    • You can observe the difference in capped brood, capped drone brood, and capped honey
    • You can observe what a queen cell looks like (even a hive that has a good queen and/or isn't going to swarm usually makes a queen cell or two for insurance)
    • You may see where the queen is laying by looking for larvae and eggs (hard to see)
    • You may see an emerging bee in the capped worker brood
  • It's also important to look for signs of problems in the hive
    • Is the queen's laying pattern a good one? That means that the capped brood is in more or less a football shape in the center of the frame. The brood is pretty solidly capped - not many skipped cells or empty cells
    • Do the workers show signs of illness? Deformed wing virus is easy to see - the wings of the workers are shriveled or malformed. You might even see a varroa mite on the back of a bee - it looks like a red tick (as in on a dog)
    • Do you have small hive beetles? If so, you might want to invest in a trap - vinegar or oil. And I smash as many as I can with my hive tool.
    • Do you have a wax moth problem? This usually only occurs if the hive is very weak. The wax moth is always present, but a strong hive keeps the wax moth from growing there. A weak hive doesn't have the resources and the hive can be overrun with wax moths.
    • Does the hive smell funny? Wax moths and SHB make a sicky sweet rotting kind of smell - otherwise the hive will simply smell of delicious honey
  • Do you need to do something to help the hive prosper?

    • Does the hive need a new hive box added? The general rule of thumb is if the hive has built out and used 80% of the top box, it's time to add a new box (that means 8 out of 10 frames in a 10 frame box).
    • If there's lots of burr comb on the tops of the frames, you may want to scrape that off. You'll see Gerard do that in the Botanical Garden hive inspection. It's not necessary, but you may want to make the hive easier for you to manipulate
    • Is the hive honey-bound? This means that above the brood box in the next brood box, instead of brood, you have a solid box of honey. Usually, at least here in the south, the bees have brood in two boxes. If the brood is stopped by a wall of stored honey, the queen usually won't pass by the honey to lay in the box above that, so you'll want to move the honey filled super and put a new brood box below it.

  • What does the hive sound like?

    • When I first open the hive and pop the top cover, I listen for the bees. If I am quiet and gentle in my movements and the hive is doing well, usually there is a humming buzz, but nothing more.
    • If there is a problem before I do anything, the hive buzzes with a roar. Sometimes the roar means there is no queen, so I want to pay attention to that
    • When I do something intrusive like a powdered sugar shake, the bees roar and grumble - I would too - who wants to have a powdered sugar shower on a perfectly lovely day for foraging?
Those are the purposes and thoughts I have for inspecting. Here are some other aspects of the hive inspection that I try to follow:
  1. I use as little smoke as possible. I always light the smoker in case I feel a need to discourage the bees from bothering me, but mostly I light the smoker and set it aside while I work. I do puff one puff of smoke at the front door of the hive when I begin the inspection - it's like knocking on the door to announce my presence. Then mostly I forget about it.
  2. Always approach the hive from the side or the back. It is disturbing to the bees to walk straight up to the front of the hive - the guard bees will greet you and you will get started on the wrong foot with the bees.
  3. Move slowly and gently. You will kill a few bees, but remember that there are up to 60,000 bees in an active hive and it's impossible to do an inspection without killing a few.
  4. Be careful in lifting the frames out of the box. I usually take out frame #2 or #3 and hang it on a frame rack while I move the other frames in the box. I don't want to risk losing the queen so for the most part I hold the frame over the box to look at it (then if she's on the frame and falls, she falls into the hive.)
  5. Don't assume that you can just grab the frame and lift it up. Most of the time the frames are propolized to the side of the box and need you to break the grip with your hive tool before lifting the frame.
  6. You only need to go through enough boxes on the hive to satisfy your reason for inspecting. For example, if you are looking to see if the queen has a good laying pattern, as soon as you find a frame that represents the good laying pattern, you can stop your inspection. You don't need to look at every frame or in every box on the hive.
  7. Always put the frames back in the box in the same orientation in which they were when you lifted them out. Unless you have a reason to manipulate the frames, put the frame back exactly where you found it. It's the bees' home and they have it arranged just the way they want it.
  8. When you replace the boxes back on top of one another, slide them onto the box below so that the bees can be gently pushed out of the way rather than squashed
Everyone has their own tragic stories - I've dropped frames, dropped the inner cover on top of the bees below, squashed bees, killed bees with my hive tool, killed a bee when I was trying to smash a small hive beetle, brushed bees badly, etc.

You'll have yours too - it's just part of bee-ing a beekeeper.

OK, those are all of my thoughts for the moment. I'm sure I'll think of more about inspecting, but I'll save it for the video if I do it this weekend.

Useful link: Mother Earth

Friday, March 21, 2008

Some more Random Smoker Thoughts


Here is a picture (above) of the smoker being lit with the wax impregnated paper towel from the solar wax melter. I keep those paper towels in a ziploc bag and tear off pieces to help light the smoker.

Here's how the smoker looks when it is operating properly. Note there's plenty of smoke coming out.

Fire is a consideration when you are finished using the smoker. I hang mine in an aluminum bucket. The smoker has a bent metal hook on the front side. I then stop up the smoke opening with a wine cork. This deprives the fire of oxygen and it soon goes out. There remain unburnt pieces of pine straw or whatever fuel I was using to help start the fire the next time. In Scouts we always learned that it was easier to start a fire with wood from the night before that had already burned some rather than starting from scratch. The smoker works that way as well.

This is the most unique job my smoker has ever had to do - be the centerpiece for a flower arrangement for the Short Course in January!
Posted by Picasa

Wednesday, March 19, 2008

How to Light a Smoker

The smoker is a metal, spouted container with a hinged lid and a bellows attached. We build a small fire in the smoker with the plan to create a cool smoke that will cause the bees to react by gorging themselves with honey. Beekeepers say that the bees think there's a forest fire and go to ingest the honey to remove it from the hive.

I don't like to smoke the bees. They are upset by smoking and they take a while to recover from the smoke. In addition the smoke affects the honey in the hive. I do always light the smoker when I am going to inspect the hives. You never know when a hive will be cantankerous -- upset by the weather, the loss of the queen, your bad timing, whatever. I want to be prepared to distract them if I am liable to be stung unreasonably.

There are so many hard parts in lighting a smoker. This is the beginning of my third year in beekeeping and I still find it difficult. When I went to the Young Harris Beekeeping Institute last spring, I found the first part of lighting the smoker (lighting the lighter to light the smoker) to be the hardest part!

I can't light a cigarette lighter - my thumb just rolls on the mechanism and nothing happens. I'm not fast enough. The solution for me has been the hand held propane lighter. It's simple to use and easy to light.


There are lots of fuels used to light the smoker. The fuel needs to be one that will release a cool smoke. Most people in Georgia use wads of pine needles. Others use burlap cut into strips and rolled up. Leaves provide smoker fuel. Some of the bee catalog companies sell fuel for the smokers. Sometimes it is pressed cotton , sometimes it is wood pellets, sometimes baling twine.

The goal is not only to light the smoker but to keep it lit. A friend of mine uses cedar chips for hamsters. I find cedar hard to keep lit, but she swears by it. Virginia Webb (a well-known Georgia beekeeper) uses wood chips and puts some in the bottom, lights them and keeps feeding the chips. Bob Binnie (president of the GA beekeepers Association) uses Dadant pellets. Bob starts his smoker with a wadded up paper towel and then feeds in the pellets.

A by-product of using the solar wax melter is the wax impregnated paper towel filter through which the melted wax drips into the collection container. I keep the paper towel filter infused with melted wax residue on hand to be a smoker fire starter, more powerful than the plain paper towel that Bob uses.


Once you've lit the smoker, the main challenge is to keep it lit. To do so, one must remember to pump the bellows every once in a while to keep the fire burning or at least smoldering and providing smoke going up the chimney to use on the bees as needed. I said "one must" because I always forget about the smoker - I rarely use it and it often goes out before I am finished with my inspection.

There are some pictures from some earlier posts on learning to light the smoker here and here.
Posted by Picasa

Wednesday, January 30, 2008

Questions that were on my Mind as a First Year Beekeeper

As the beginning of my third year in beekeeping approaches (I started on Easter Sunday, 2006), I have been thinking about the questions I wish someone had answered for me as I got started.

One of my recent assignments was to give a presentation at the Short Course on "Bee-ing a Beekeeper" which was about my experiences and the stories of a panel of several others. I focused on the fun(ny) parts of Bee-ing a Beekeeper. I've thought about posting the PowerPoint presentation I did and then thought it wouldn't be the same without the stories to go with the pictures, but I may post it anyway.

In thinking about what I might address if I were asked again to talk about first year experiences, I generated (in no particular order) the questions that were on the top of my mind when I got started. They are:
  • How hard is it to put together a hive box?
  • What do you use to light a smoker?
  • How do you put the bees in the hive and what are the scary parts?
  • How do you deal with your neighbors?
  • What is it like to be stung the first time?
  • How much is the initial investment and do you have to have an extractor?
  • Will you have enough wax the first year to make candles?
  • What's the purpose of a hive inspection and how hard is it to do one?
  • What are the most confusing parts of the first year of beekeeping?
I think I'll post on these questions over the next few weeks as many people begin their beekeeping experience for the first time. I've recently addressed how to build a hive box and how to deal with your neighbors. Stay tuned for posts on the rest of these questions.

Wednesday, June 20, 2007

The Solar Wax Melter Succeeds Again!

Today I left wax all day long in the solar wax melter and brought it in after sunset. The wax had drained all the way through the paper towel, leaving this burned non-wax residue. Isn't it amazing that the residue burns dark brown/black in the heat of the SWM? The paper towel is stiff with wax, making me wonder if it wouldn't be a marvelous starter for my smoker. I'm going to save it and try it.

Here's the gorgeous block of wax, the shape of the rectangular container, that was floating on the water under the paper towel. Have you ever seen such beautiful wax?

I love this solar wax melter. It's a "green" way of melting wax. My kitchen isn't messy and my double boiler isn't ruined. Now that's a good deal all the way around.


Posted by Picasa

Wednesday, July 05, 2006

Beekeeping in North Carolina


I'm in North Georgia for the July 4th week. While here I went to visit my new friend Ed to see his bees. Ed has four beehives in North Carolina just over the Georgia line. His hives are in a beeyard protected from bears by an electric fence with a solar powered battery. He shares his beeyard with about 30 hives belonging to Bob Binnie, a well-known N Georgia beekeeper from Lakemont, Georgia.

Bob unexpectedly arrived at Ed's house just before I did so I was lucky to get a free lesson about bees from someone who really knows his bees. Bob is one of the speakers at EAS(Eastern Apiculture Society) in Young Harris, Georgia in August this year. His topic is "Breaking in to New Markets." Bob sells his honey all over this area.

Ed and Bob wait until the sourwood is in bloom to put honey supers on their hives. I wondered why the bees didn't swarm if they had to wait this long before getting space to expand. Bob (in my wonderful private bee lesson) explained that the hives at Ed's place were mostly new splits, started in May, so in fact were just now at production strength.

I have to confess that I have never seen the queen in either of my hives or in any hive. Bob showed me the queen in one of the hives and I was thrilled to see her. He also showed me a queen cell and many examples from Ed's hives of great brood patterns.

I also learned from Bob how he lights his smoker. Everyone seems to have a different trick. Bob's (and as a result Ed does this too) is to use a paper towel. He fills the smoker with thick twine and a paper towel and then lights the towel. Unlike mine, which I can spend a minimum of 15 minutes trying to light, his went up in thick smoke right away. He keeps it running with pellets he gets from Dadant.

So for smokers so far:
--Virginia Webb uses wood chips and puts some in the bottom, lights them and keeps feeding the chips.
--My friend and mentor, Nickie, in Atlanta uses hamster cedar chips and pine needles
--Bob Binnie and Ed use paper towels to start the action and then feed Dadant pellets
--I, who take forever to get mine lit, use dryer lint, cedar chips and anything I can find that will burn......hmmm, I think it will be paper towels for me going forward!

It was certainly a privilege to see Bob in action. I asked him about his hives in the Rabun Gap area where my house is and it happens that he supplies the observation hive bees at Osage produce market where I buy local produce daily when I am up here. His hives line the highway beside Osage as well. After my afternoon at Ed's, I went back to Osage and found the queen in Bob's observation hive there!

When I was a little girl, we had a housekeeper who would also say, "We live and learn and dies and forgets it all." Goodness, I hope I remember all I observed while watching Bob.
Posted by Picasa

Tuesday, May 09, 2006

Bee Status Report


I donned my beesuit and lit the smoker! I used dryer lint to get it started and pine needles to keep it going - Hooray!

I checked on both hives and they look great. Bermuda has gotten a new shot of adrenalin and is growing rapidly - still a couple of frames behind Destin. Both are working well in the medium that I added last week.

These two layers - the hive body and the medium super are for the bees. This weekend or even maybe on Friday I'll add a honey super that may actually be for me.

I went to the Metro Beekeepers
meeting tonight. In Atlanta we have one of the oldest ongoing beekeepers' associations in the country. It's a great place to get help with beginner questions. Cindy Bee (that's really her name) who is famous in Atlanta for rescuing swarms of bees was there. She knows so much about it. I loved hearing her talk about her bees.

I'm learning more every day and from every contact with other beekeepers.

Monday, May 08, 2006

How to light a smoker and other things I learned at the Folk School

I learned many things at the Folk School workshop.

1. How to light a smoker

Virginia used wood shavings. She lit a few at the bottom of the smoker and then built the fire up from there. I am lousy at lighting the smoker, but I think I have been packing it too full before starting it. She dumps it all out when she's through and starts over each time. I have left the unburned fuel in mine after using and just stopped it up to end the fire.


These are a little out of focus because I was taking them while wearing my bee suit and veil and it was awkward to take pictures.


2. How to use a honey extractor.

We took the extractor apart to clean it and then didn't know how to get it together. It took five of us working together before Charles, a class member, finally got it right! That's probably the beginning of a good beekeeper joke - how many beekeepers does it take to put together an extractor? (someone will have to supply the funny answer) For us, it would be one: Charles, but it took five of us klutzing around before we found the answer.


3. How to melt and use beeswax.

Virginia's secret was to pour the wax through the control top part of (unused of course) control top panty hose to filter out any extra stuff from the comb and frames that might accidentally be in the wax. She poured into a 1 liter plastic bottle which is just the right thickness to handle the heat of the hot wax.

4. How to use the hive tool.

I've been using the curved end. Virginia almost exclusively uses the straight end and this allows less of what I end up doing - breaking into comb and causing drips of honey and damage to the comb. Posted by Picasa

Sunday, April 30, 2006

Added Medium super to Bermuda and Destin

April 28, 2006: Built and painted medium supers. Built foundation frames for one of them (Destin) Will install tomorrow. Better build shallow supers before I leave for the Folk School – they may need them sooner than later.

April 29, 2006: Took FOREVER to light smoker – must get cedar chips. Thought dryer lint might work as well. We used to use that at Girl Scouts.

When I lit smoker and opened Destin, they had built comb above the inner cover. Also saw 3 small hive beetles – or some kind of beetle on the inner cover. Brushed them off but couldn’t find them to kill them. Destin has drawn out the comb on 8 of the 10 combs and is starting on the outer edge – perfect candidate for the new medium. I put it on with great relief.

I looked at Bermuda but it isn’t built out as much – about 6 frames are fully drawn. They haven’t touched 1 or 10 but have begun expanding wax on 8 and 2. I still think I’ll go ahead and add the super just for consistency and because I’ll be at the Folk School for a beekeeper class next weekend and won’t be able to work with the bees.

Early afternoon built frames for the super on Bermuda.

Waited until the end of the day to put on the super. Much easier to light the smoker this afternoon. Must get some chips. They are still busy bees in Bermuda but not as crowded or vigorous as Destin. Posted by Picasa

Pin this post

LinkWithin

Related Posts Plugin for WordPress, Blogger...