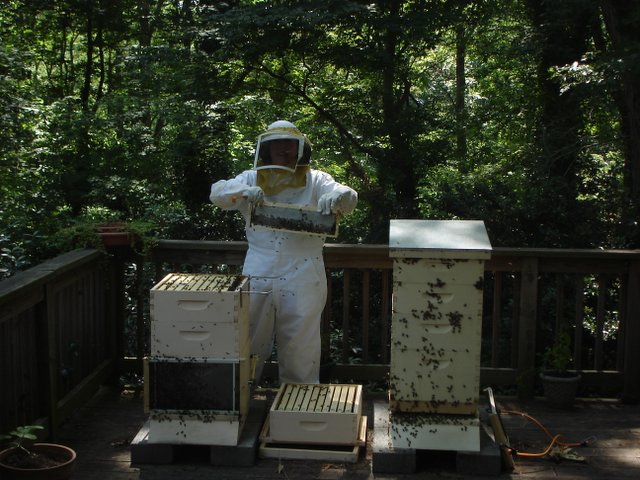
My brother Barry wants to be a beekeeper and I promised him a list of the basics he would need. I decided to post it here for any of you who are curious to get started.
Here's the list - then you'll find descriptions of my thoughts behind it. This is my list and how I would do it if I were starting this year. There are all kinds of points of view and mine is not the only one. I am particularly biased about some beekeeping issues, as you who follow this blog already know!
Basics:
Good beekeeping book
Protective clothing: A bee suit (or long sleeved shirt, pants) and gloves
Hive equipment:
10 medium 8 frame hive boxes
80 frames to fit the medium boxes
Sheets of wax foundation for the frames
2 Telescoping covers for 8 frame equipment
2 inner covers or 2 ventilated inner covers for 8 frame equipment
2 screened bottom boards for 8 frame equipment
2 slatted racks for 8 frame equpiment
A smoker and something to use to light it (lighter, matches, whatever)
A hive tool (preferably 2 - they're cheap)
That will get you started. The descriptive list below includes some description and explanation as well as some extras to add to the basic list above.
************************************************************
The basics for the beekeeper (the elaborated list):
A good beekeeping book for beginners:
Here are some suggestions:
Protective Clothing:
A Bee suit – if not a bee suit plan to wear long pants, long sleeved shirt and a bee veil
Bee suit thoughts: It's hot inside a bee suit. You need one that you can stand to wear in the heat. The head gear is often a problem for me. My original suit is from Dadant and comes with a hard hat and veil. The hard hat is regulated by a head band that I hate because it never fits right and slips down over my eyes all the time.
The ventilated suit from Golden Bee (504-456-8805) is great in hot southern weather. I don't like the veil particularly – it relies on a headband to keep it centered and that doesn't work well for me, but the suit is cool (all ventilated material) and I can manage the head part. Also the mesh of the veil is painted white which is great for bees not bothering you but hard for someone else to see your face inside the suit. (Matters to me because I wear it for teaching inspections).
A similar suit is made by UltraBreeze although their website says that at the moment they are not taking orders.
I love a hooded jacket that I have from Mann Lake that is great to throw on for a quick visit to the hives or to use when I'm not doing a full on inspection.
Gloves - Many beekeepers work without gloves, but I don't like being stung on my hands – it's inconvenient.
Gloves present their own problems. Most beekeeping gloves are big, making it awkward to grasp things in the hive well. When you order gloves, talk to the company from whom you are ordering to understand how their gloves are sized. If I am using leather gloves, I like the ones I FINALLY got from Dadant that are XXS and do fit.
However, I take pictures all the time I am in the hives and now prefer nitrile gloves because they allow me more dexterity. I have been stung through them (they are used by surgeons and are not supposed to be penetrable by a knife, but leave it to the bees!)
Miscellaneous clothing items that I take with me to the beeyard:
A bandana (there are about 100 uses for the bandana in the world – several in the beeyard – if only to wipe your brow – but I use it to keep my Dadant helmet from slipping),
A lanyard that I hook my camera on around my neck,
I always wear tennis shoes and socks – the only time I have been stung on my foot by a bee was when I stepped on a dying bee in my house
Basic equipment needs:
Hive Woodenware
Enough for two hives – you should start with two hives – this way you have something to compare to when one hive seems off in some way. You also can kill one hive with over zealousness and let the other survive more on its own!
Most beginning beekeepers start with a deep and a medium box for brood and shallows for honey. This is the old way and if you are starting with nuc hives, unless you've made special arrangements, the nuc will be in a deep nuc box.
However, for switching frames back and forth between boxes and for many other advantages (weight when lifting, etc), I would encourage everyone to do all of their boxes as medium boxes. For two hives you need a minimum of 3 medium boxes per hive and probably a couple of extras for each hive in the event that your bees get going well enough to produce honey the first year. I would also encourage 8 frame boxes – much easier to lift and manage
This means you need 10 medium eight-frame boxes. I would order based on shipping prices for your area. Shipping costs can be as much as the cost of the equipment you are ordering. I like to order from Brushy Mountain Beekeeping because the shipping to Atlanta is less than most of the other companies, but I order from Betterbee which is in New York and Dadant which has a warehouse in Florida. There are many good bee companies and you may be able to find a local supplier from whom to get your equipment.
Like I said, you can order them from any bee company. These come unassembled – you nail or screw them together – keep the sides right side up and the inside on the inside! They should be painted which is a good thing to do while you wait for your bees – the Oops cart at Home Depot is a good source of paint. I paint all of mine the same color and keep a large gallon of paint available to do so. There's a post on my blog showing how to assemble them.
Frames for the 10 boxes:
Each box takes eight frames. These also come unassembled. You'll need 80 frames. I don't use foundation at all any more, but starting out, you'll want to use foundation – wax, not plastic. There's a video/slide show on my blog about how to assemble frames. These frames have a groove in the bottom for the wax foundation and a wedge at the top to nail it into the frame.
Foundation for the frames – I would stick to pure wax. Brushy Mountain offers this. It's less expensive than Dadant for the same thing and if you are ordering your equipment from them, it all ships with one shipping charge. But you can get foundation from any bee company. People will tell you to use plastic, but I've now thrown out all of my plastic. The bees don't like it and wax is natural in the hive. In the end, you'll probably switch to foundationless, anyway, and let the bees build their own. Each hive needs
a telescoping cover and an inner cover. You're going to be using 8 frame equipment, so be sure the inner cover and telescoping cover are for 8 frame equipment. Here is
a telescoping cover and
an inner cover.
Brushy Mountain (and others) make an English garden hive top – which is pretty to look at but not practical for an inspection – feel free to get it instead of the telescoping cover, if you would like. My friend Julia likes (and I want to order)
the ventilated inner cover – great for the hot summers in the South. If you ordered it, you would not need the inner cover.
You'll also need
a screened bottom board.
Ventilation is the issue in the heat of the summer. The screened bottom board helps with this as well as Varroa mite control. The ventilated inner cover would help as well.
I keep slatted racks (a place for the bees to hang out rather than waste their energy fanning the hive) on all of my hives. Brushy Mountain doesn't make them for 8 frame equipment.
Betterbee does.
Smoker:This is an essential piece of beekeeping equipment and you'll use it a lot. Here's a
basic one from Brushy Mountain. I rarely use mine except to let the bees know I'm coming by puffing one puff at the door. I don't think it's worth buying one of the fancier ones unless you plan to have so many hives that you'll need to relight it a lot.
Propane lighter: Available at any hardware store (I can't find a picture, but I put one in everyone's stocking for Christmas – cheap and useful)
Hive Tool Another essential piece of beekeeping equipment – buy two so you can always lay your hands on one of them.
Helpful Things to Have that aren't Essential:
Frame Rack: Very helpful – especially if you are looking for the queen, trying to see the differences in the bees, taking photos – I obviously love mine, but everyone doesn’t use them.
Frame Grip I've always relied on my hands – I don't want to inadvertently squash bees – but I'm putting it on this list because almost every other beekeeper I know uses this. I just never got comfortable with it.
Bee Brush I use this a lot – especially when harvesting honey since I remove one frame at a time from the hive. If you are going for crush and strain honey, then this is essential.
Harvest Equipment (Hopefully you'll have a harvest!):
This is all I need for harvesting and filtering honey. I also use a sharp knife and some basic kitchen equipment. You'll also need jars, but that is your preference. What kind of honey your produce dictates what type of jar you use. You are going to be able to cut comb (the foundation you are ordering will allow crush and strain as well as cut comb honey) or produce chunk honey (comb in a jar of honey)
*********************************************
OK, I think that is what is needed (at least what I would need) to start beekeeping. This is my list and others out there will want to add or suggest other things. There are other items that you will find useful – a sifter from the kitchen for powdered sugar and a few other things that I carry in my bee basket, but you'll come up with what works for you.
You'll notice that I didn't put any medication or feeding systems on this list. I don't use any medications or poison of any kind in my hives. I also tend to feed with Ziploc baggies inside the hives. A Boardman feeder may be useful for water for the bees, but there are other ways to provide water. I also didn't put an entrance reducer – not going to be necessary in the hot South but would be in other parts of the country.
Note: I did this post in Word's blog post section and uploaded it from Word....never again. The margins are awful - many apologies!