Welcome - Explore my Blog

I've been keeping this blog for all of my beekeeping years and I am beginning my 19th year of beekeeping in April 2024. Now there are more than 1300 posts on this blog. Please use the search bar below to search the blog for other posts on a subject in which you are interested. You can also click on the "label" at the end of a post and all posts with that label will show up. At the very bottom of this page is a list of all the labels I've used.

Even if you find one post on the subject, I've posted a lot on basic beekeeping skills like installing bees, harvesting honey, inspecting the hive, etc. so be sure to search for more once you've found a topic of interest to you. And watch the useful videos and slide shows on the sidebar. All of them have captions. Please share posts of interest via Facebook, Pinterest, etc.

I began this blog to chronicle my beekeeping experiences. I have read lots of beekeeping books, but nothing takes the place of either hands-on experience with an experienced beekeeper or good pictures of the process. I want people to have a clearer picture of what to expect in their beekeeping so I post pictures and write about my beekeeping saga here.Master Beekeeper Enjoy with me as I learn and grow as a beekeeper.

Need help with an Atlanta area swarm? Visit Found a Swarm? Call a Beekeeper. ‪(404) 482-1848‬

Want to Pin this post?

Friday, March 18, 2011

Picking up Bees from Don (aka Fatbeeman)

Today Julia and I drove to Lula, Ga to pick up bees from Don. She was getting a package for Blue Heron and picking up another for a friend. I was picking up 10 packages for Linda T's Bees in South Georgia and getting two packages for another friend.

When we arrived, Don was shaking a package into a nuc. He is using an empty medium nuc box as a funnel to help contain the bees as they are shaken.


Now he is taking the cork out of the candy end of the queen cage. He wedges the queen cage, screen wire down, in between two frames and leaves her for the bees to release. (The man in the white shirt just got stung right in the middle of his forehead).
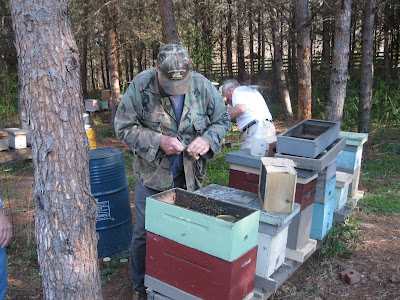


Now Don is closing up the nuc before taking us to his basement to pick out our packages.
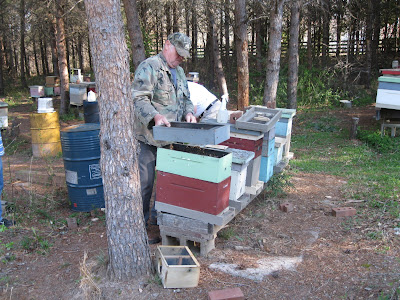


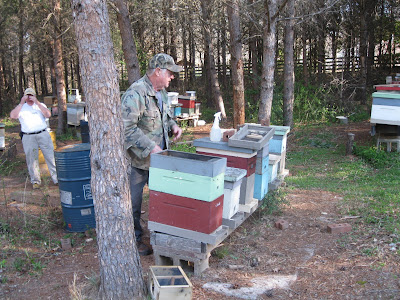
It's always fun to see Don in action. (The white-shirted man is trying to scrape the stinger off of his forehead!)
 
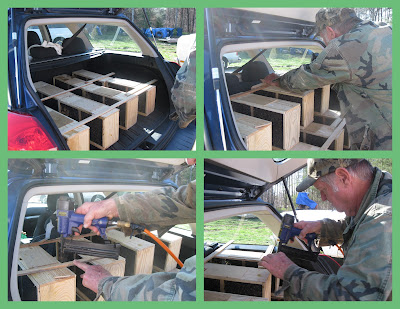
All told we were picking up fourteen packages in the back of my Subaru.  It's important that the bees not overheat in transit so Don nailed them apart using pieces of wood to keep the packages separate and to keep them upright.


With the car all ready to roll, I got Julia to take my picture with Don.
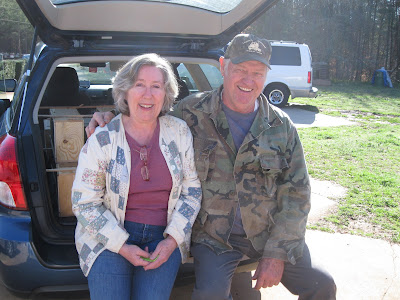

We drove back to Atlanta with a car full of bees and only a few loose in the car at the back window.

Thursday, March 17, 2011

Observations about the Wax Tube Fastener

After using the wax tube fastener (which came with no directions) for a few years, I am learning some additional helpful hints and want to pass them on to you. If you want to see my original wax tube fastener saga, you can find it here.

Today we waxed strips into 65 frames for the hives in South Georgia.  To do that many takes a lot of wax.  I melted the wax in my converted Presto Pot that I bought on EBay.

I never use canned vegetables in my kitchen, but I bought a can of asparagus just to satisfy my wax tube fastener need.  You can see the now empty can of asparagus being put to use as a wax container in the photo below.  It's just the right depth for the wax tube fastener.

However, as we worked through the 65 frames, we had to refill the can several times.  As the hot wax level lowered in the can, it was no longer high enough to fill the wax tube fastener completely with wax.  The consequence of this was that the wax residue in the upper part of the tube near the handle solidified, interrupting the vacuum created when you cover the invisible hole on the black handle.

You can see in the photo below from the wax residue on the outside of the asparagus can that the molten wax was about half way up the pipe end of the WTF.

 
To combat this problem, I had two pans of boiling water going on the stove while we worked.  One pan was simply boiling water.  The other heated water contained the filled asparagus can with the wax tube fastener inside the can.

I refilled the can every time it got to about this depth (see photo below).  Because at this point the WTF was not functioning well since the vacuum had been disrupted, while I refilled the asparagus can, I put the WTF in the other pan of boiling water.  This served to melt the wax in the pipe so that the flow could start again.  I lifted the WTF out of the boiling water and allowed every drop to flow out of it before returning it to the melted wax in the can.

This process was much less frustrating than having the tube suddenly appear to quit working.  I also kept a toothpick around to run in and out of the hole in the handle occasionally to keep that path clear as well.

 
My parents grew up in the Depression and instilled in me an approach of "Waste not, want not," so I didn't want to lose any of this precious wax.  It's all I have and when it's gone then I'll have to figure out another way to stick the wax starter strips in the frame grooves.


Meanwhile in the roasting pan that I used to hold the frames I was waxing, I line the bottom with a piece of waxed paper.  We, of course, dripped wax all over the waxed paper.  When the job was done, I put the paper lining, covered with wax drippings, into the freezer.

After an hour in the freezer, the wax dripping just popped off the paper.  I put the peeled and popped off wax into the Presto Pot for future melted wax needs.  I always let the wax cool in the pot, ready to be remelted for the next waxing occasion.
 

And from the Depression era thinking, I am now letting the water cool in both pans from the stove.  In the morning, I'll peel the cooled wax off of the top of the water and add that to my wax collection.
Posted by Picasa

Wednesday, March 16, 2011

Registration for Young Harris is now Open

The Beekeeping Institute at Young Harris College in north Georgia is put on jointly by the UGA Honey Bee Program and Young Harris.  In Georgia and really in the Southeast, it's the premier place to go to learn the ins and outs of beekeeping.

There's an advanced track and a beginning track.  It's the place where one can become a Certified, Journeyman, Master, or Master Craftsman beekeeper in Georgia.  This year there are some great visiting lecturers including Debbie Delaney whom I heard talk about bee genetics at EAS last year; Dr. Yves LeConte who is director of bee research in Avignon, France; and Jerry Hayes from the Florida Department of Agriculture.

Many people who earned their Master Beekeeper at the Institute are also teaching in the program (including me - I get to teach Low-Tech Beekeeping).  And you'll get to hear Jennifer Berry (who writes regularly for Bee Culture), Cindy Bee (one of the best beekeepers in the country), and Keith Delaplane who is not only the  head of the UGA Department of Entomology but the author of a book many beginning beekeepers use: First Lessons in Beekeeping.

The program only takes 150 people and it has filled up the last few years, so if you want to go, register soon!

Sunday, March 13, 2011

Blue Heron First Real Inspection 2011

I am thrilled to report that this hive made it through the winter and is going great guns! There were lots of bees and lots of brood throughout the hive. They are healthy looking - I didn't see any Varroa and no other bad signs and they seemed nonplussed by my intrusion.


Next time I am going to take a tripod. I didn't get good pictures. I was by myself and didn't check the camera settings. The camera was still set on Kids and Pets from taking pictures of my grandchildren the day before.


I used the purchased hive drape to cover the hive except for the frame I was removing. As you can see on the left in the above picture, I also draped the boxes I removed.

I was concerned about this hive because the bees were still in the bottom box after the winter with a solid box of honey above them. Often the queen will not cross a honey barrier like that and she is said to be honey-bound. I looked at the old capped brood in the bottom box. All but the outside two frames were being used for brood. One frame had a perfect football shaped pattern, all the center had emerged and new eggs and larvae now occupied the space.

I took off the second box - it's full of honey and the comb is often cross-combed with two frames joined by comb between them. The honey in that box is all composed of "bee tea" syrup driven honey so it is only good for bee food. I took the box off of the hive and set it aside to decide what to do with it.

I was so surprised to find that Box three contained lots of beautifully drawn comb and new capped brood as well as young larvae and eggs. I didn't see a queen cell anywhere, nor any drones. In this third box, however, I did see some drone brood (see the picture below).


And then I saw her. I so regret that bad picture - I took THREE bad pictures! Anyway, I outlined this absolutely gorgeous queen so you could see her. She was large and long with an all golden abdomen. If you click on the photo below, you can see that I've outlined her in red.

 Right in front of me, she lowered her abdomen and laid an egg....privacy notwithstanding. She was beautiful and brave - she had crossed the honey barrier to continue her egg laying in the box above it where there was space for the taking.


Every frame in every box was being used so I added a fourth box of foundationless frames. I actually put it in position 3. I took a frame of nectar from the side of Box 2 and put it in the middle of Box 3 (the new box) to help the bees know how to build the comb in the frames.

I replaced that frame in Box 2 with a foundationless frame.  I also marked all the frames as per Housel positioning.

Julia is inspecting this hive on Saturday and we'll see if they have built any comb out by then.

I then decided to put the honey barrier box on as Box 4 and wrote on it in magic marker "Bee Tea Honey" and "Cross Comb". I will not harvest this honey for eating because of the bee tea. If the bees don't use it, I'll probably collect it and feed it back to the bees so that I can make use of the honey and straighten out the cross comb.

And now I'm going to enter my adventure on Hive Tracks and go to the kitchen and wash my hive tool which is gunked with propolis as often happens in the first inspection.
Posted by Picasa

Preparing Hive Inspection Gear

This week marks the beginning of my hive inspections for my hives in Atlanta. I spent some time on Friday getting my gear in gear. I washed all my hive tools and scrubbed their ends with a brass scrub. The yellow one was caked with propolis and took some elbow grease to get clean. I plan to wash used tools at the end of every inspection this year and I plan to carry a container of Wet-ones with me to wipe them off on site.

This is an effort to prevent disease spread from hive to hive.


What's in my hive bag? Two magnifying glasses are there to help people see eggs when I have people accompanying me on inspections.


I also carry, as you can see in the photo below, a propane lighter for my smoker, two permanent markers to write on frames or hive boxes if need be; a container of Benadryl for a sting reaction, a bee brush, a drape for the hive, some baby powder to use if I wear nitrile gloves; several hive tools, a container of thumb tacks, a pair or two of nitrile gloves, a couple of empty ziploc baggies, some rubber bands; a paper towel or two; and a jar of swarm lure that I made.


There may be a couple of other things in there - oh, yes, my Swiss army knife, a frame rack, some string, my leather bee gloves, a pair of pruning shears.

I bought this container at a knitting class I took at the John Campbell Folk School but I kept losing things in the deep pockets.  It never was a knitting bag, but is actually a tool bag - the knitting folks re-purposed it, but it didn't ever really work for me.  It works great as an inspection bag.


So I'm ready to inspect Blue Heron on Sunday and Topsy on Tuesday.
Posted by Picasa

Wednesday, March 09, 2011

Delaplane on the Hive as a SuperOrganism

The Metro Atlanta Beekeepers meeting drew a large crowd to the Botanical Garden to hear Dr. Keith Delaplane, head of the department of entomology at the University of Georgia speak on the beehive as superorganism.


Keith is such an engaging speaker that he kept everyone's interest as he taught us a lesson on genetics and then helped us all to understand the concept of the superorganism.


He pointed out that the hive survives best with a genetically diverse population. This is supported by the mating of the queen with 15 - 20 drones, thus bringing a complex genetic pool to the hive.

William Morton Wheeler introduced the idea of the hive as a super-organism in 1911. A super-organism is "a complex, coordinated, individualized system of activities directed at acquiring and assimilating resources from the environment, protecting the system and producing other systems."

Dr. Delaplane said that thinking of the hive in this way means that we can imagine the hive as a total functioning body with the ovaries being the queen; the testes being the drones; the body being the workers; the liver being the beeswax; and the uterus being the brood cells.

He emphasized that the comb is the liver of the hive.  This does not mean that the comb processes yucky stuff in the hive, but rather that it absorbs the dirt, the chemicals, the bee footprints, the cocoons, etc.  So if your bees use old comb to raise brood, in essence they are raising the brood in the liver rather than in the uterus.

Note: (in support of those of us using foundationless frames and thus encouraging our bees to build new comb each year): In a tree, bees raise brood in the newest comb (the uterus of the superorganism). The following year, the same bees would use the former brood comb to store honey and again raise the brood in new comb.

When a hive swarms the organism essentially splits itself in half and one half moves at least 500 meters away from the original colony to avoid competition. From that moment on, both halves of the original super-organism are tasked with surviving the winter. This swarm/splitting occurs in early spring because this gives both halves opportunity to recover from the split and to build up resources to survive the winter.

Delaplane pointed out that all the disease resistant traits are recessive genetically. This, he explained, is because for the super-organism to survive, there must be bees whose main best focus is foraging, fanning, nursing, etc. The traits that promote disease resistance such as hygienic behavior can't be dominant or the bees would all be in the hive dragging out varroa infested larvae rather than out foraging for winter.

So if we are thinking of the hive as a super-organism, then beekeepers might change how they operate in the following areas:
  • Rethink density in the apiary (in the wild, bees locate 2 hives per acre)
  • Cull old combs and give bees opportunity to build new comb for brood raising
  • Feed more and better
  • Emphasize high drone density
As always, Dr. Delaplane brought his energy and enthusiasm to his talk and I really enjoyed hearing him.

Before I left the meeting, I bought a copy of Cindy Bee and Bill Owens' new book on Honeybee Removal.  I don't think I'll ever do bee removals other than collect swarms, but I wanted to support my friends.


Posted by Picasa

Monday, March 07, 2011

Wings and the Bee

Today on Beemaster there is a discussion of k-wing virus in the bees.   When we open our hives in the spring, we are first hoping to find the hive alive.  If it's not alive or struggling, then the beekeeper wants to know what's wrong.

A hive may have starved to death.  Frequently this is why a hive has died.  The bees got too cold and the cluster could not move to where the honey was stored.

A struggling hive may have bees with various diseases.  The k-wing virus refers to a viral caused problem with the bee's wings.  The bee wing is made in two sections which are held together with hamuli (tiny hooks).  When a bee is infected with k-wing, the hamuli no longer hold the two wing sections together and the wing looks like the letter "K"  Below is a picture I found on the Internet taken by Danny Jensen:

You can see that the bee's wings are not connected.  This is a bee that cannot fly.

I've had examples in my own hives in other years, but couldn't find a picture as good as this one.

You also may find bees with deformed wing virus.  The bee emerges with shriveled, useless wings.  This is a different disease from k-wing and looks like this:


Being able to fly is essential to the community of the beehive.  If the bees are unable to fly, they are useless to the hive and the hive will fail to thrive.

In the normal life of the bee, the wings are essential for survival.  Old bees have ragged tips on their wings and seeing a bee with such wings on a flower in the summer, lets the observer know that she is almost at the end of her useful life.

Randy Oliver has an interesting article on "Old Bees"  in which he notes that the bees have a 500 mile warranty on their wings.  They wear out at about that point on average and the bee's useful life is then over.  So even if they aren't impaired with disease as in the photos above, when the foraging bee has flown her 500 miles, she's done.

Friday, March 04, 2011

A Look at Blue Heron and I Miss the Smell of the Bee Hive

When I had the table at the science fair at Montgomery, I drove around for a couple of days with bee equipment in the back of my car.  I had a nuc with old comb in it; some honeycomb; some drawn frames out loose in the car.  Even my grandson, when he rode in my car a couple of days after the fair said, "Oh, Grandma, your car smells just like the bee hive!"

I miss that smell that goes with bee season, but spring is bursting out all over in Atlanta.  The flowering trees like cherries and pears are beginning to bloom.  Tiny red blossoms from the red maple are blowing down on the streets.

I went to Blue Heron and opened the hive for the first time.  I didn't do a deep inspection but did look at each box.  The top box was a surround for a baggie feeder and a Boardman (inside the hive).  The sugar syrup had not been touched.  The bees had not needed it despite our harsh winter.


I removed the empty box, put the sugar syrup baggie into a bucket, and removed the Boardman.  Of course that means for a couple of days until I took it out of my car, the car had that warm wonderful bee hive smell!

The top box had a little honey stored but the box below it was completely full of capped honey - and heavy as could be.  The bees were still living in the bottom 8 frame deep.  There was lots of capped brood and although you can't see it since my camera was operating at less than optimal, the open cells are full of brood.


I only pulled up two frames but felt great about the capped brood and larvae.


Concerns about this hive that must be addressed:
1. The full honey super above the brood box means that the queen is honey bound.  I need to checkerboard with empty frames or at least move the full box up to the top and switch the mostly empty top box with the second box.
2.  The honey box needs to be marked since that honey was made with "bee tea" and I don't want to harvest honey that isn't informed by nectar, but is condensed sugar syrup.
3.  This hive is doing well and I need to consider the possibility that it will swarm (thus the need to checkerboard).

Julia and I will inspect it and try to address all of the above issues.
Posted by Picasa

Pin this post

LinkWithin

Related Posts Plugin for WordPress, Blogger...